USP Pro makes it easy to redirect users after successful form submission. First, there is a global option in the plugin settings that serves as the default redirect URL. There you can indicate any URL to use for the “success” redirect, or leave the option field blank to redirect back to the current URL. Here is a screenshot to illustrate:
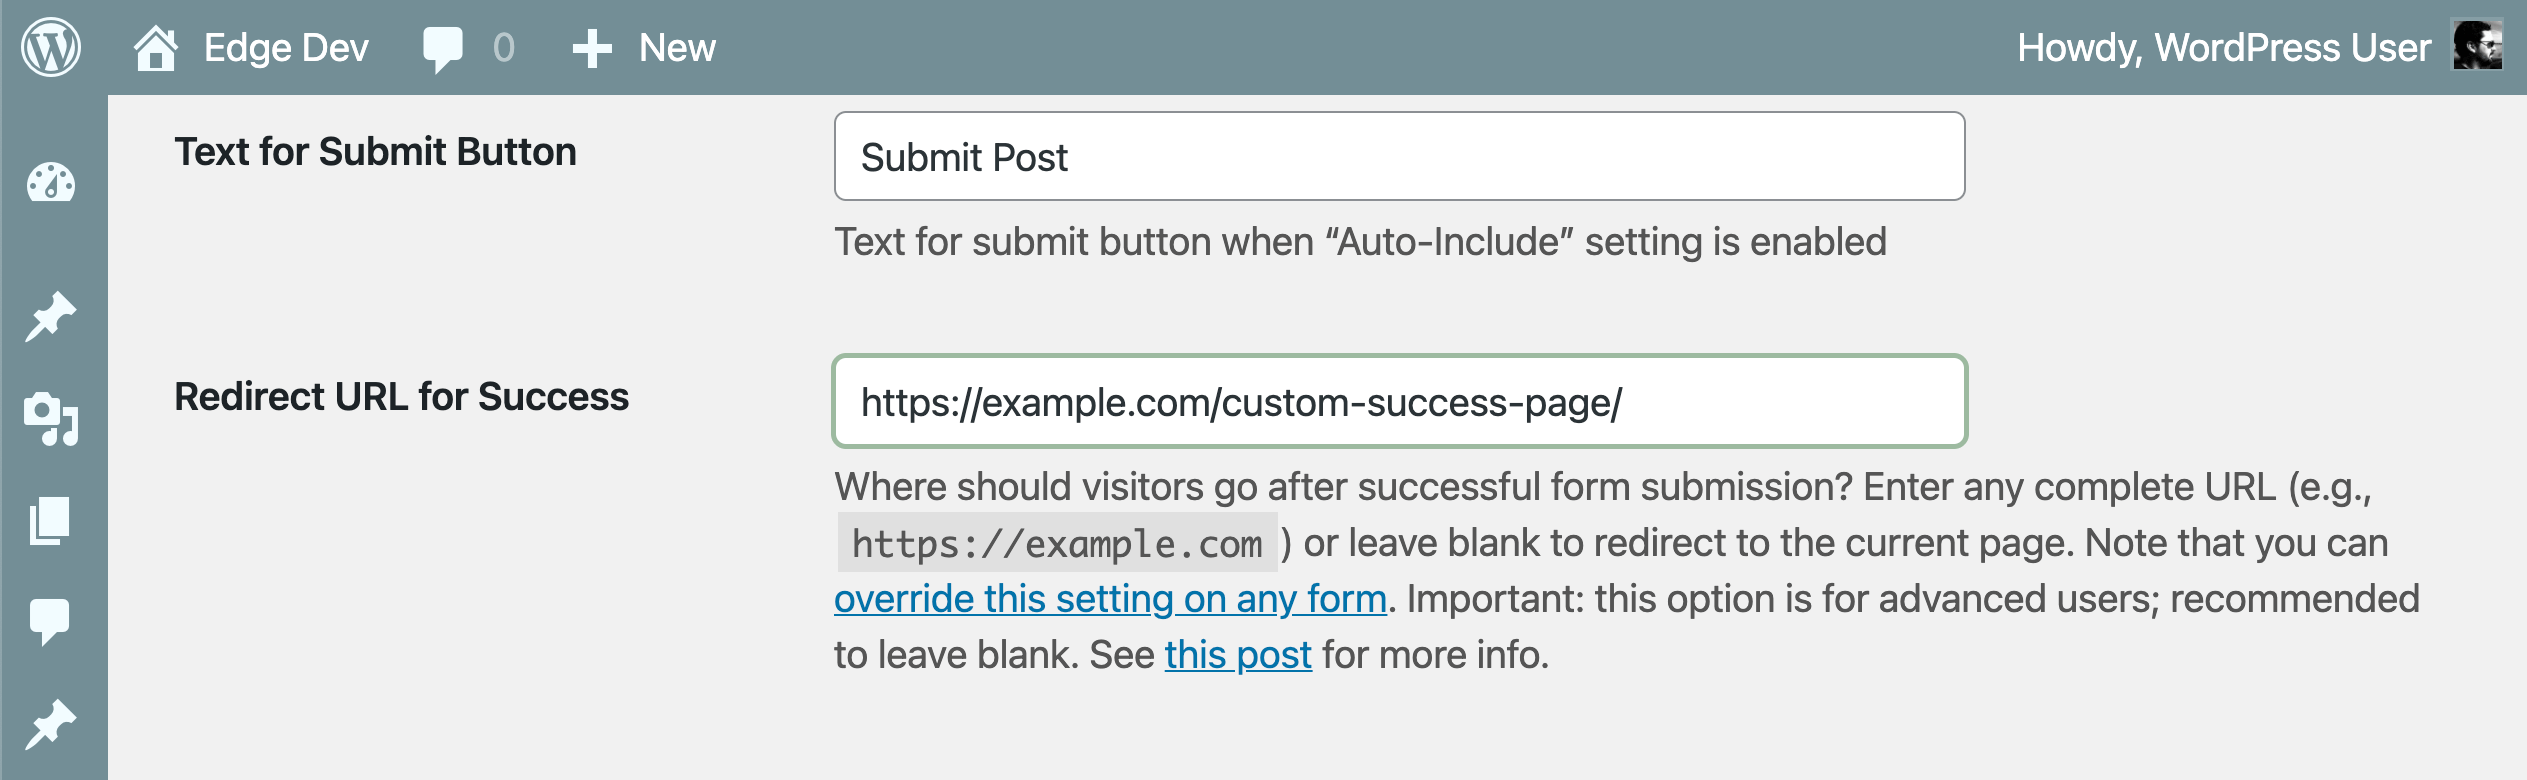
This setting is located in the USP Pro Settings ▸ Advanced ▸ Form Configuration ▸ “Redirect URL for Success”.
Once this is set (or left blank), USP Pro will use it as the default redirect location. Then, to override the default redirect for specific form(s), the [usp_redirect] shortcode may be added to the required form(s). Here are the steps (see screenshots):
- Add New/Edit any USP Form by visiting the USP Forms screen
- From the “Edit Form” screen, click the USP:Redirect Quicktag button
- Enter the full redirect URL in the first dialogue prompt (required)
- Enter any custom field attributes in the second dialogue prompt (optional)
- The Quicktag will then add the required shortcode to the form
- Save changes and done
Visual Tutorial
Here are the steps with some screenshots to help visualize.
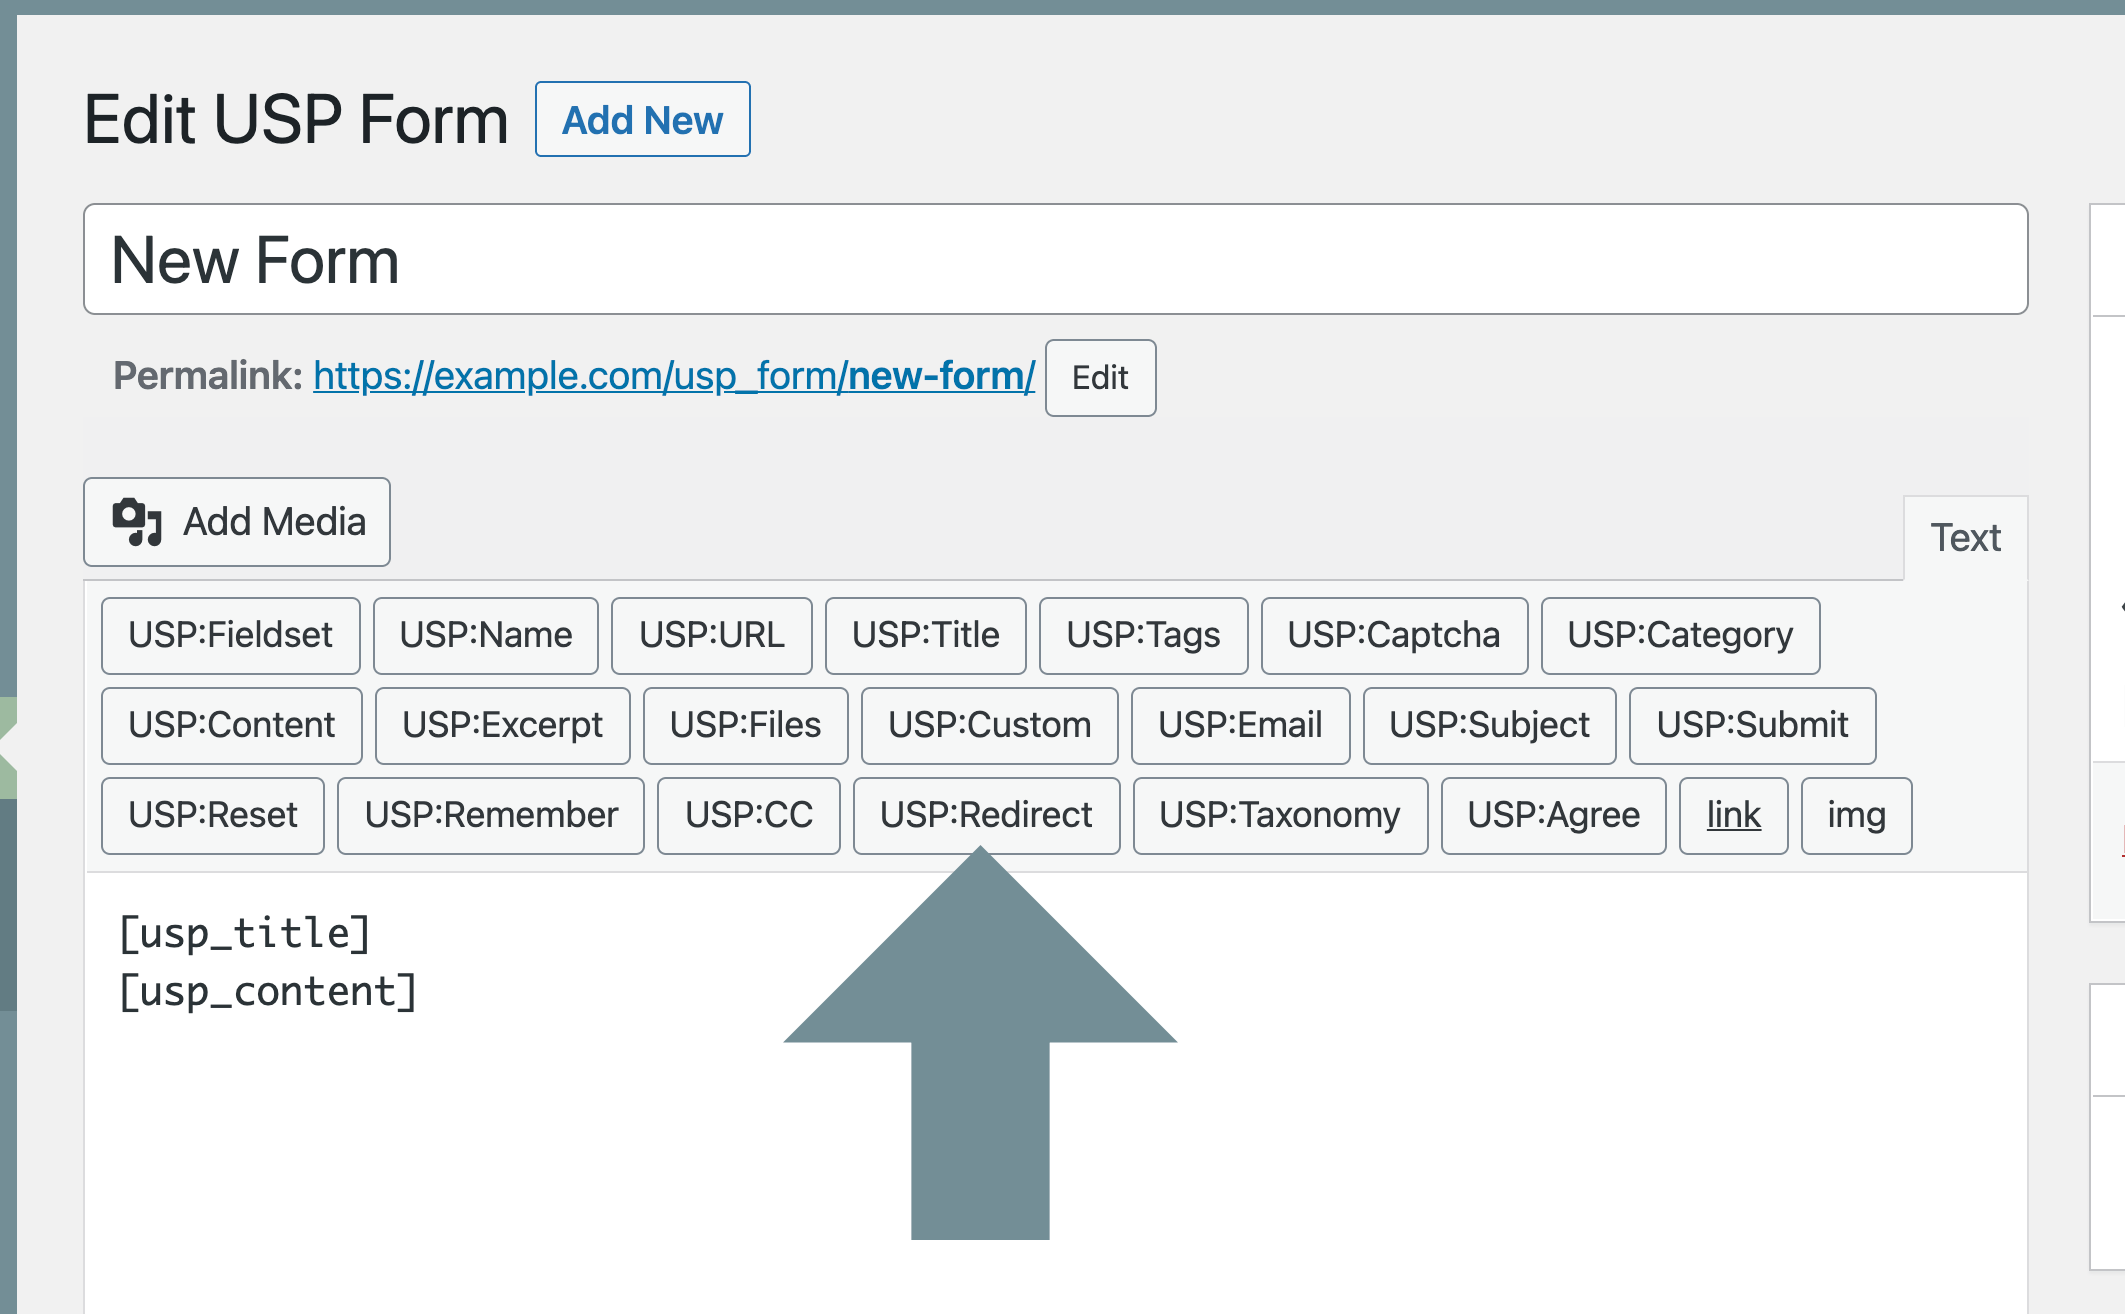
Step 1
On the “Edit USP Form” screen, click the USP:Redirect Quicktag button.
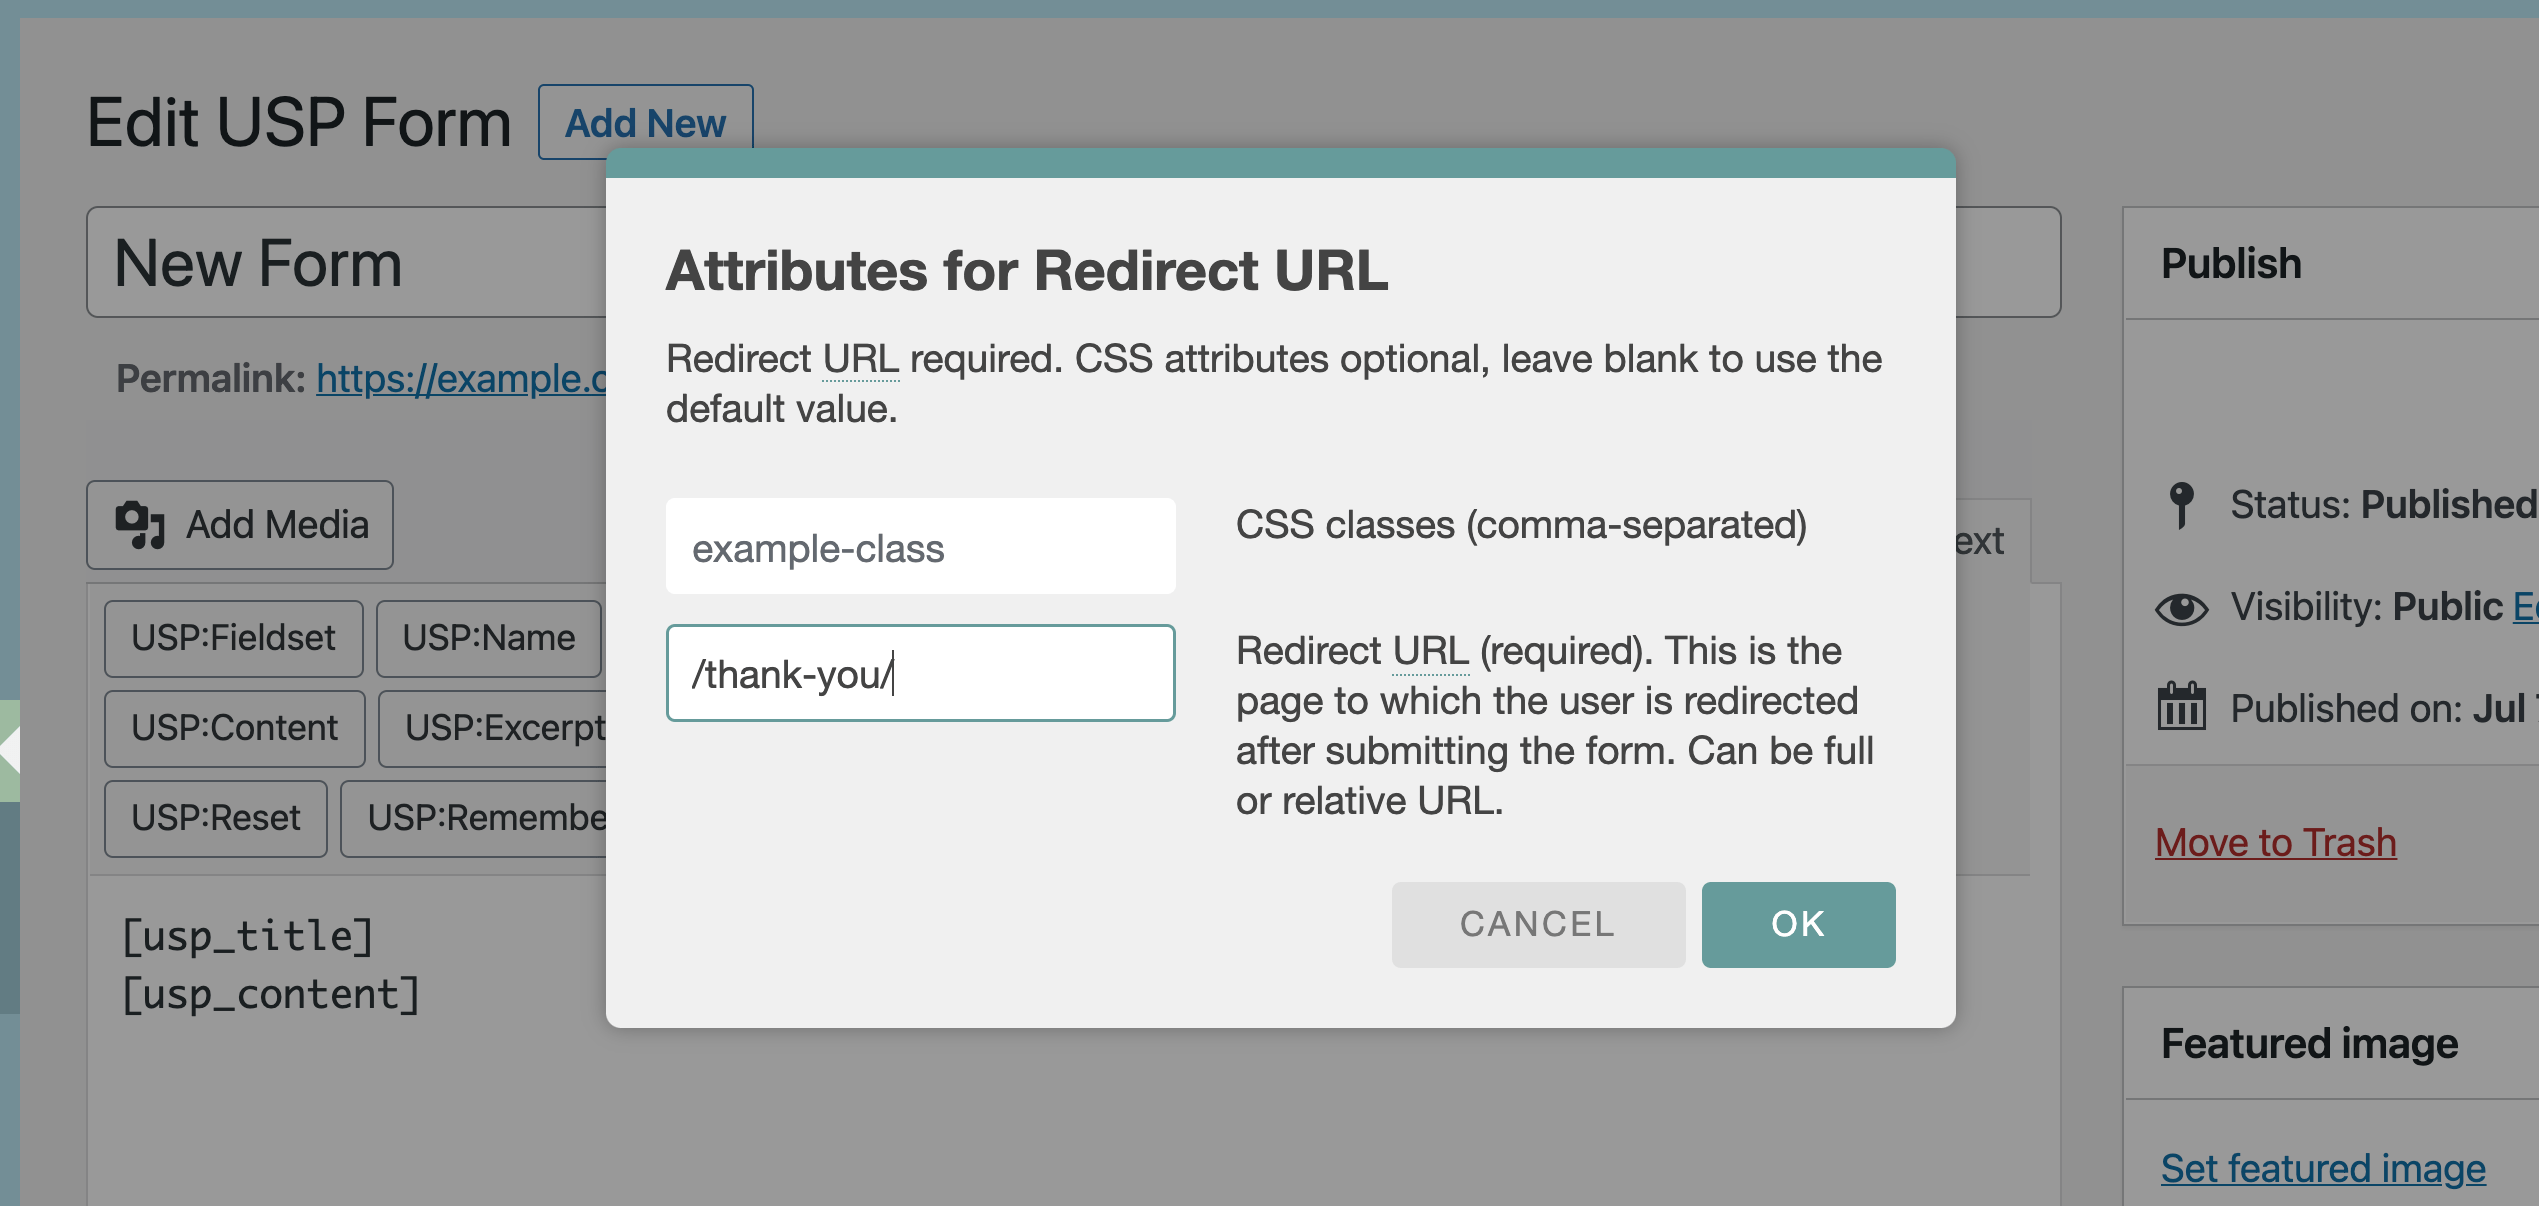
Step 2
Next, enter the redirect URL and any custom classes (optional). The click the “OK” button to add the shortcode to the form.
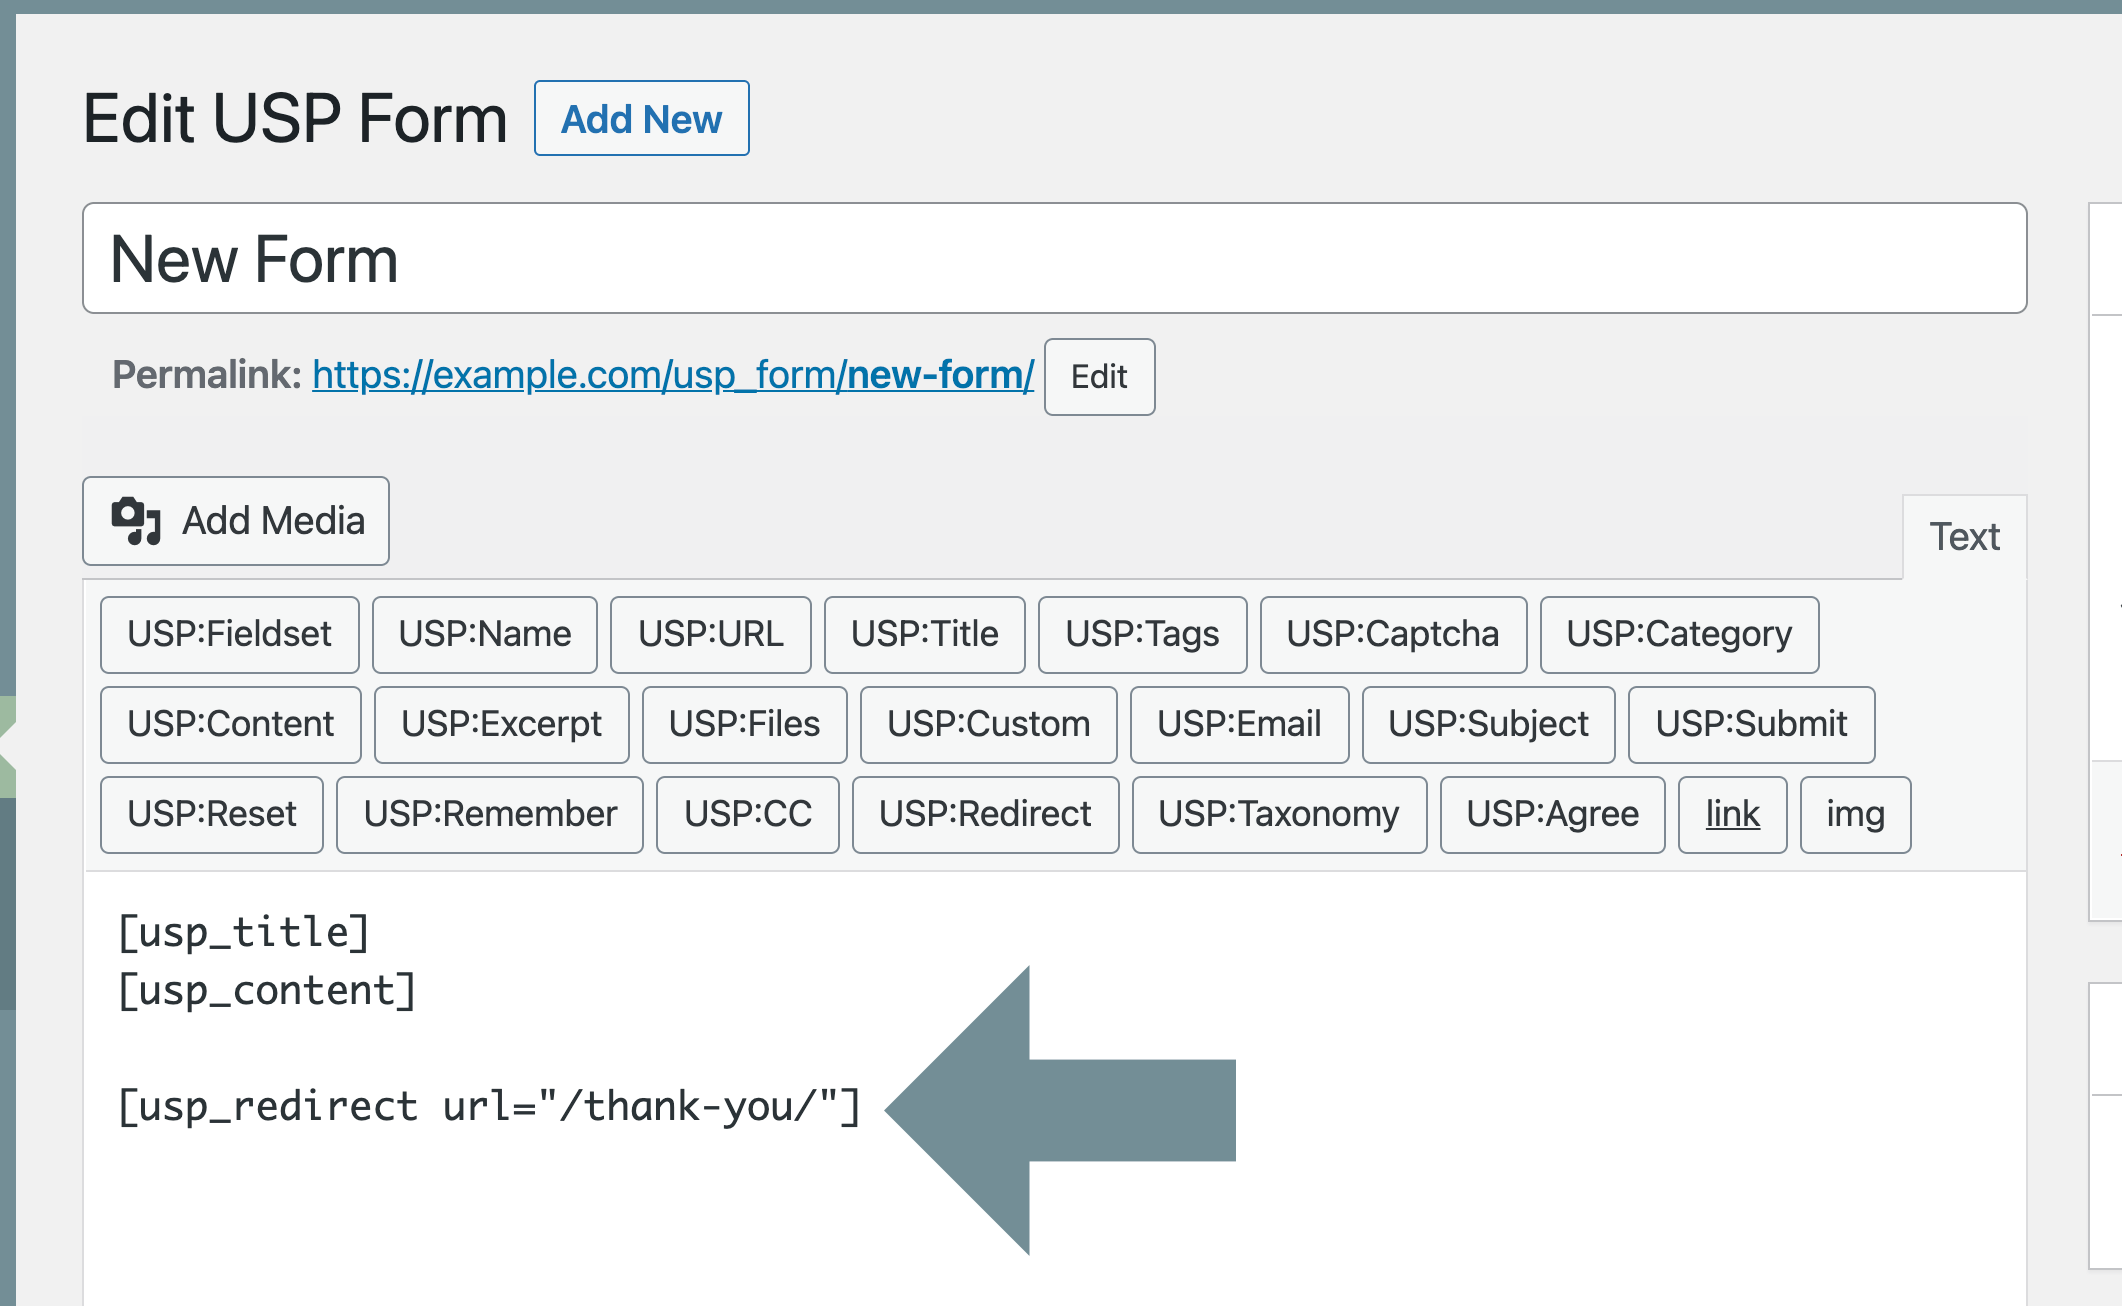
Done.
Your form now has a custom-redirect shortcode. So after each submission, the user will be redirected to the specified URL. Note that the redirect shortcode will not be seen by any user on the front-end form.
Remember to save your changes! :)
About the Redirect URL
After adding the redirect shortcode to your form, it should look similar to this:
[usp_redirect class="optional-custom-class" url="/thank-you/"]For the optional class attribute, you can add any custom CSS classes that may be needed. And for the required url attribute, you can enter the URL to which the user should be redirected after successful form submission. Here are some examples:
- Full URL — Example:
https://example.com/wherever/you/want/ - Full URL — Example:
https://example.com/somewhere.html - Partial URL — Example:
/thank-you/ - Partial URL — Example:
/the/redirect/location/ - URL with Anchor — Example:
/example/#whatever
These should be self-explanatory. For the “URL with Anchor” example, the result would redirect the user to the page located at /example/, and jump specifically to the location on the page where the #whatever anchor/ID tag is located.
Important
Success and error messages are not displayed when using a custom redirect. So if you are using the [usp_redirect] Shortcode, or have enabled either of the following settings:
- Advanced ▸ Redirect URL for Success
- Advanced ▸ Redirect URL for Failure
..then success and error messages will not be displayed.
So for example, if you have a custom success redirect enabled, and a visitor successfully submits your form, the user will be redirected to the specified URL, but the plugin will not display a success message. Likewise for custom error redirects: if a user submits the form and there are errors, the user will be redirected to the specified URL, but the plugin will not display any error messages. This is why the redirect settings indicate that they are intended for advanced users.
Fortunately, WordPress makes it possible to customize just about everything, so it’s possible to set up your own success and error messages. Here is a guide for implementing success and error messages for custom redirects.