As of USP Pro version 1.9, you can set up meta boxes for custom fields in submitted content. This tutorial explains how to do it.
Custom meta boxes can make things a little nicer for your users. Instead of working directly with custom fields in the Post Edit screen, users will enjoy the more familiar meta-box UI. Here’s how to set it up.
Step 1: Activate custom prefix
Custom meta boxes work best with hidden custom fields. In order to do this, visit Advanced ▸ “Custom Field Prefix” and enter the following:
_usp_Step 2: Define your custom fields
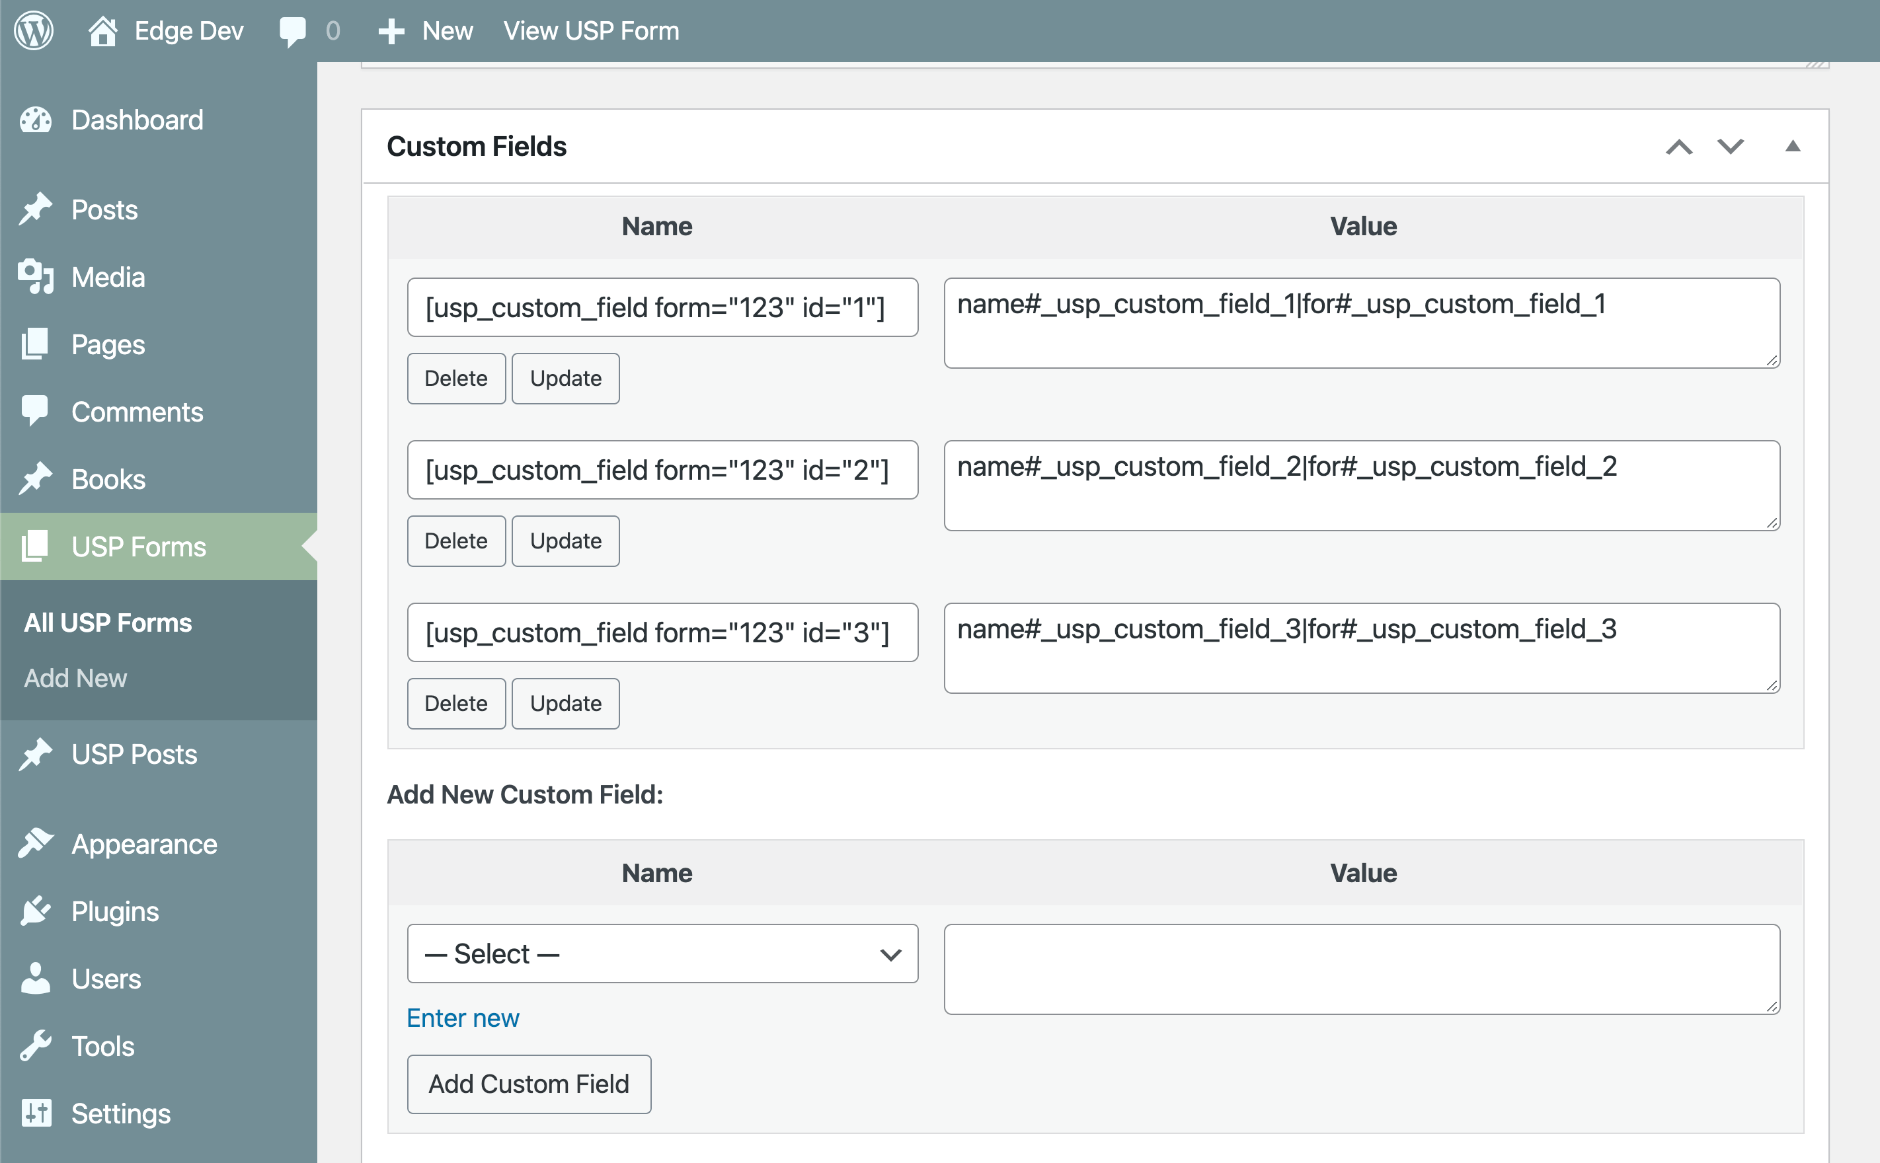
Next, add the name and (optionally) for parameters to your custom field definition(s). For example, to add three meta boxes, we define three custom fields, like so:
name#_usp_custom_field_1|for#_usp_custom_field_1
name#_usp_custom_field_2|for#_usp_custom_field_2
name#_usp_custom_field_3|for#_usp_custom_field_3
This is a simplified example, you may add further parameters based on your requirements, etc. Don’t forget to include the three custom field shortcodes in the form. View a screenshot of this step »
Notes
Note that, for the name/for value, you can use any alphanumeric string that begins with _usp_. For example, any of the following strings would be displayed in the USP Meta Box:
_usp_custom_field_1_usp_custom_10_usp_fieldName_usp_anything_usp_etc
The trick is setting the Custom Prefix setting as _usp_.
Step 3: Enjoy!
That’s all there is to it. If everything went according to plan, your submitted posts will include “USP Custom Fields” meta box, as seen in the screenshot below.
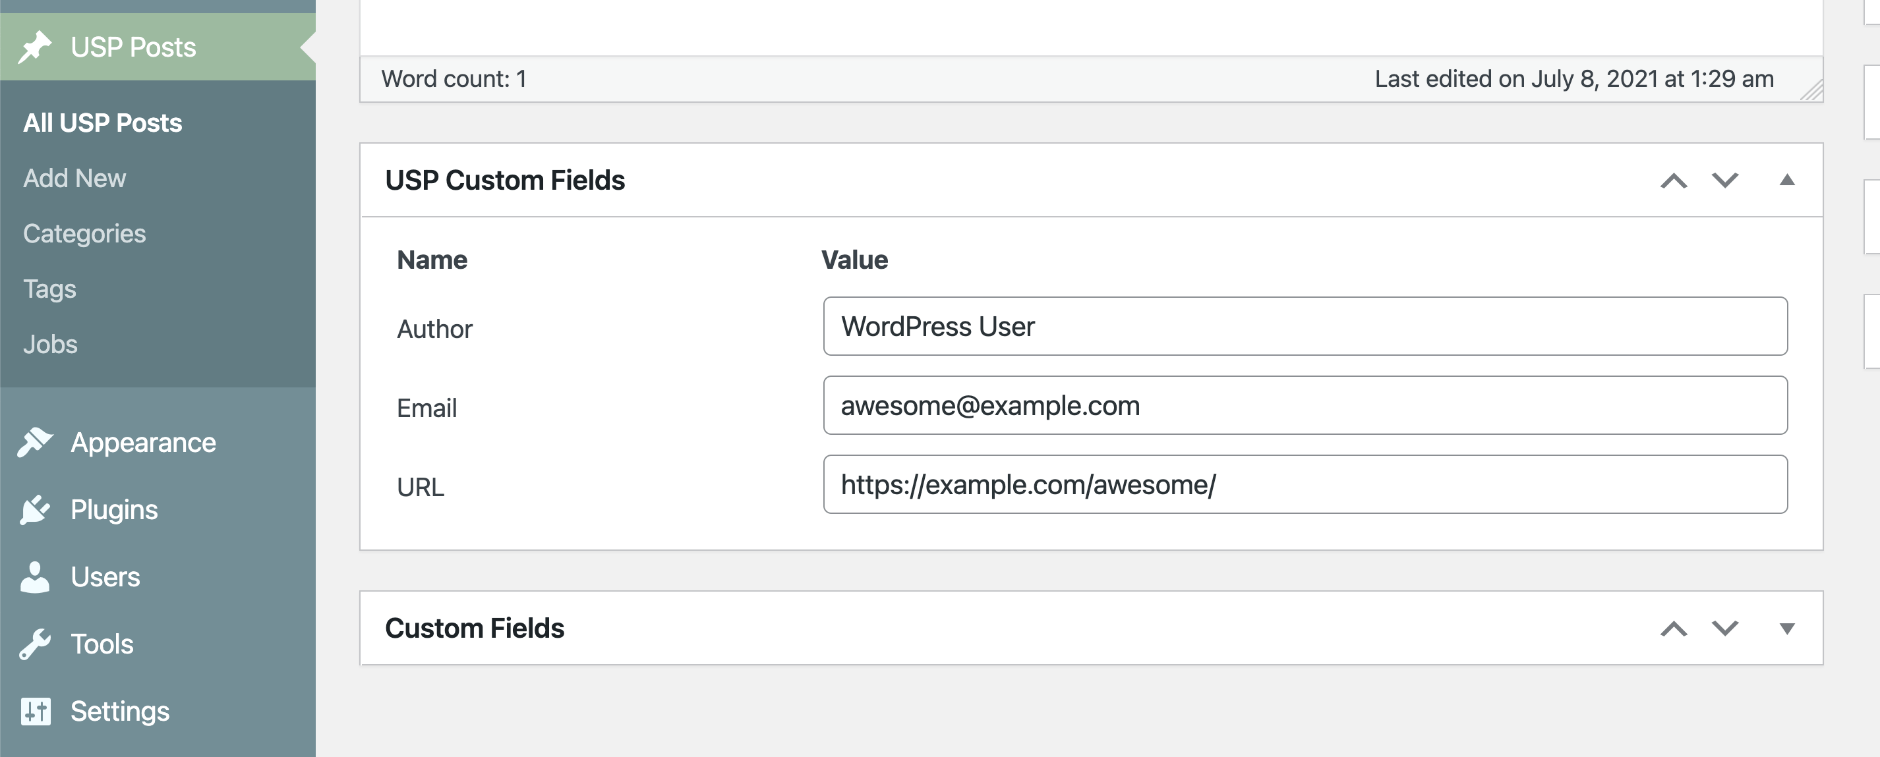
Note that this feature works with all Custom Post Types :)