Head Meta Pro enables you to configure the perfect HTML meta tags for your WordPress-powered site. Define meta tags for each type of page-view, including single posts, pages, archives, search results and more. Use variables like %%DATE%% to include dynamic, context-specific information with your meta tags. Define post-specific meta tags. Works with all post types, taxonomies, and post formats. Supports Facebook (Open Graph) meta tags and X (Twitter) meta tags. In this guide, we will go through configuration and usage of the plugin.
Contents
Overview
Head Meta Pro is very straightforward and easy to use. On the settings page, you can define a default set of meta tags, and also define meta tags for each type of page view (Post, Page, Archive, and so forth).
The default tags are overridden by tags defined for other page-views. For example, any tags defined for Posts or Pages will override the default tags. And if you want to remove any tag, just enter %%NULL%%.
The plugin also provides a “Meta Tags” meta box on each “Edit Post” screen. You can use the Meta Tags box to define post-specific tags and custom HTML content for each post and page.
Also notice for each page-view, you can define social meta tags for Facebook and X (Twitter). Consult the official Facebook and X documentation for more information about their corresponding meta tags.
Also note that you can use shortcut variables like %%DATE%% to include dynamic bits of information in any meta tag. More details about this in the “Shortcut Variables” section below.
Meta Tags
Most of the tabs provided in the plugin settings do one thing: enable you to define meta tags for different page views. You can define meta tags for the following page-views:
- Default — Default set of meta tags, overridden by other page views
- Home — Meta tags for the site’s home page and/or front page
- Posts — Meta tags for single posts and/or other custom post types
- Pages — Meta tags for pages (for example, about page, contact, etc.)
- Archive — Meta tags for archive views, including categories and tags
- Search — Meta tags for search results
- Other — Meta tags for 404 “Not Found” pages
Avoid Duplicate Tags
When configuring your meta tags, keep an eye on the HTML output. It is very important to avoid duplicate tags. For example, if you are using an SEO plugin that generates title and description tags, then leave those tags blank/empty in the Head Meta Pro settings. Otherwise you’ll get duplicate tags which is bad for SEO.
Custom HTML Tags
For any of the “Custom Meta/Code” settings, you can include any valid HTML tags. Currently that includes the following tags: <meta>, <title>, <script>, <noscript>, <style>, <item>, <base>, <link>.
Special Characters
When defining your meta tags, use HTML entities for any special characters (i.e., non-alphanumeric characters). For example, to include an ampersand “&”, use &.
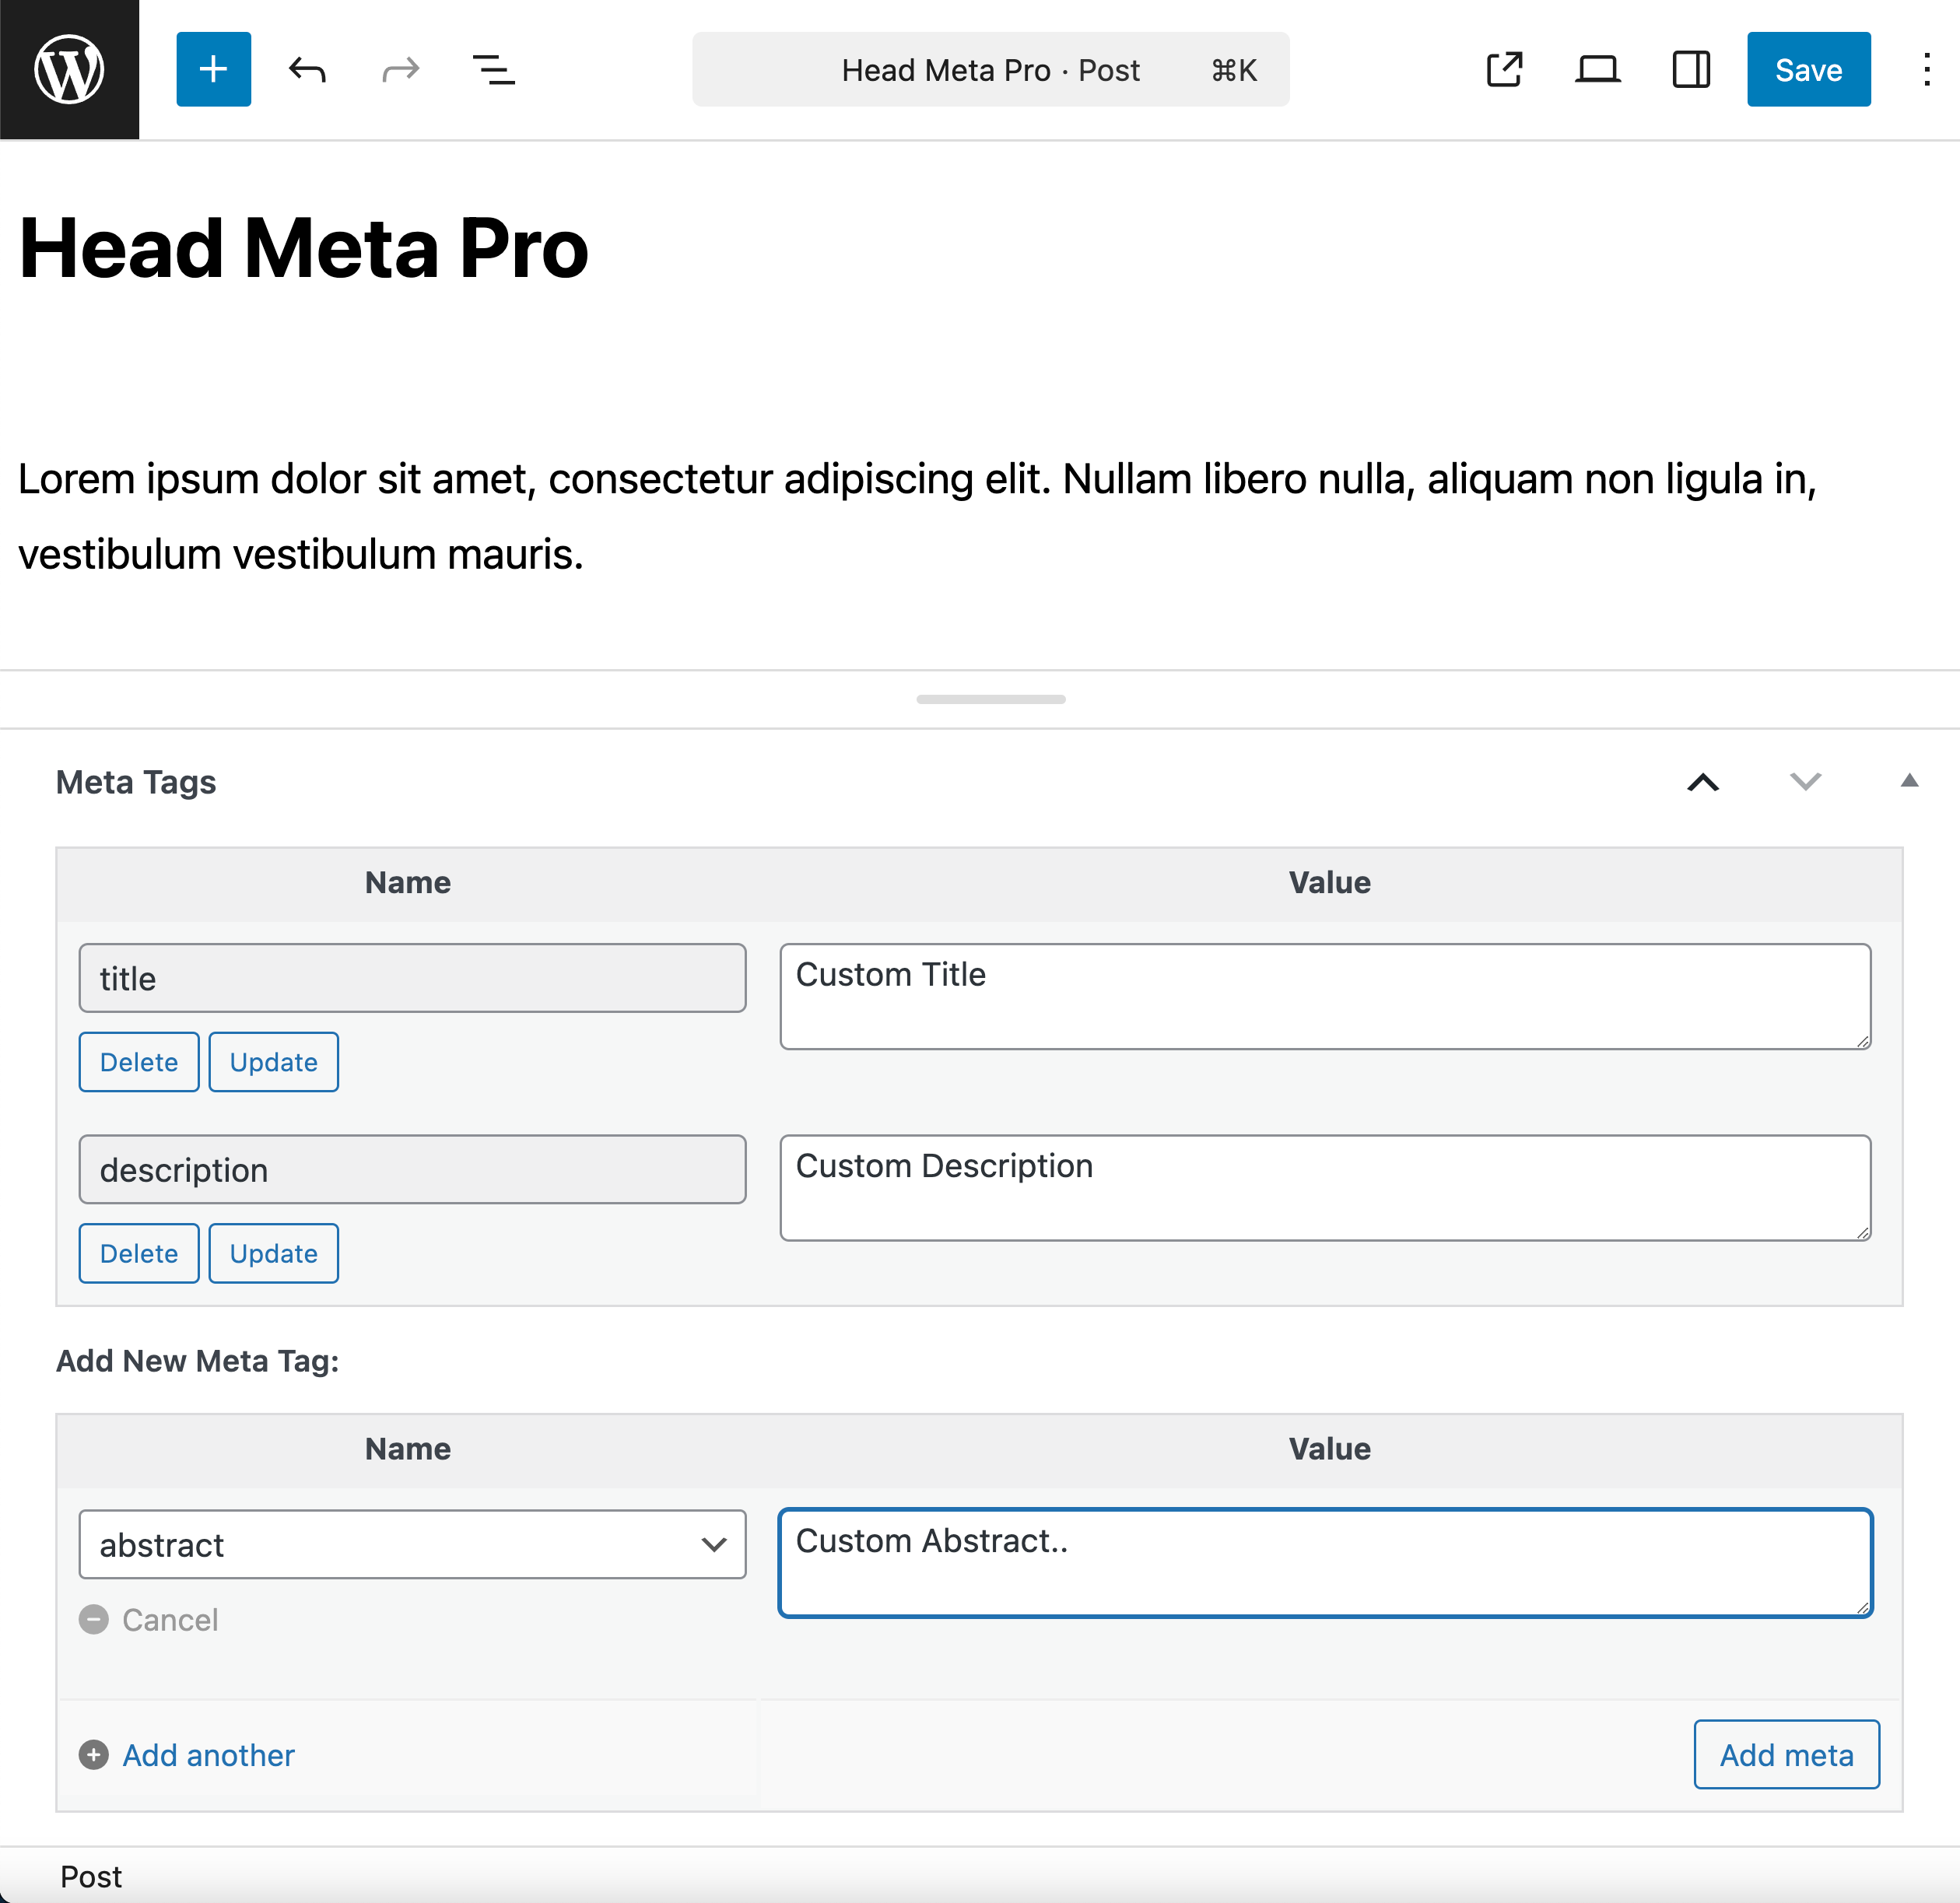
Meta Box
In the WordPress Admin Area, on each “Edit Post” screen, you will find the “Meta Tags” meta box. You can use the Meta Tags box to define post-specific tags and custom HTML content for each post and page. Here is a screenshot of the Meta Tags box.
To add a meta tag to your post, choose the tag from the select menu and define its value in the adjacent field. Then click to add the meta tag and done. Don’t forget to save changes on the post itself.
Each tag added via the Meta Tags box can be updated or deleted from the post. Simply locate the tag in the list and click either “Update” or “Delete”, respectively.
Any tags added to posts via the Meta Tags box will override any tags that may be defined in the plugin settings. The Meta Tags box always takes precedence.
Also note, just like in the settings, you can use shortcut variables like %%DATE%% to include dynamic bits of information in any meta box field.
Disable Unused Tags
By default, the Meta Tags box menu includes all available meta tags. So it can take some time to scroll through them all. If you are not using some of the meta tags, you can disable them so they do not appear in the meta box menu. To disable a tag, leave its Slug/ID blank/empty in the settings provided under Other ▸ Meta Box.
Shortcut Variables
In the plugin settings and Meta Tags box, you can use shortcut variables to include dynamic bits of data, like the current date and post title. Check out this guide for a complete list of all available shortcut variables. Note the same list of shortcut variables may also be found in the Help tab on the plugin settings page.
Testing Meta Tags
Head Meta Pro provides a “Preview” feature on each settings page. So after you configure your meta tags, you can scroll down to near the “Save Changes” button to preview how the tags will be included on the front-end.
Note: shortcut variables will not be converted in previews, as they depend on context in order to generate replacement data. For example, if you include %%POST_TITLE%% in a meta tag, the preview will show %%POST_TITLE%% instead of any actual post title.
To confirm the preview is accurate, simply view the source code of your web page(s). The meta tags always are included in the <head> section, which is near the top of the web page. So to confirm your meta tag configuration, examine the head section of your web pages.