This quick post explains the various ways to add CSS and JavaScript to your USP Forms and submitted posts.
CSS & JavaScript for Forms
Here are the different ways to add/edit CSS and JavaScript for USP Forms.
CSS
For any USP Form, you can add/edit CSS:
- via the USP Pro settings ▸ CSS/JS tab ▸ “CSS/Styles”
- via your theme’s
style.cssfile (or other theme stylesheet) - via the USP Form itself, by wrapping the CSS in
<style>tags
Additionally, it is possible to add CSS to any USP Form via Custom Field. For example, to add some custom CSS to your form, create a new Custom Field named usp-css with a value that includes your CSS code. So on the “Edit Form” screen, scroll down beneath the form to the “Custom Fields” panel. There you can add a new field for your custom CSS, as shown in this screenshot:
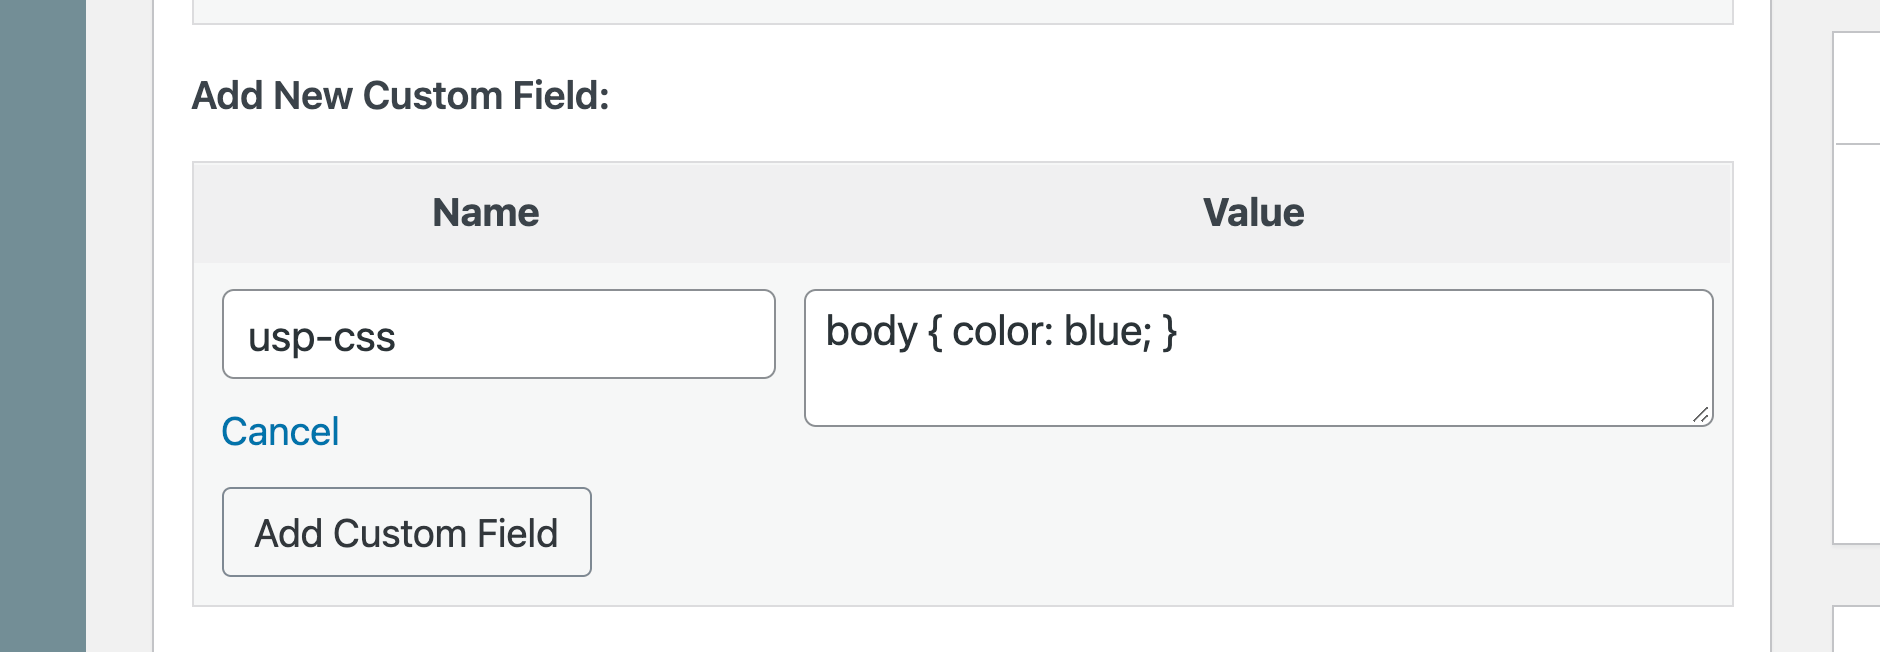
Note that any CSS added via Custom Field is displayed inline and automatically wrapped with <style> tags.
JavaScript
For any USP Form, you can add/edit JavaScript:
- via the USP Pro settings ▸ CSS/JS tab ▸ “JavaScript/jQuery”
- via your theme’s included JavaScript file
- via the USP Form itself, by wrapping the JavaScript in
<script>tags
Additionally, it is possible to add JavaScript to any USP Form via Custom Field. For example, to add some custom JavaScript to your form, create a new Custom Field named usp-js with a value that includes your JavaScript code. So on the “Edit Form” screen, scroll down beneath the form to the “Custom Fields” panel. There you can add a new field for your custom JavaScript, as shown in this screenshot:
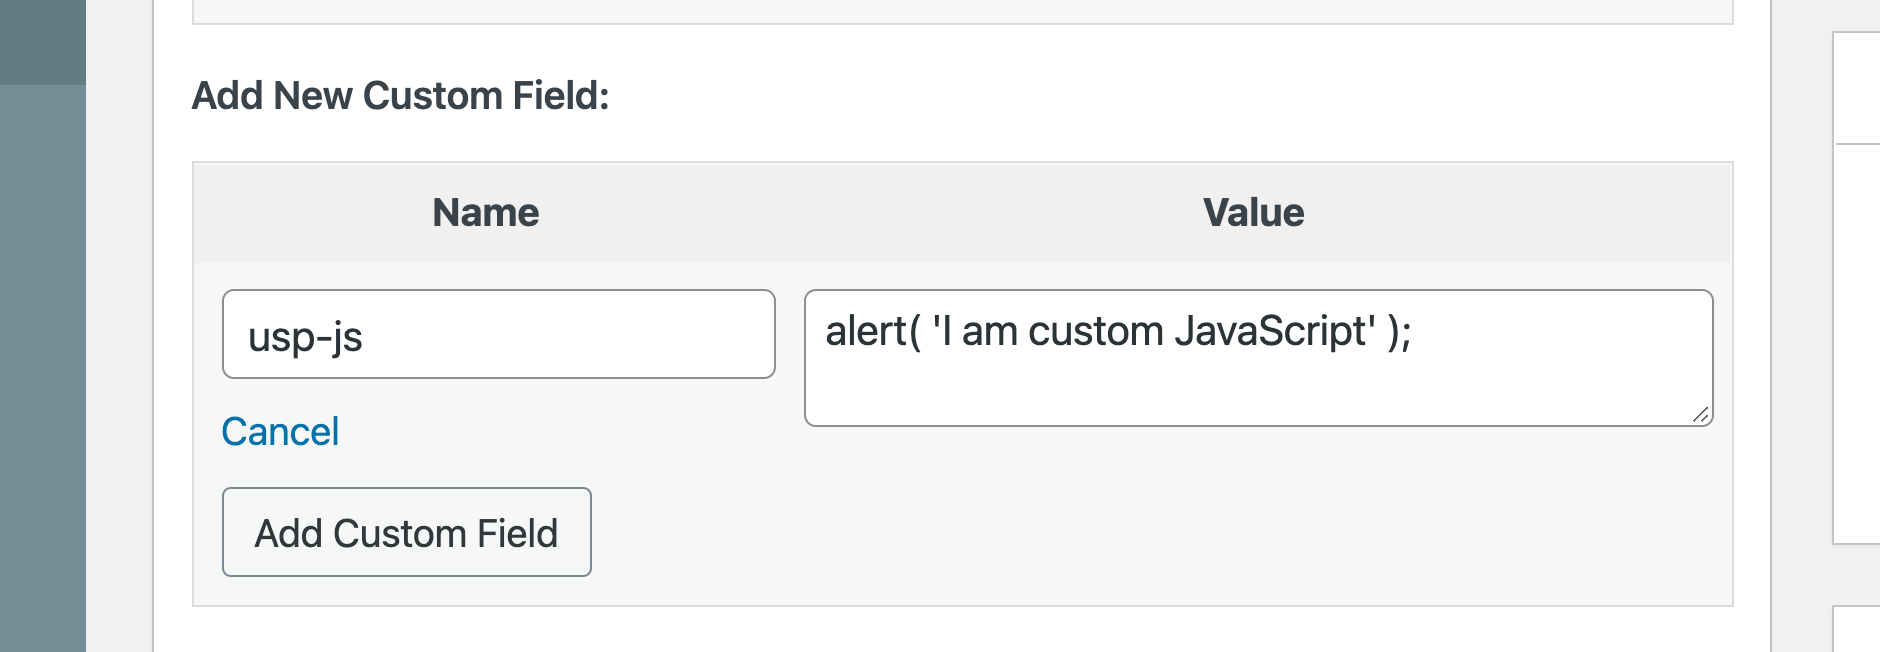
Note that any JavaScript added via Custom Field is displayed inline and automatically wrapped with <script> tags.
CSS & JavaScript for submitted posts
Here are the different ways to add/edit CSS and JavaScript for submitted posts.
CSS
For any submitted post, you can add/edit CSS:
- via your theme’s
style.cssfile (or other theme stylesheet) - via art-directed content, see next section
JavaScript
For any submitted post, you can add/edit JavaScript:
- via your theme’s included JavaScript file
- via art-directed content, see next section
Art-Directed CSS & JavaScript
Using Custom Fields, it’s possible to include custom content (aka “art-directed” content) with any/all submitted posts. First we’ll look at how it’s done for CSS, and then we’ll see how it’s done for JavaScript.
Video Tutorial
Written Tutorial
Art-Directed CSS
There are two ways of adding custom, art-directed CSS. You can add it to all posts or to any specific post(s).
Add custom CSS to all submitted posts
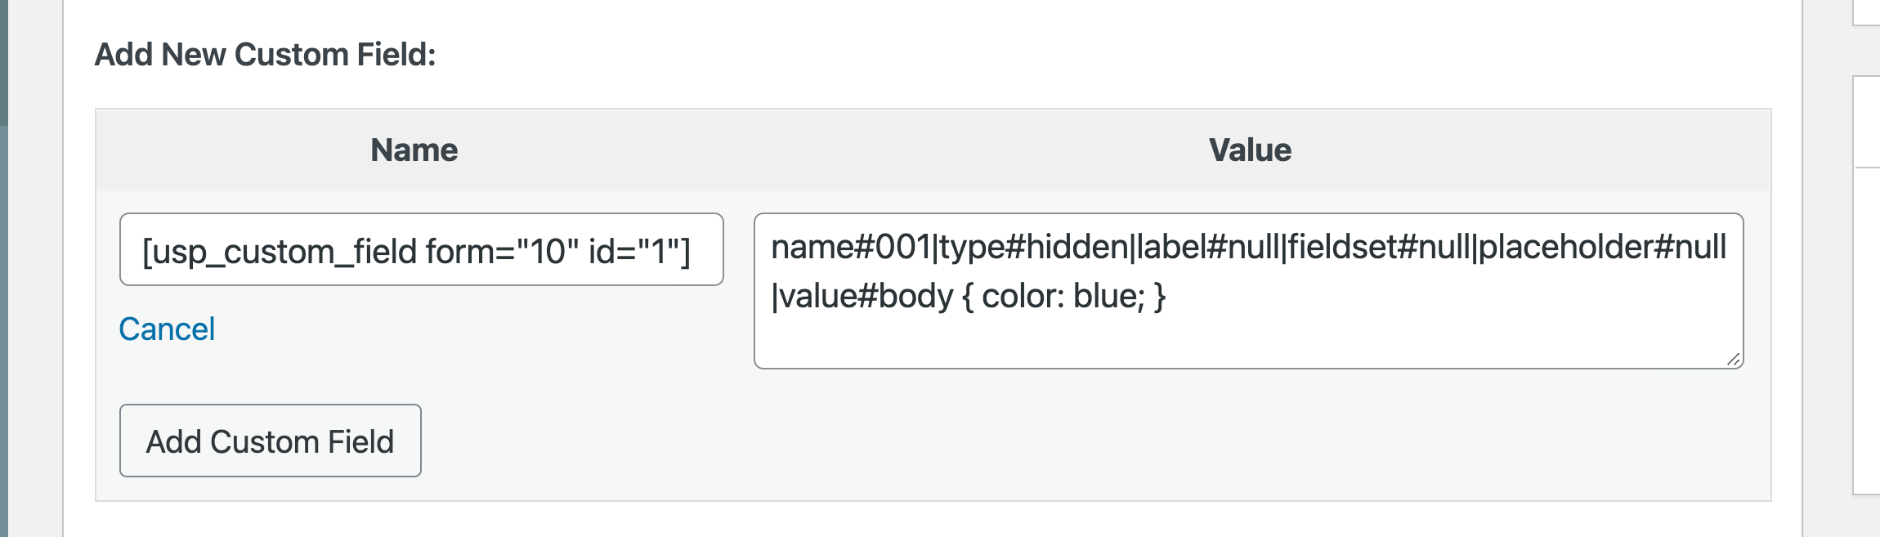
To add art-directed CSS to all posts submitted by a specific form, create a new Custom Field on the form itself (via the “Edit Form” screen):
- Custom Field Name —
[usp_custom_field form="10" id="1"] - Custom Field Value —
name#001|type#hidden|label#null|fieldset#null|placeholder#null|value#body { color: blue; }
Replace body { color: blue; } with your custom CSS. Note that form="10" and id="1" will vary depending on your form. Here is a screenshot of what you should be seeing on the “Edit Form” screen:
Add custom CSS to a specific submitted post
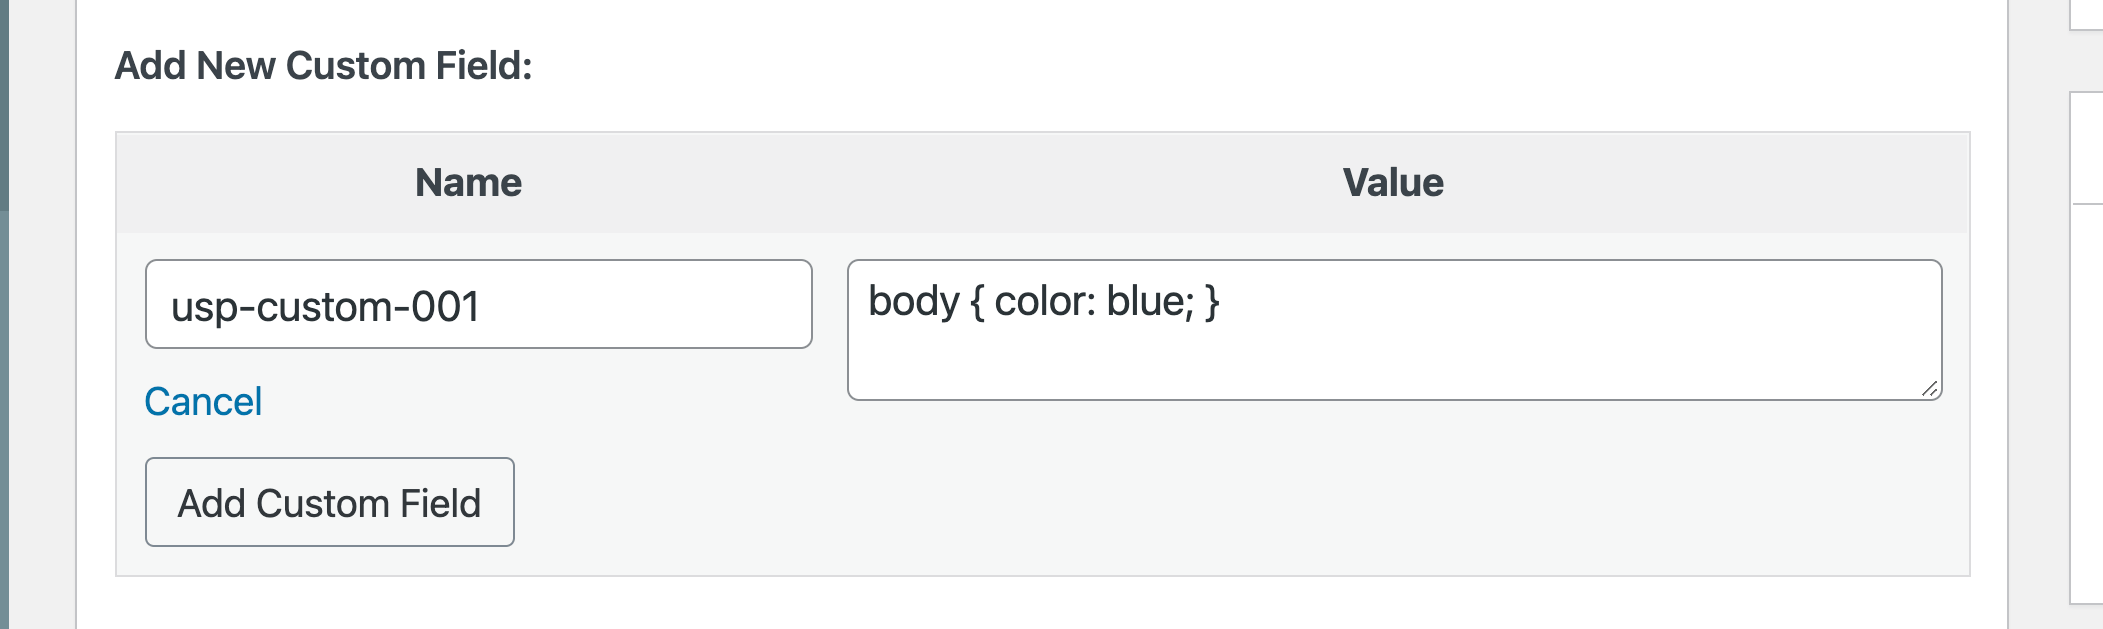
To add art-directed CSS to a specific submitted post, create a new Custom Field on the post itself (via the “Edit Post” screen):
- Custom Field Name —
usp-custom-001 - Custom Field Value —
body { color: blue; }
Replace body { color: blue; } with your custom CSS. Here is a screenshot of what you should be seeing on the “Edit Post” screen:
Art-Directed JavaScript
Adding art-directed JavaScript works exactly the same way as art-directed CSS (described above). The only difference is that instead of using 001, you use 002. So when defining art-directed scripts for all forms, you use this for the custom-field value:
name#002|type#hidden|label#null|fieldset#null|placeholder#null|value#alert('Hello World!');And likewise to add art-directed styles to a specific post, you use this for the custom-field value:
usp-custom-002
Notice in both cases that we changed 001 with 002, and also changed the value to include JavaScript code instead of CSS.
Art-Directed HTML/Text
Using the same technique as described for art-directed CSS and JavaScript, we can add text/markup to any/all submitted posts. The only difference is that instead of using 001 (for CSS) or 002 (for JavaScript), you use 003 (for HTML). So when defining art-directed text/HTML for all forms, you use this for the custom-field value:
name#003|type#hidden|label#null|fieldset#null|placeholder#null|value#<em>Hello World!</em>And likewise to add art-directed text/HTML to a specific post, you use this for the custom-field value:
usp-custom-003
Notice in both cases that we use 003 for the custom-field name, and also change the value to include HTML/text instead of CSS or JavaScript.
Summary
To summarize the different codes to use for art-directed content:
001— CSS (will be wrapped with<style>tags)002— JavaScript (will be wrapped with<script>tags)003— HTML/text (will not be wrapped with anything)