The Banhammer Pro Armory displays data for each logged request. So you can monitor traffic and keep a close eye on site activity. This quick tutorial explains how Banhammer Pro helps to manage your logged data, and prevent it from taking up too much space in the WP database.
Automatically clear Armory data
To help keep database size to a minimum, Banhammer provides a setting called “Reset Armory”, which determines the time interval to automatically clear all Armory data. There you can select a time interval ranging from “One minute” to “Never”. Choose this option based on the amount of traffic your site gets. Super busy sites should choose a small interval, like “One hour” or “Six hours”. Sites with not so much traffic will be fine going with a larger interval, like “One week” or “One month”.
Important! For the “Reset Armory” setting, only choose “Never” for testing purposes. Leaving the reset interval set at Never eventually will result in massive database size. Best to auto-clear the Armory every so often, based on the amount of traffic your site receives.
Manually clear Armory data
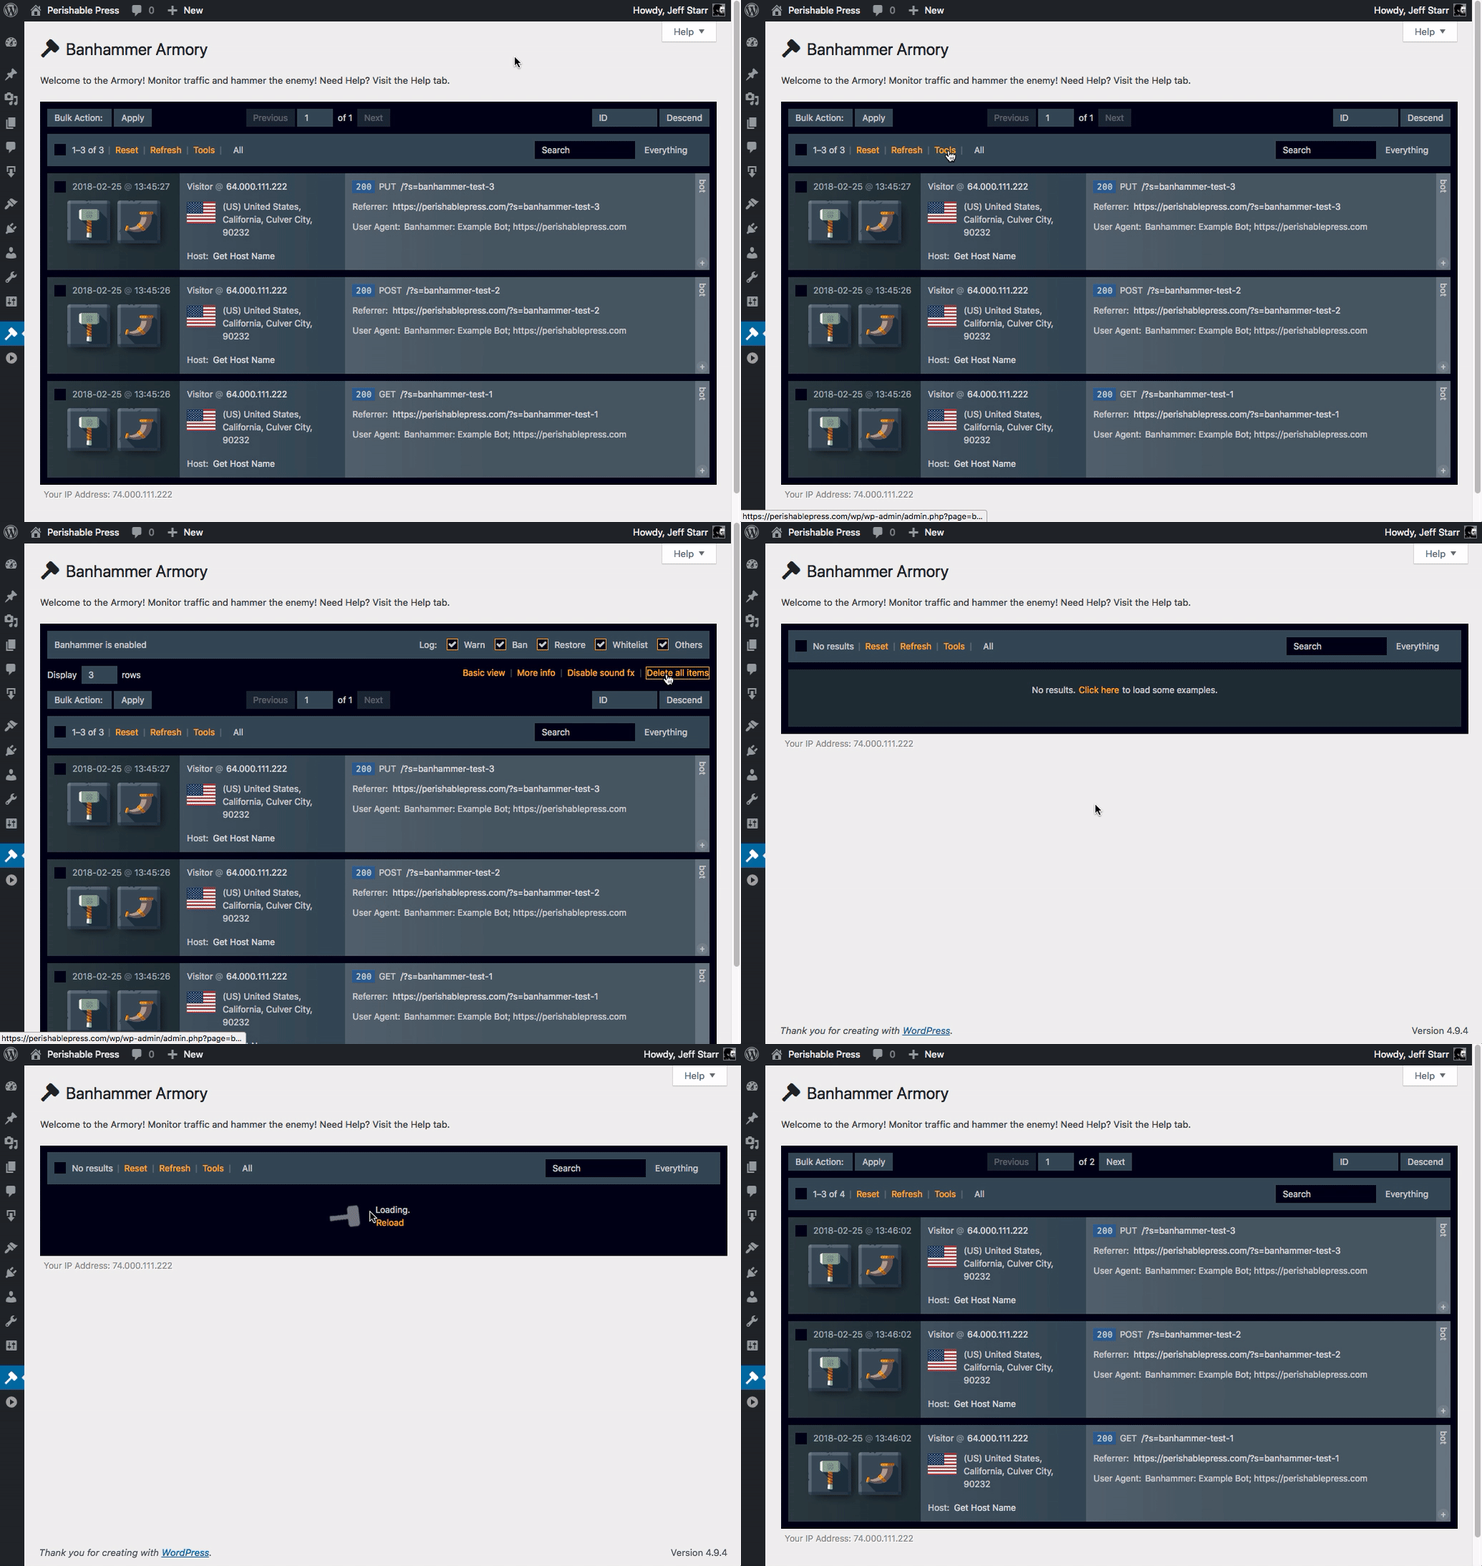
At any time and for any reason, you can clear all Armory data via Tools ▸ “Delete all items”. Here is an animated GIF that shows how it works:
As shown in the GIF, after deleting all Armory data, you can click the provided link to load some example logged items. Feel free to skip that part if not needed. The example items are just meant to give you an idea, maybe for sites that have yet to receive any outside traffic.
Pro Tip: All data displayed in the Armory is meant to be temporary. The Armory is a “snapshot” of current site activity, not a permanent record. As you monitor traffic and warn/ban targets via the Armory, they will be sent to the Tower, where they are kept permanently, or until you delete them. So think: Armory = temporary, and Tower = permanent.
Delete individual Armory items
Last but not least, it’s also possible to delete individual items from the Armory. Simply check the box (upper-left corner) of the item you want to delete, and then select “Delete” from the Bulk Action menu (upper-left of Toolbar).
