Banhammer Pro features an “Armory” screen, where you can keep an eye on site traffic. This post provides an overview of the Armory, showcasing its various features to give you a better idea of how it works and what you can do.
How it works
In the Armory, you can monitor traffic and drop the banhammer on any unwanted users or bots. Overview:
- When someone visits your site, a new entry will be logged and displayed in the Armory.
- Each logged entry provides data about the visit, including IP address and WP username (if applicable).
- Each logged entry provides “Ban” and “Warn” buttons, enabling you to warn or ban the target.
- The target will be either the IP address or the WP username, which you can select via the “Target” menu.
- You can manage all banned and warned items in the Tower.
Auto-Clear Data
All of the data that is displayed in the Armory is temporary. It will be cleared automatically at regular intervals to help optimize performance. Visit the Help tab on the Settings page to learn more about auto-clearing the Armory.
Armory controls
The Armory provides numerous controls for navigating and sorting data. Everything is designed to be as intuitive as possible. Spend a few minutes playing around to get a better idea of how everything works. And remember, everything displayed here in the Armory is temporary, so feel free to explore!
Screenshots
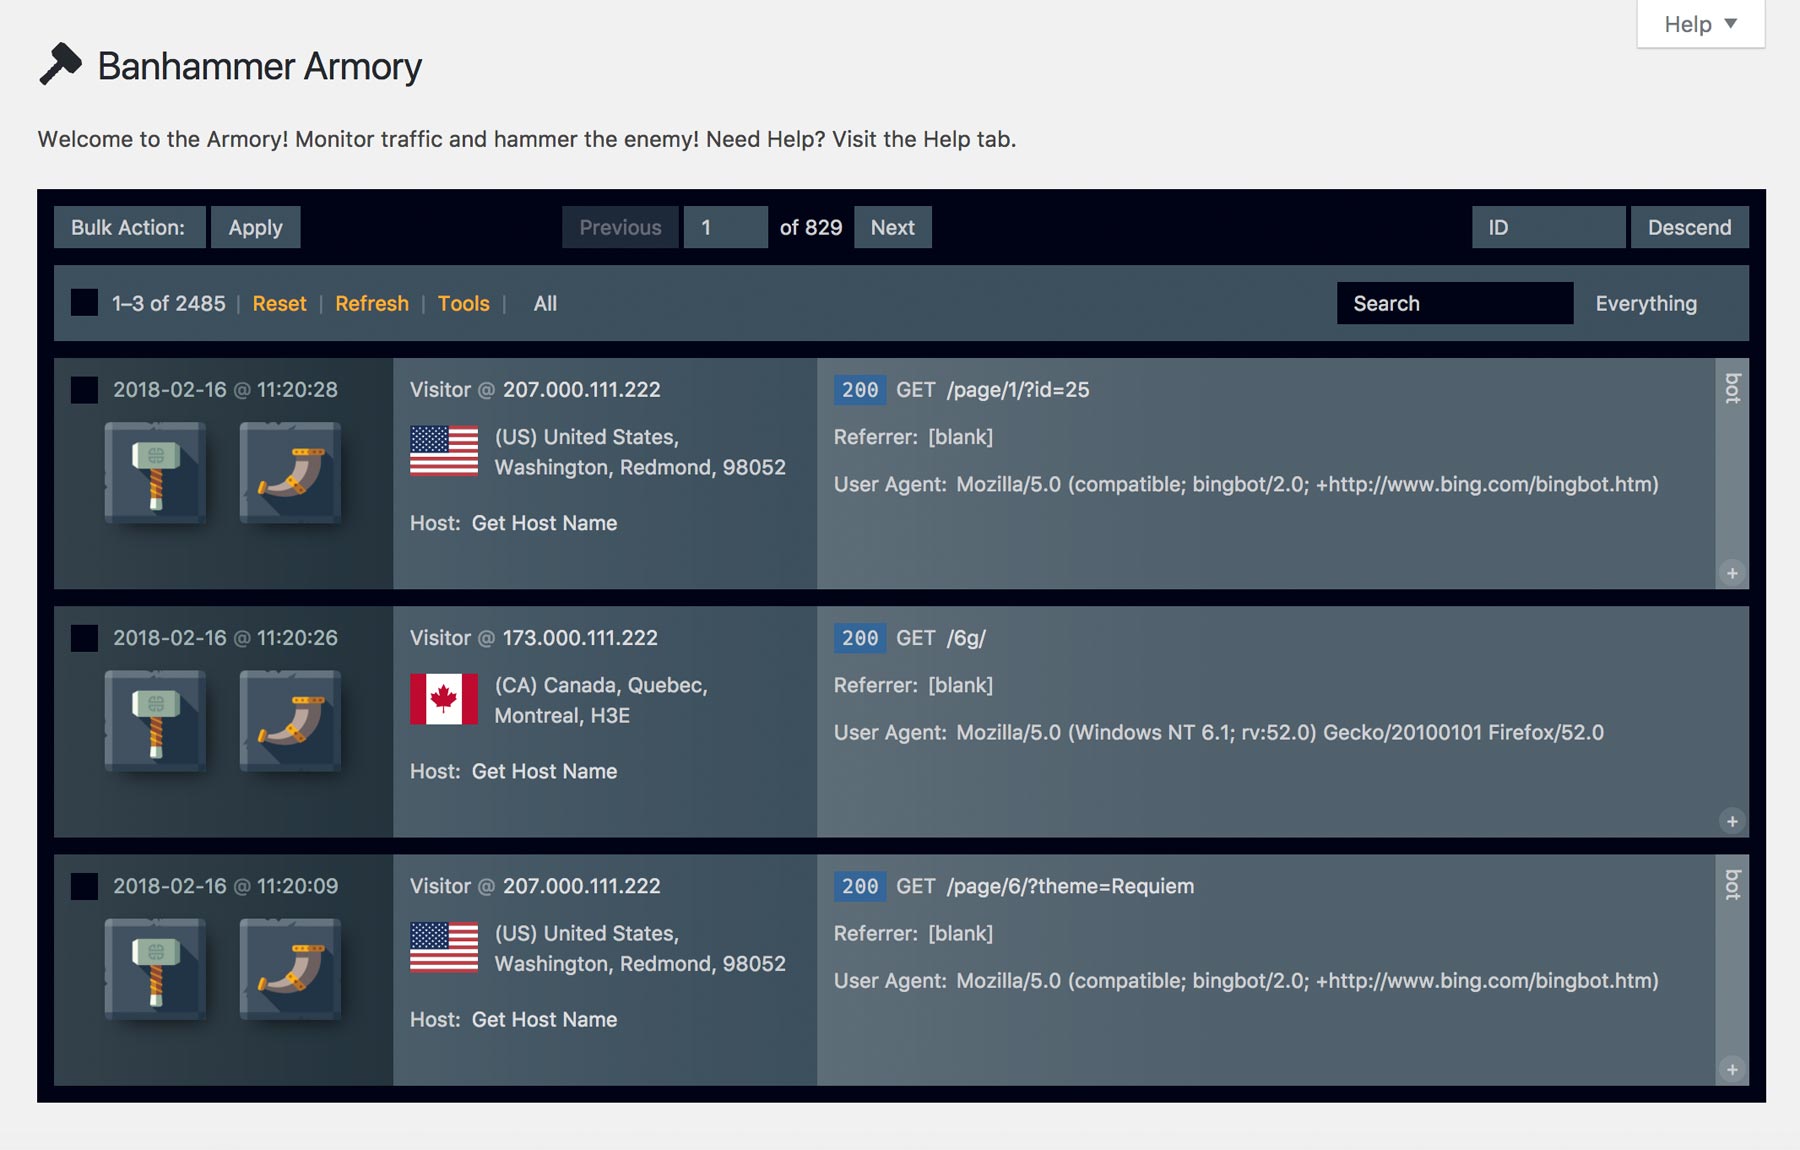
You can visit the Armory via the “Banhammer Pro” menu. The Armory screen should look something like this:
Or, if “Basic View” is enabled, you may see something like this:

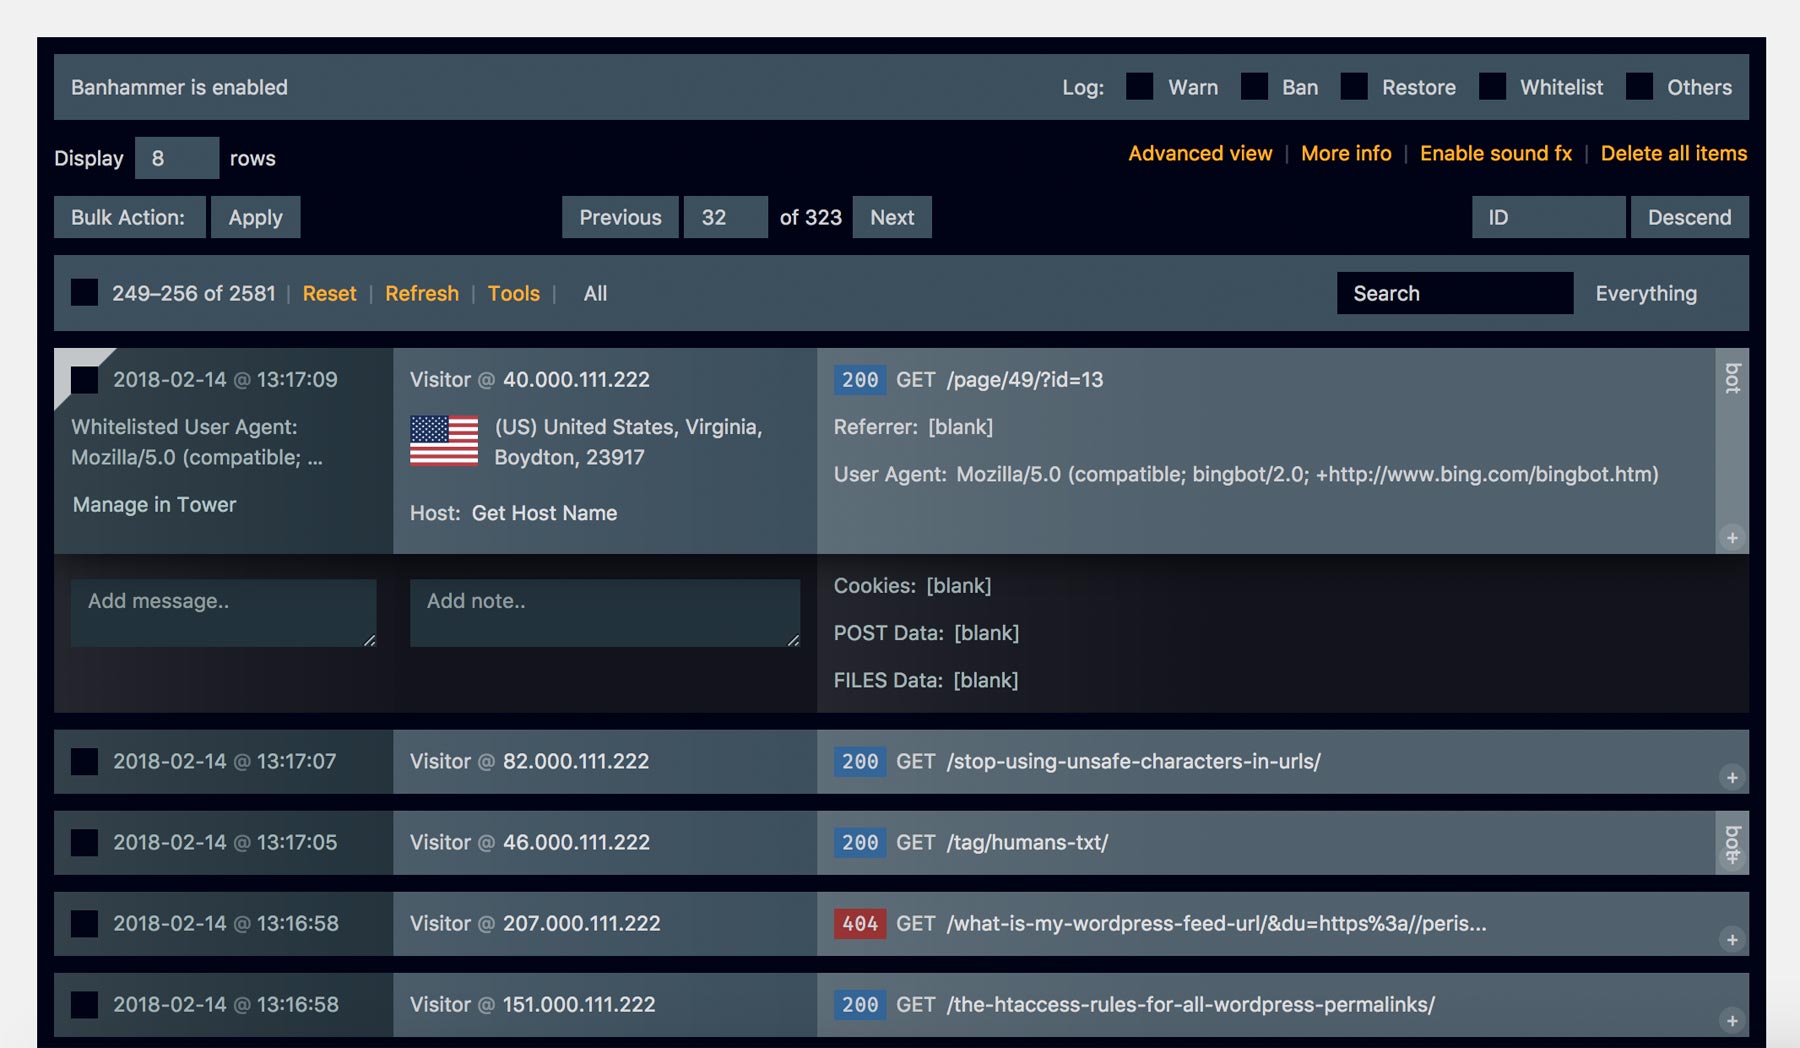
You can double-click any item to toggle Advanced View, and you can click “More Info” to display Message, Notes, and additional request data. For example:
Features
Using the above screenshot as reference, here are some of the things you can do in the Armory.
Toolbar
- Reset – resets the Armory to its default state
- Refresh – refresh the current set of results
- Tools – toggles additional tools and features
- Filter – filters results by status (e.g., Banned, Warned, Restored)
- Search – search and filter results by field (e.g., Date, Country, Status, Referrer)
Tools
- Log – enable or disable logging of Warned, Banned, et al
- Display “x” rows – sets the number of rows displayed in the Armory and Tower
- Advanced/Basic View – Advanced view is like in screenshot #1, and Basic View is like in screenshot #2
- More Info – toggles more info for each logged item (i.e., Message, Notes, and additional request data)
- Sound Fx – enables sound effects for Ban, Warn, Whitelist, and Delete actions
- Delete all items – deletes all items in the Armory
- Bulk Actions – applies actions like delete and whitelist to any selected targets
- Prev/Next/Jump – enables navigation thru paged results
- Sort – sorts by field and ascending/descending
Logged Items (each row)
- Select target – click beneath the Warn/Ban buttons to select a target (e.g., IP Address, WP User, Request URI, et al)
- Ban button – click to ban the selected target
- Warn button – click to warn the selected target
- User Info – click links to edit WP User and lookup IP Address
- Host Name – click to lookup host name info
- Logged Data – includes Request URI, Referrer, User Agent
- Custom Message – click More Info to customize the banned response
- Custom Notes – click More Info to add private notes
- Additional Data – click More Info for Cookies, POST and FILES data
And keep in mind that the best way to understand how everything works is to just play with it for awhile. Seriously, the UI is intuitive and even fun to use :) Further documentation is available 24/7 via the Help tab on the Armory screen.