Banhammer Pro features a “Tower” screen, where you can view and manage any banned or warned targets. This post provides an overview of the Tower, showcasing its various features to give you a better idea of how it works and what you can do.
How it works
Visit the Tower to manage all banned, warned, restored, and whitelisted targets. Overview:
- To ban or warn a target and add it to the Tower, visit the Armory.
- In the Armory, each logged entry provides “Ban” and “Warn” buttons, enabling you to warn or ban the target.
- The target will be either the IP address or the WP username (if applicable), which you can select via the “Target” menu.
- After banning or warning a target, visit the Tower to manage and view the number of blocked/warned hits.
Stay on target
Banhammer Pro enables you ban and warn targets based on IP Address, User Agent, WP User, Request URI, or Referrer. Each target:
- Must be added via the Armory
- May be a WP user or an IP address
- May be banned, warned, or restored
- Is unique and appears only once in the Tower
- Can be restored or deleted only via the Tower
So for example, after banning a target via the Armory, you can visit the Tower to restore access or change status to warning. Note that each target shows the number of banned, warned, or restored hits (center column). See the Notes tab for more details.
Tower Controls
The Tower provides numerous controls for managing and sorting data. Everything is designed to be as intuitive as possible. Note that it is totally fine to ban, warn, and restore any item as often as desired. Deleting however is final, unless you find the target in the Armory and warn/ban again.
Pro Tip: Be careful about who/what you ban. Banhammer provides tools like IP lookups, so you can verify and make triple-sure that you really want to ban some user or bot. And if you accidentally ban yourself, you can use the Unlock plugin to restore access.
Screenshots
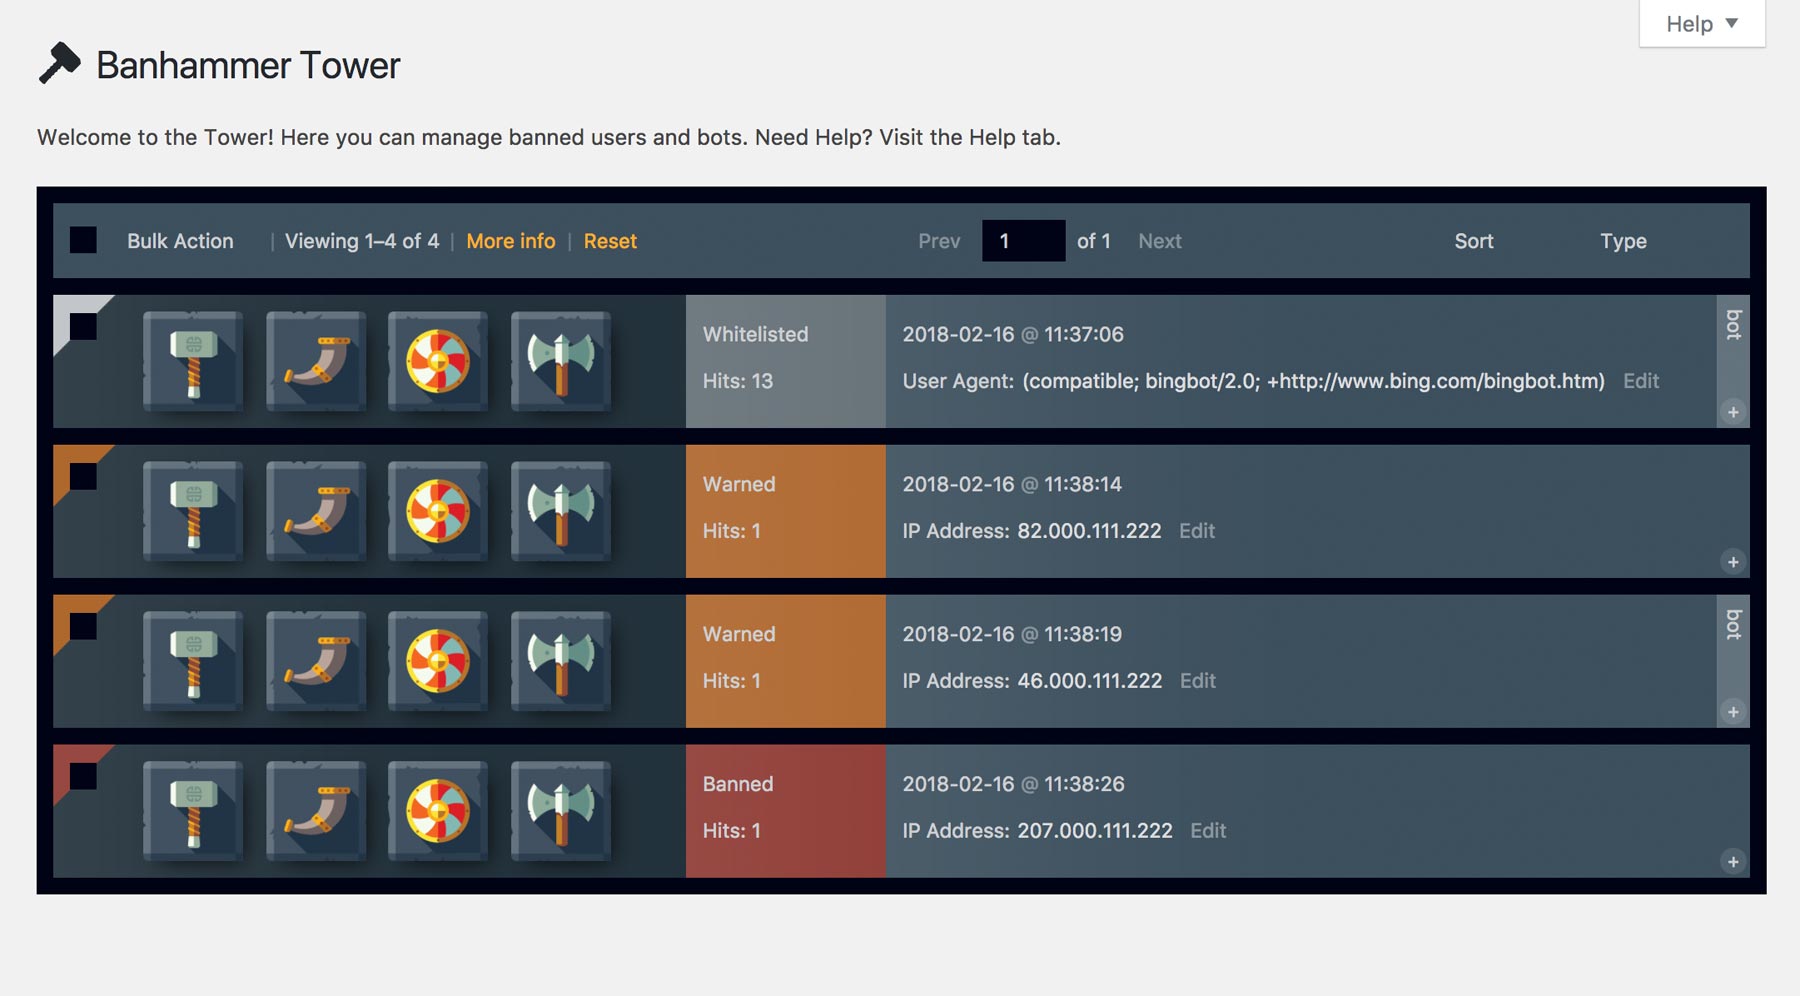
You can visit the Tower via the “Banhammer Pro” menu. The Tower screen should look something like this:
And if you click the “More Info” button, each target will toggle open additional fields:
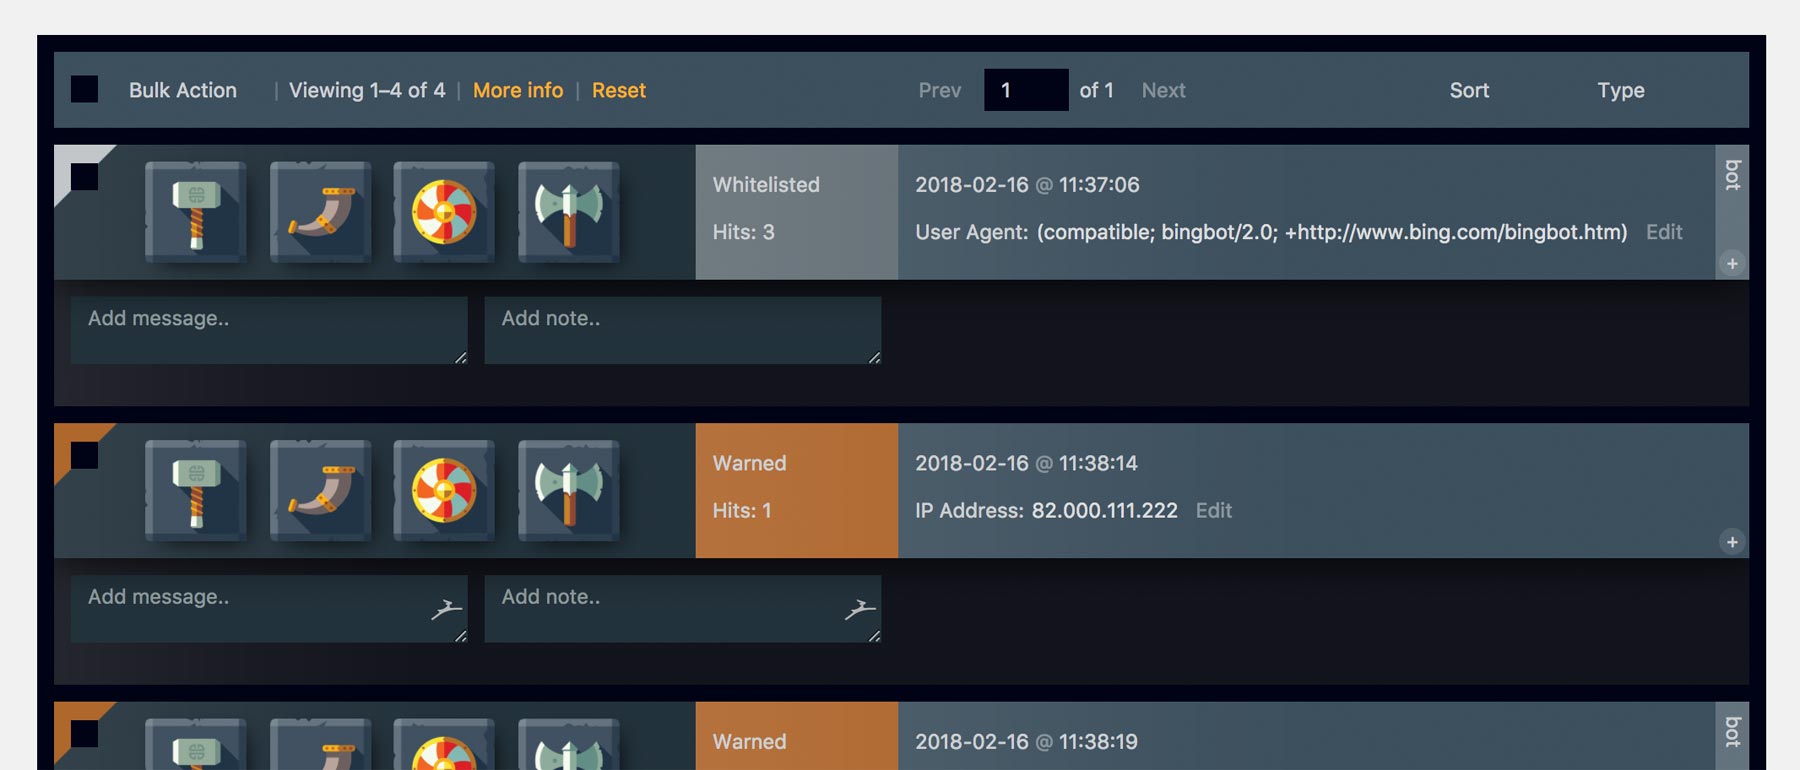
So you can specify a custom banned message, and add private notes to any target.
Features
Using the above screenshot as reference, here are some of the things you can do in the Tower.
Toolbar
- Bulk Action – applies actions like delete and whitelist to any selected targets
- More Info – toggles Message and Notes fields for each target
- Reset – resets the Tower display to the first set of results
- Prev/Next/Jump – enables navigation thru paged results
- Sort – sorts by status (e.g., Banned, Warned, Whitelisted)
- Type – sorts by target (e.g., IP Address, Request URI)
Targets
- Checkbox – select to apply Bulk Action
- Ban button – click to immediately ban the target
- Warn button – click to immediately warn the target
- Whitelist button – click to immediately whitelist the target
- Delete button – click to immediately delete the target
- Status & Hits – displays the target’s current status and number of hits
- Date/time – indicates when the target was added to the Tower
- Target – note that you can edit any target by clicking the “Edit” button
- Message – click “More Info” in the toolbar to customize the banned message for any target
- Note – click “More Info” in the toolbar to add a private note to any target
Sound Effects! Banhammer provides sound effects for fun. To enable, visit the Armory > Tools > “Enable sound fx”. When enabled, sounds are played whenever an action button is clicked. In the Tower, this includes the Ban, Warn, Restore, and Delete buttons. For more information, visit the Help tab in the Armory (Notes section).
And keep in mind that the best way to understand how everything works is to just play with it for awhile. Seriously, the UI is intuitive and even fun to use :) Further documentation is available 24/7 via the Help tab on the Tower screen.