If you are using REST Pro Tools to lock down the REST API via the “Manage Access” settings. But you want to enable REST access for Contact Form 7 or some other plugin. If that sounds like you, follow this quick guide. It explains how to allow any REST routes that may be required. Again, this tutorial only applies when you are managing routes via the Manage Access settings.
How it works
Depending on the configuration of REST Pro Tools, newly added plugins will be either enabled automatically or disabled automatically. To find out, visit the Manage Access settings and select any user role from the dropdown menu. Next to the selected user role is a small circle/dot icon. If that dot icon is a dark/blue color, it means that any newly added routes will be enabled automatically for the selected user role. Otherwise, if the dot icon is a light/grey color, it means that any new routes will be disabled automatically.
Here is a screenshot to give you a better idea:
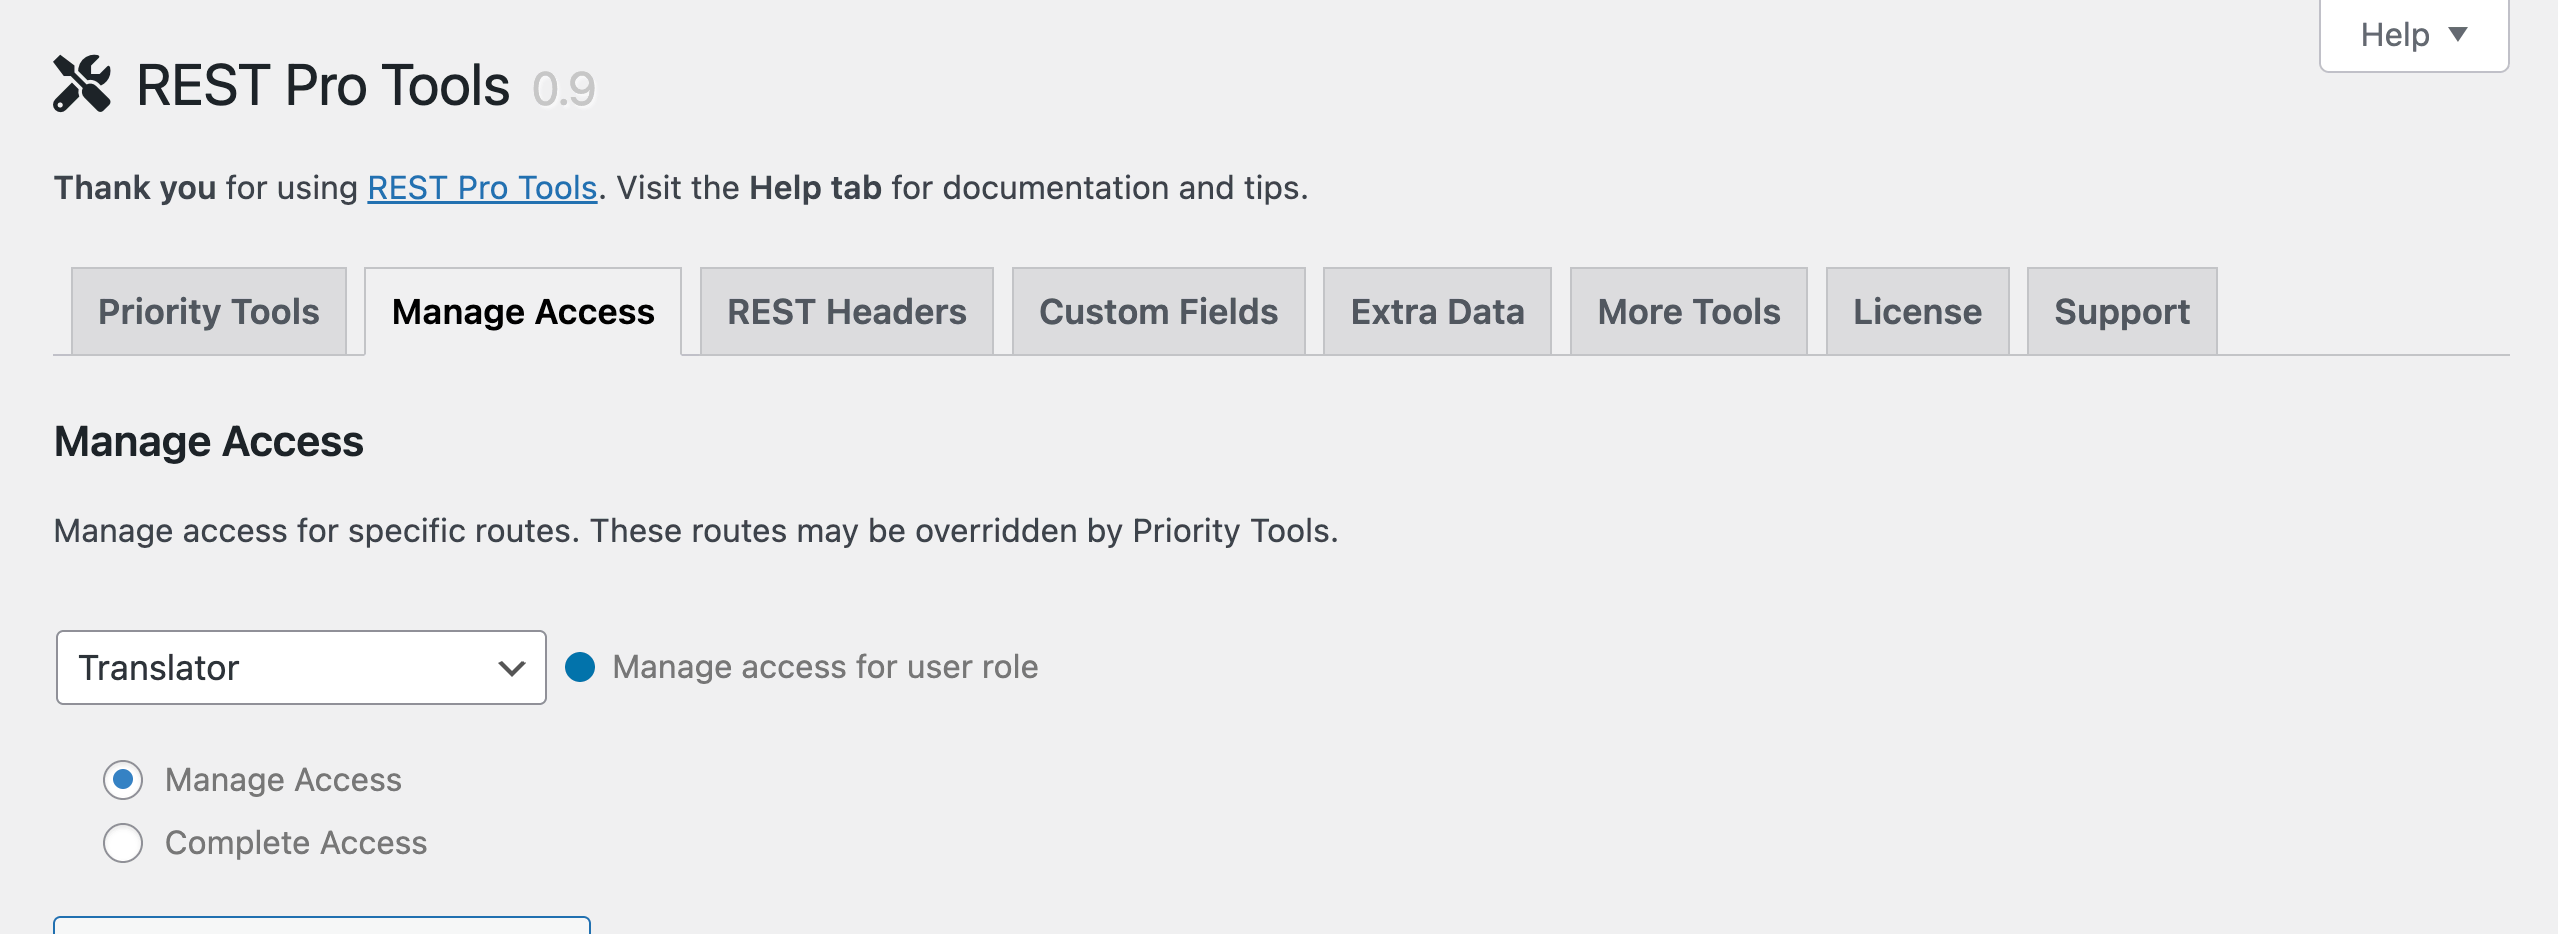
Notice the small “dot” icon displayed between the user-role menu and the text that says, “Manage access for user role”. That is the “auto-enable indicator”. Because the indicator is blue in color, any newly added routes are enabled automatically for the “Translator” user role. If the indicator were grey color, any new routes would be disabled automatically.
Enable Contact Form 7
When the auto-enable indicator shows blue when Contact Form 7 (or any plugin) is activated, any related routes will be enabled automatically. So to enable Contact Form 7 in this case, no action is required, it’s already done.
Or, when the auto-enable indicator shows grey when Contact Form 7 (or any plugin) is activated, any related routes will be disabled automatically. So to enable Contact Form 7 in this case, follow these steps:
Step 1: Make sure that REST is not disabled globally via the Priority Tools settings. The global “Disable REST” settings will override and limit the granular settings described below.
Step 2: On the Manage Access tab, choose each user role and select the “Manage Access” option beneath it. That will toggle open all of the routes for the chosen user role.
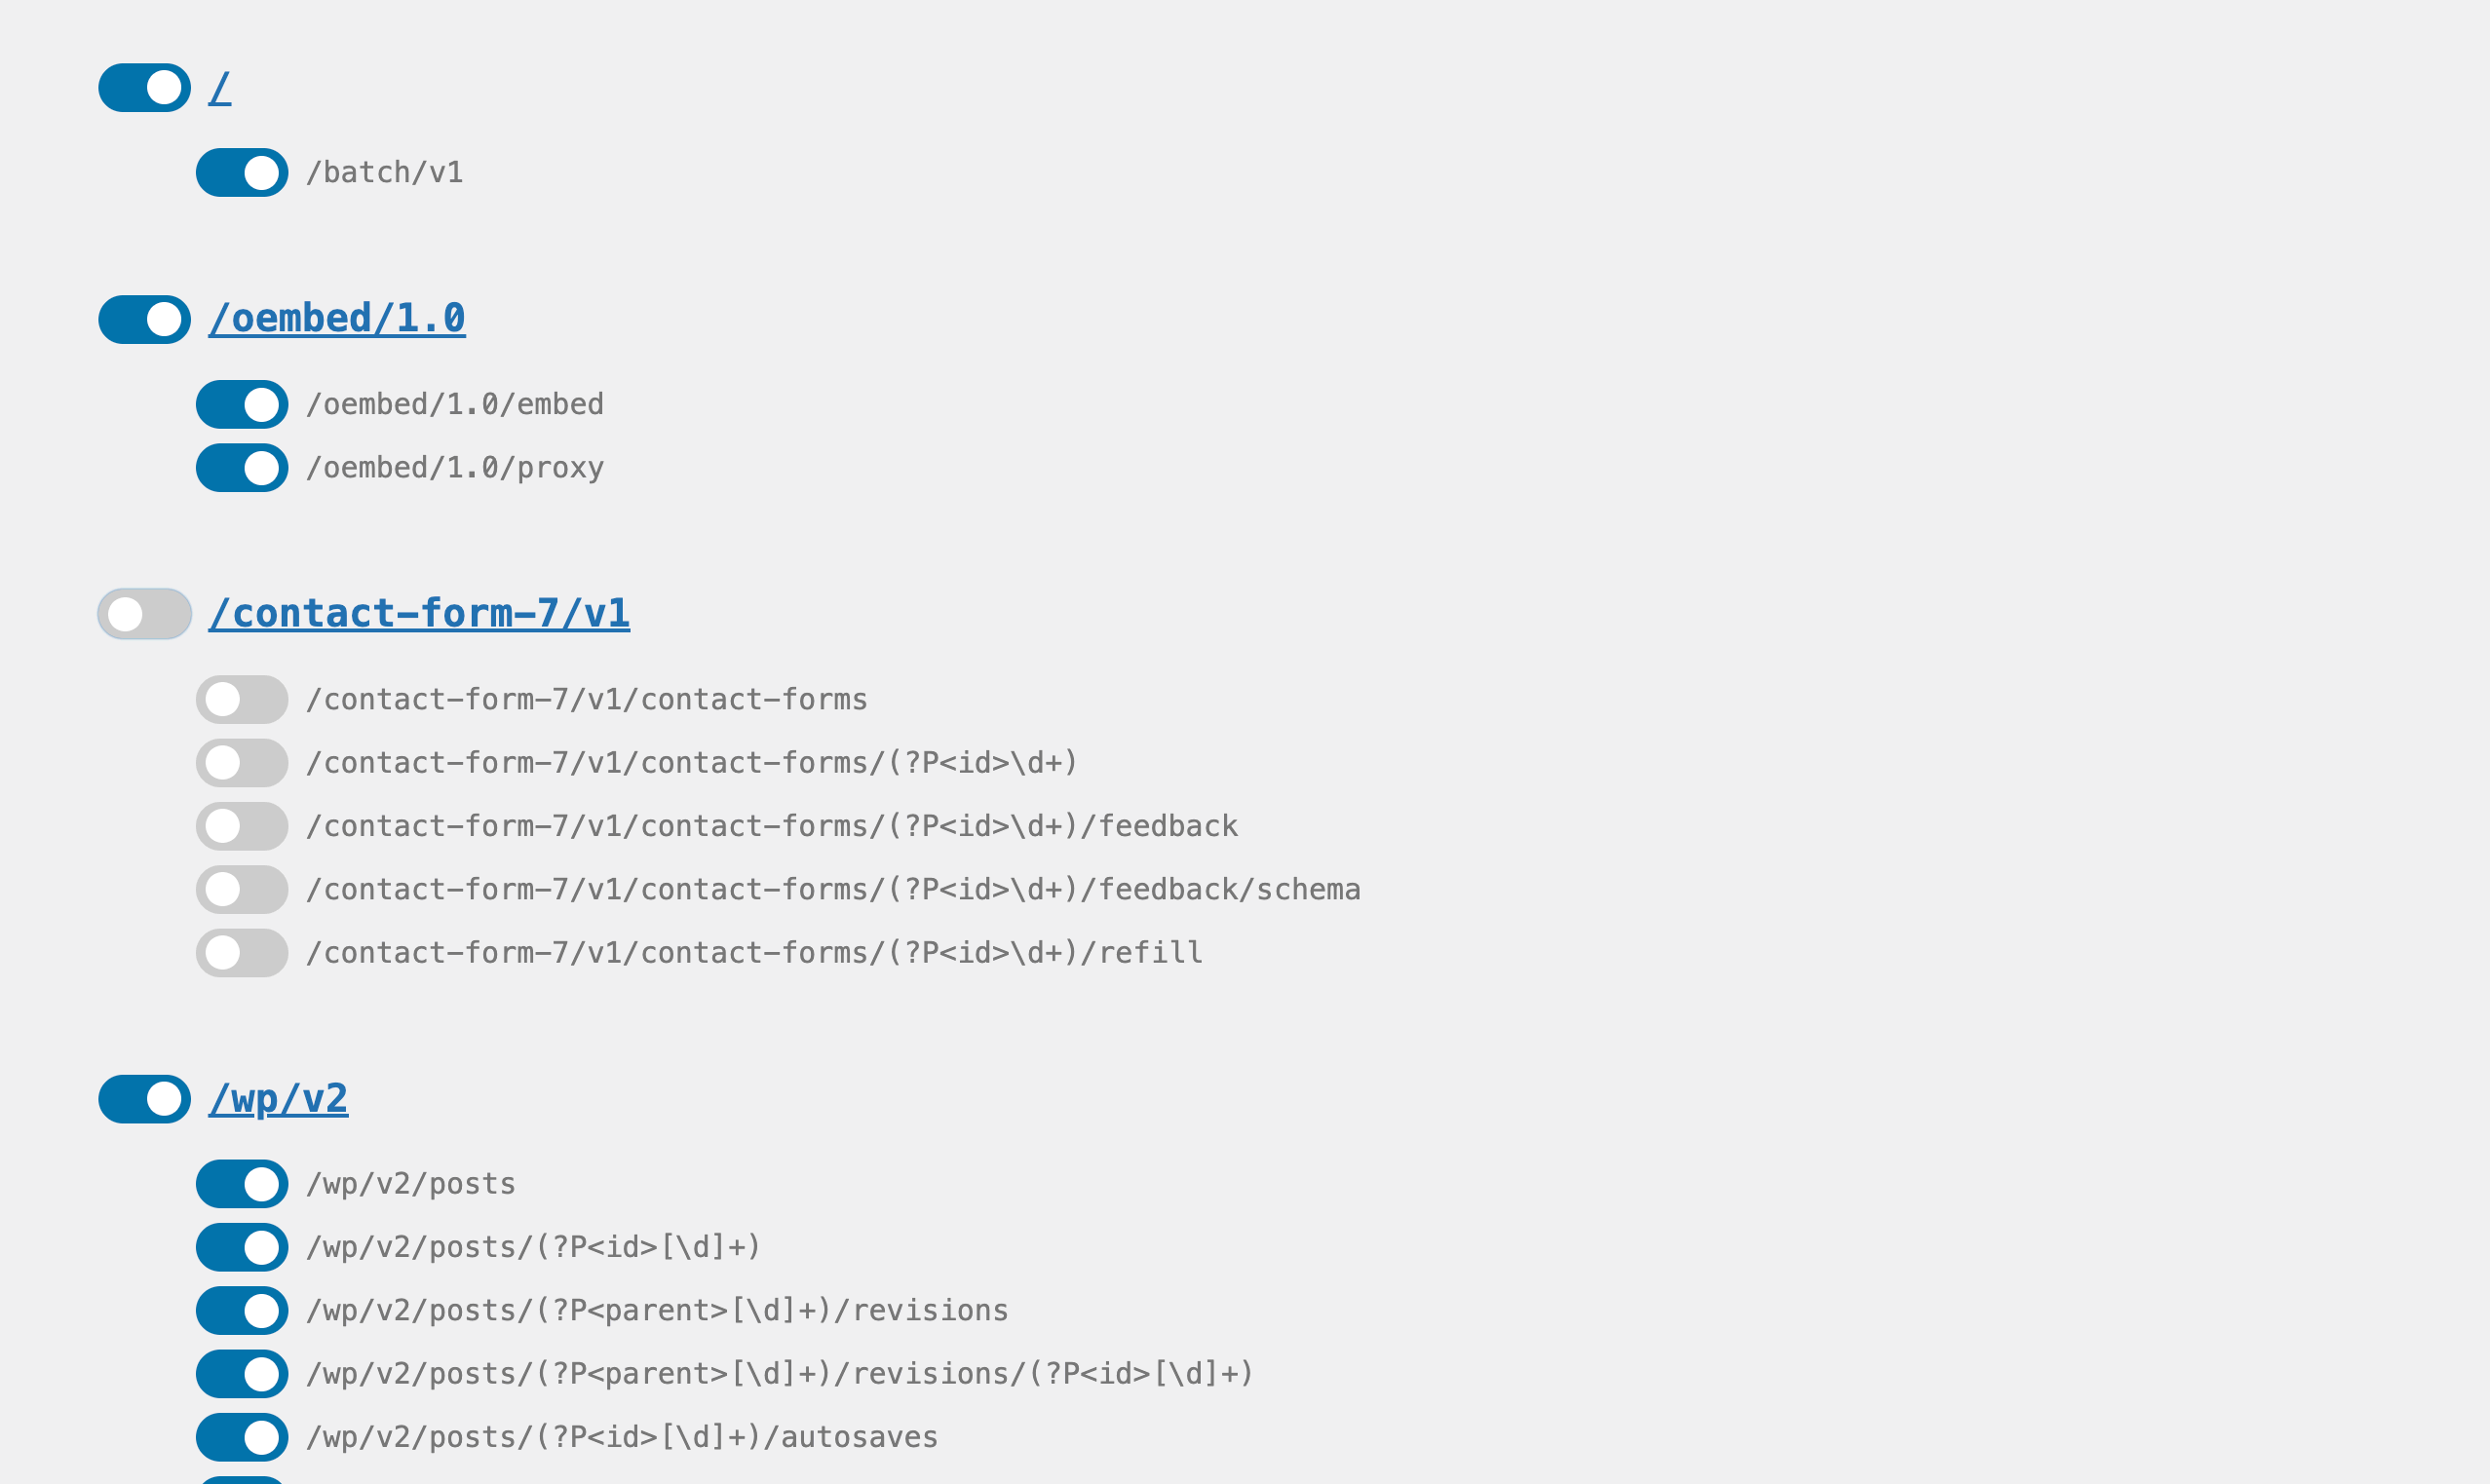
Step 3: Scroll down through the list of routes until you find the routes for Contact Form 7 (or whichever plugin you are working with). They should be located under the parent route /contact-form-7/v1, which currently looks something like this:
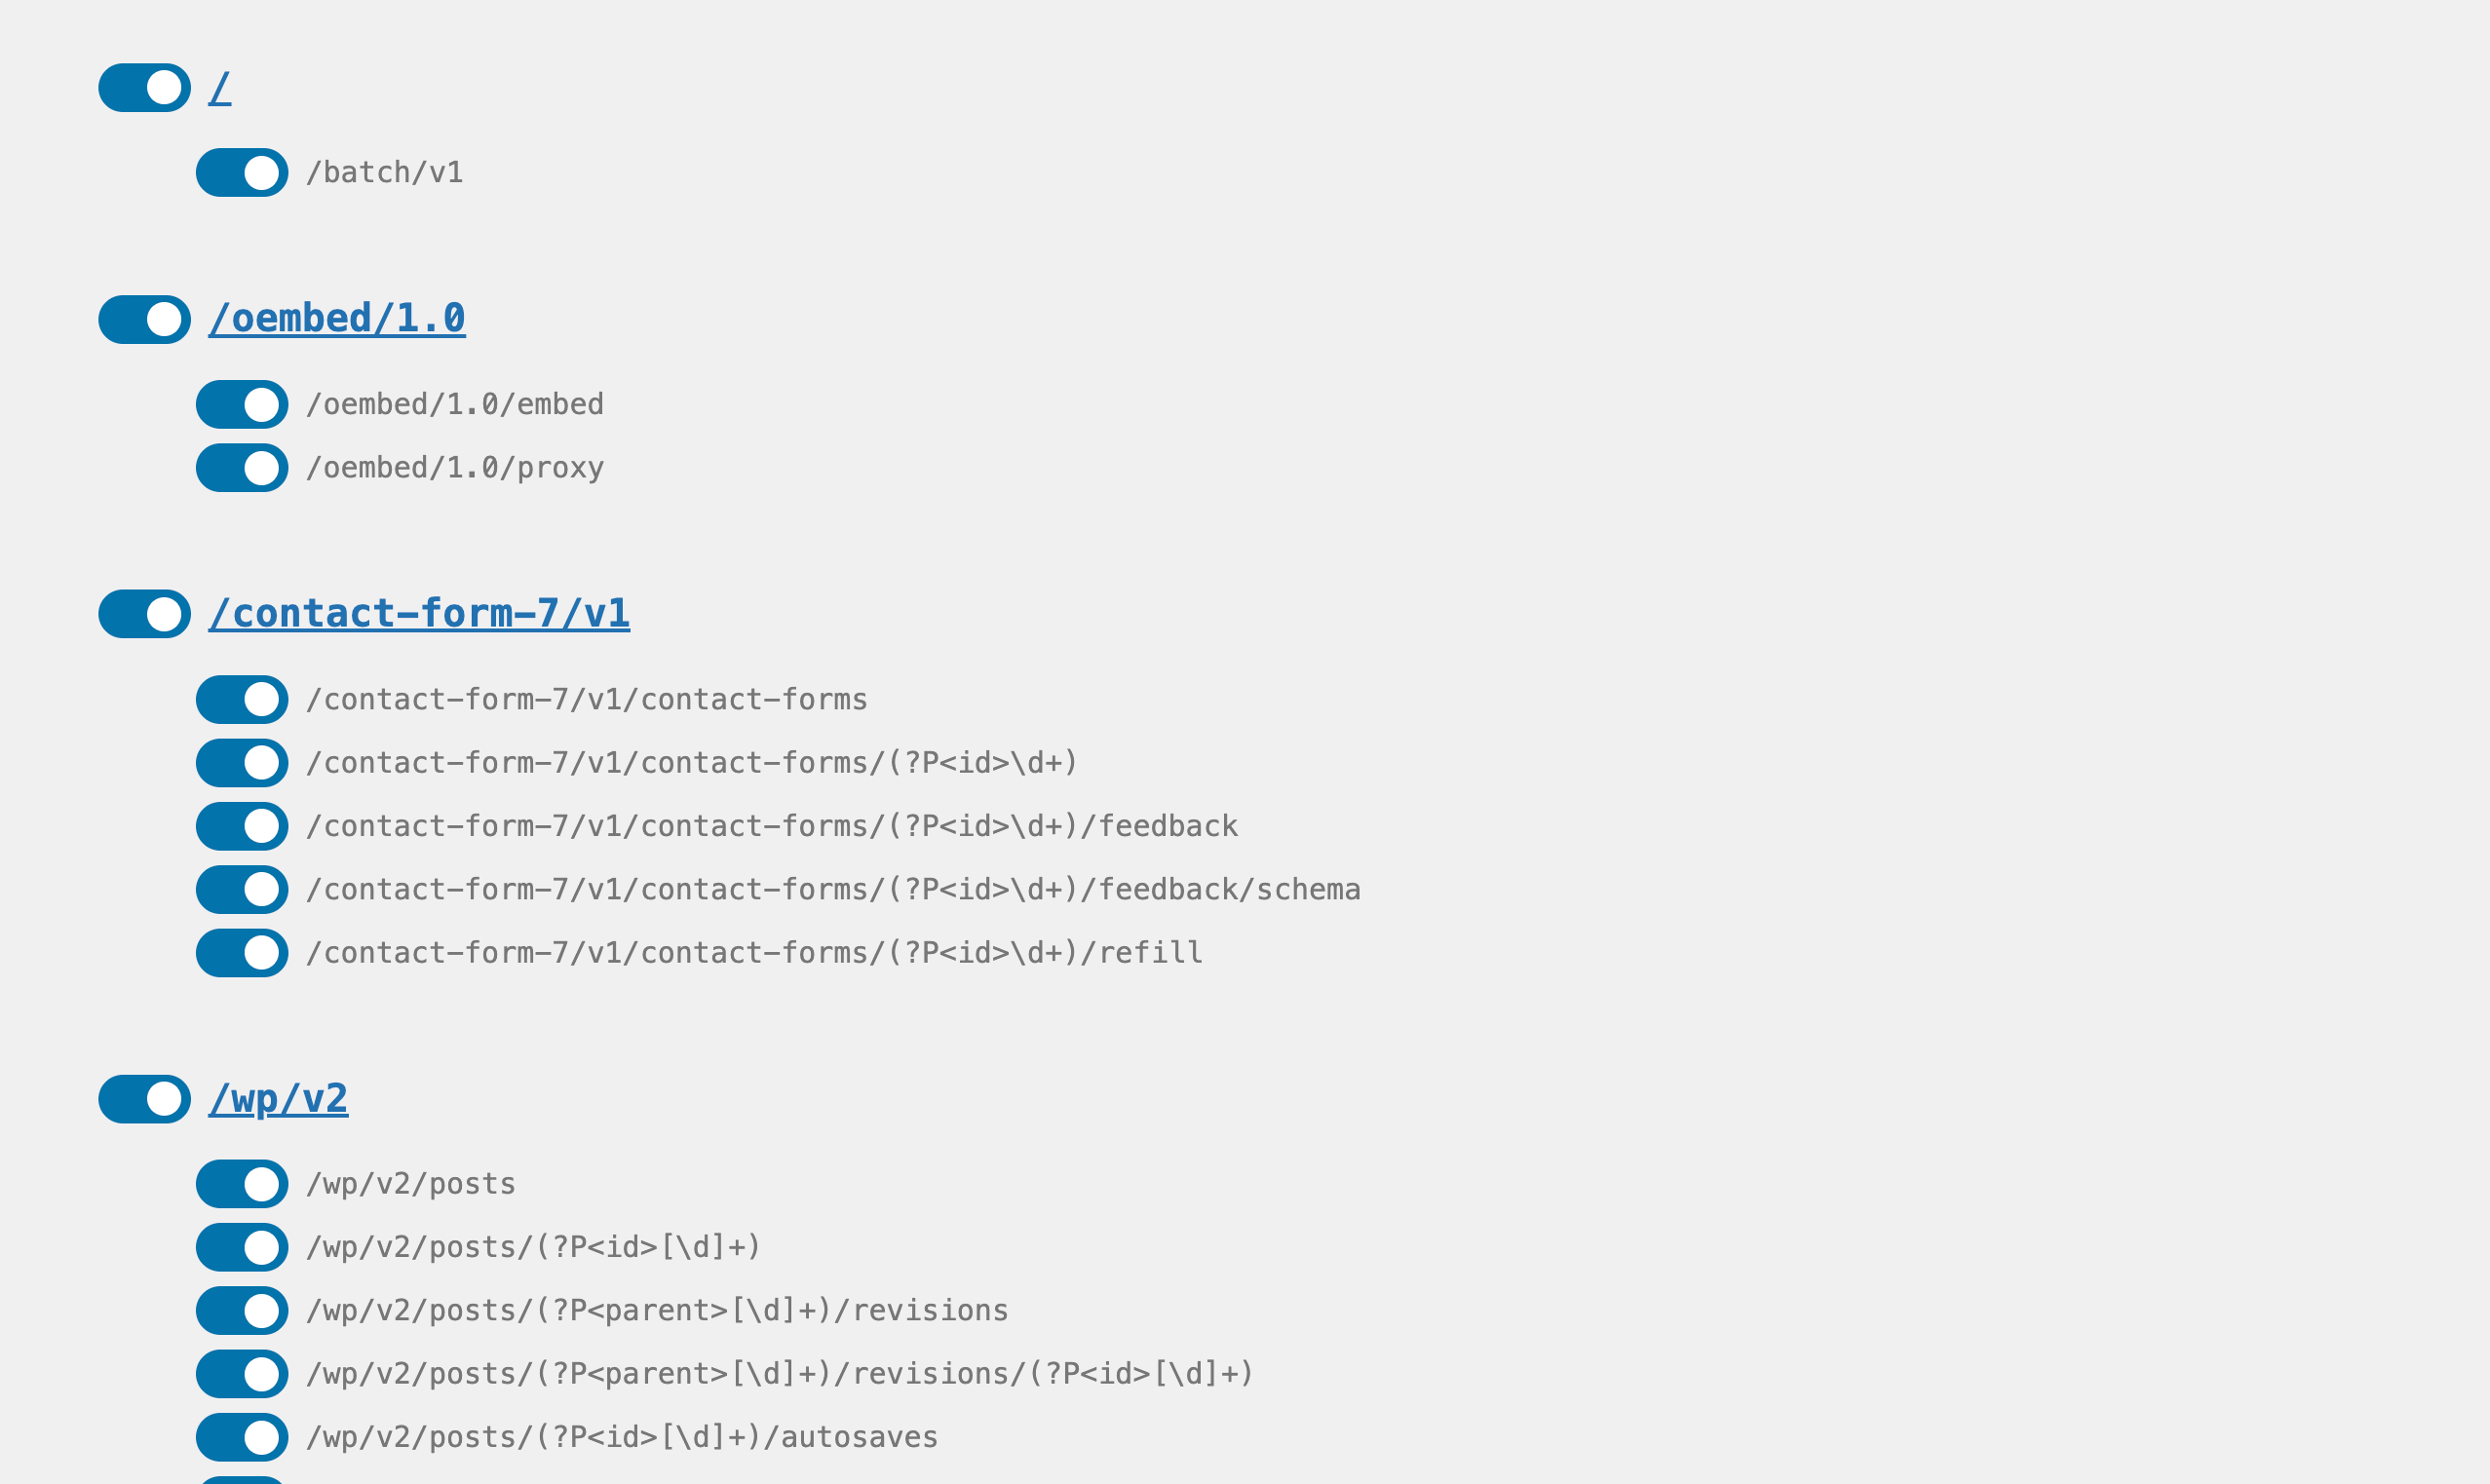
Step 4: To enable the routes for Contact Form 7, simply slide the toggle to the “on” position. So it looks like this:
Step 5: Lastly, scroll down and click the “Save Changes” button to save the changes.
Repeat the above steps for each user role, or for whichever user roles might require the newly added Contact Form 7 rules. Again, these same steps may be used to enable routes for any WordPress plugin or theme.