In this post, you’ll learn how to make form fields optional or required with USP Pro.
Make any field optional or required
By default, all fields are required. So, to make any field optional:
- For form fields added via shortcode (such as
[usp_title]and[usp_content], addrequired="false". - For custom fields, add
data-required="false"
For example, here is a form that has some optional fields and some required fields, as indicated by the required attribute:
[usp_name required="true"]
[usp_title required="true"]
[usp_email required="false"]
[usp_url required="false"]
[usp_content required="true"]
Likewise for custom fields, for example here are three custom-field definitions, two of which are required:
field#input_checkbox|checkboxes#input1:input2:input3

field#input_radio|radio_inputs#input1:input2:input3|radio_checked#input1

field#select|options#input1:input2:input3|data-required#false
Alternately, we can explicitly specify that a custom field is required:
field#input_checkbox|checkboxes#input1:input2:input3|data-required#trueEither way works fine.
data-required#null to disable the required and data-required attributes.Behind the scenes..
So what exactly happens when a field is set as either optional or required? I’m glad you asked:
- Optional fields – adds markup attribute
data-required="false" - Required fields – adds markup attributes
data-required="false"andrequired="required"
That’s all that happens, no other changes are made in either case.
Client-side validation
Once you get your fields set up as optional or required, no other changes are necessary. If you stop here, the form will be validated server-side when the form is submitted. Any missing fields or errors will be displayed above the form. But you may want to go further and enable client-side validation. With client-side validation, the form content is validated in the browser, before the data are sent to the server. So client-side validation saves resources and time, and gives the user a better experience.
USP Pro provides two ways to validate the form client-side in the browser:
- Let the browser validate the form automatically (depends on browser support)
- Validate via Parsley.js (works in all browsers)
Let’s look at each of these..
Let the browser validate
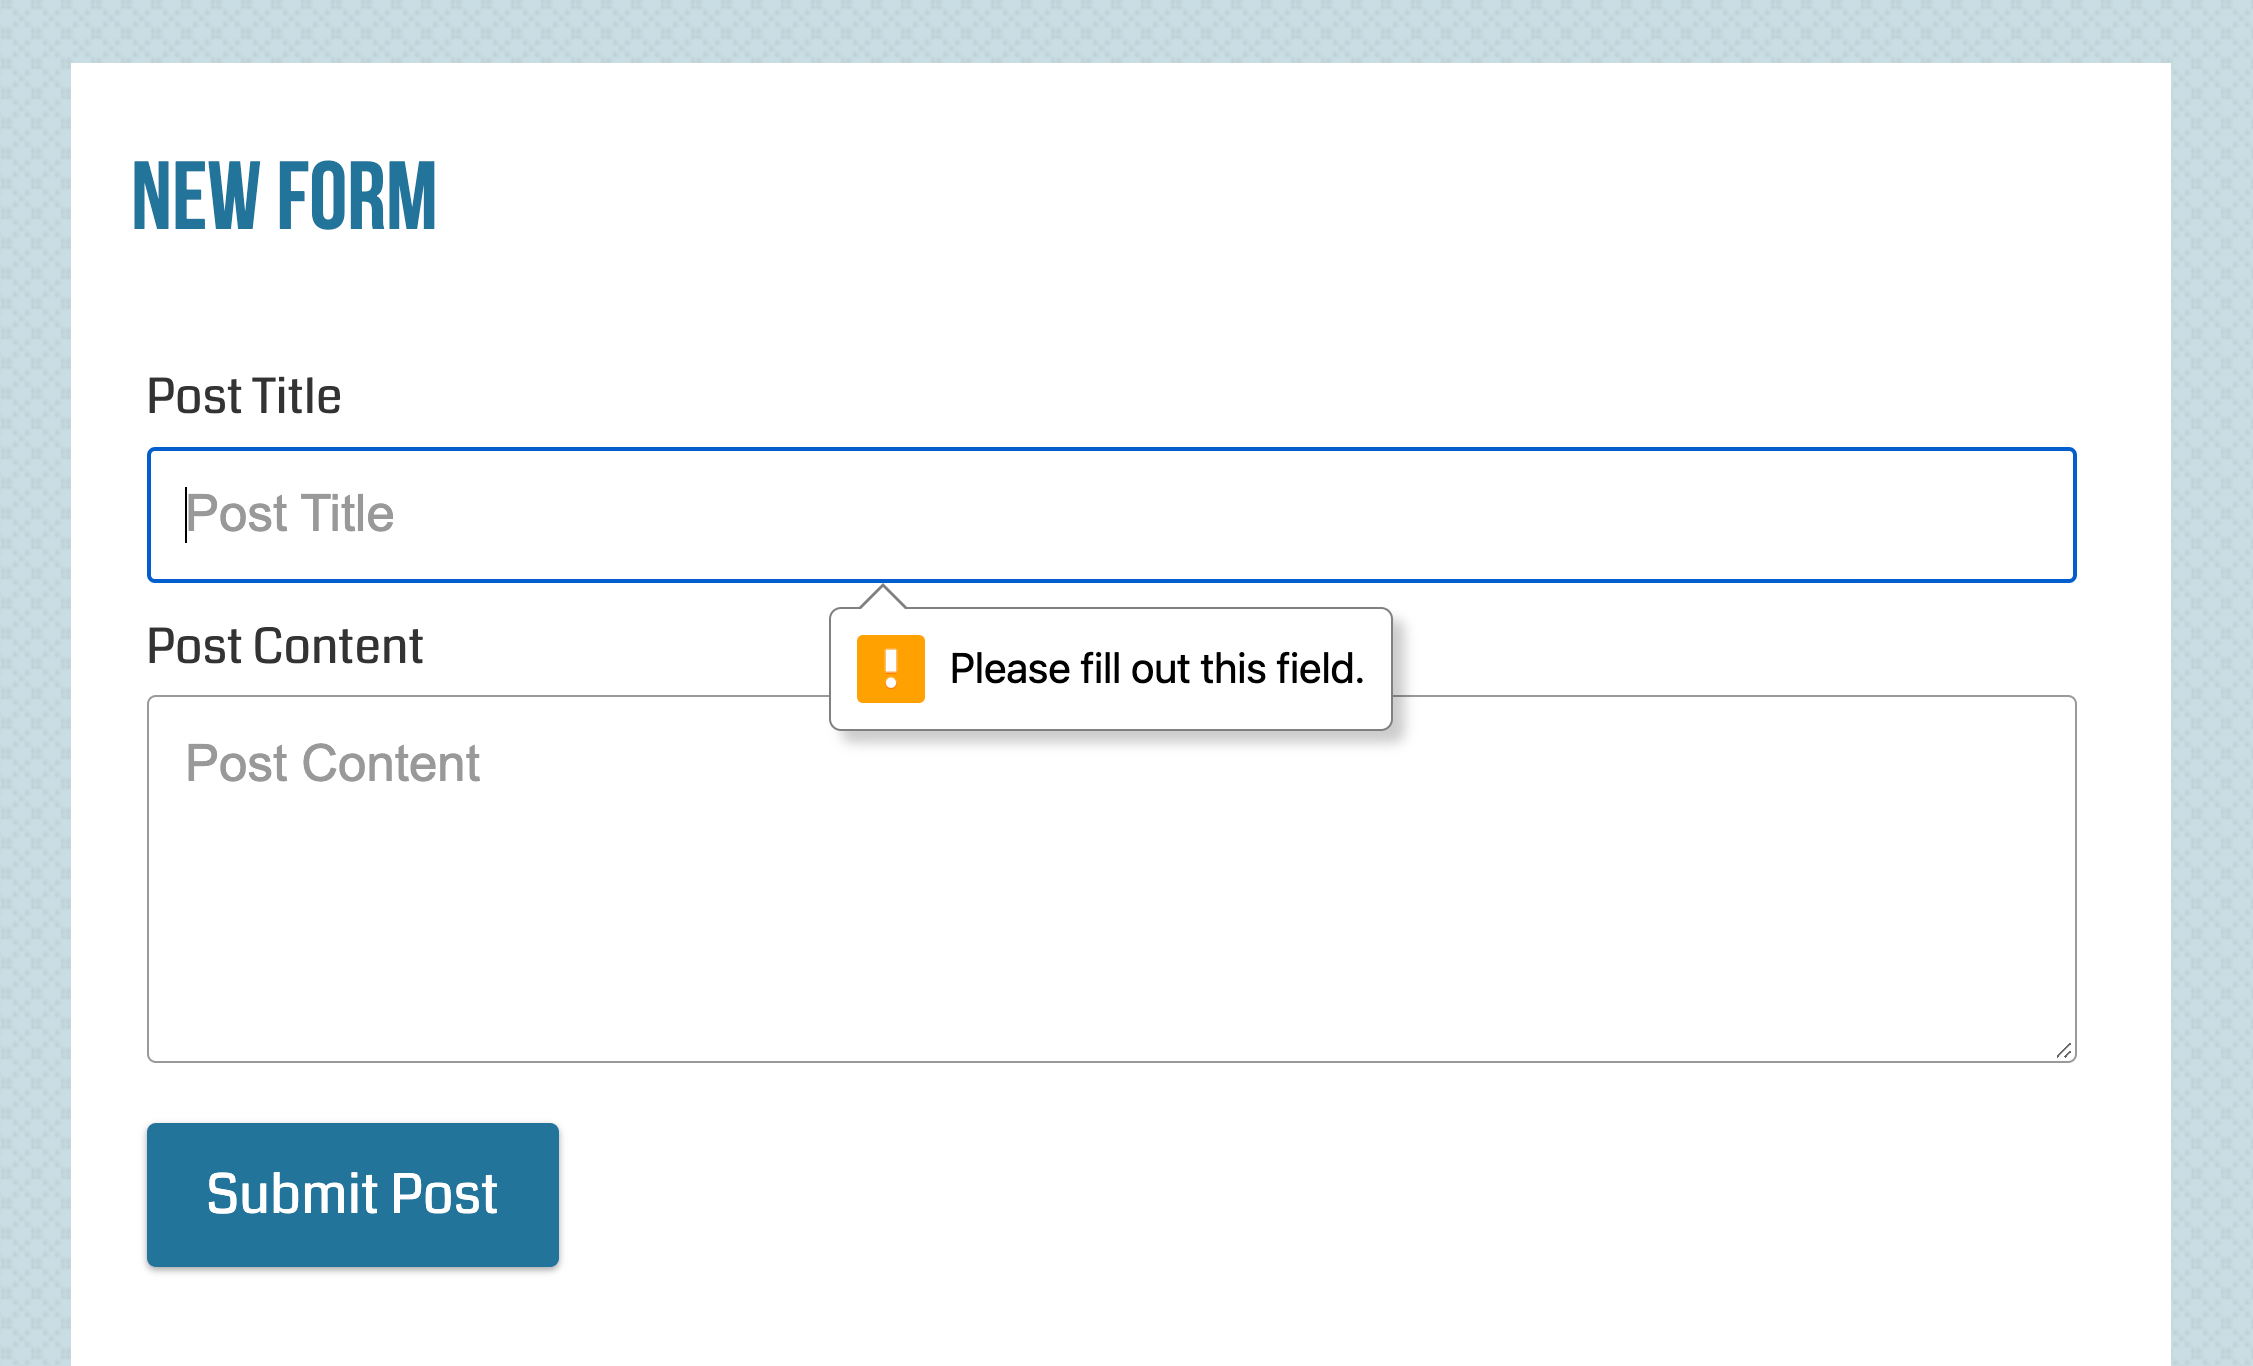
For the first option, “Let the browser validate the form automatically”, no additional steps are required. Chrome and other enabled browsers automatically detect the “required” attribute on each form field and validate accordingly.
novalidate to the USP setting ▸ Advanced ▸ “Custom Form Attributes”. That way browsers like Chrome will not try to validate the form. To restore browser-based validation, simply remove novalidate from the “Custom Form Attributes” setting.To give you an idea of what browser-based validation looks like, here is a screenshot showing Chrome’s validation of a required field:
Validate via Parsley.js
Using a dedicated validation script such as Parsley.js will ensure that client-side validation happens in all browsers. This provides a better, more consistent user experience. You can even style Parsley’s various error messages with your own CSS, to better fit with your current theme, the wow factor, or whatever you can imagine. To implement Parsely.js, follow the Parsley tutorial.
After implementing Parsley.js, try submitting a form that includes a few required fields. That will give you an idea of how it works. When testing, you should see something similar to this (depending on form content, etc.):
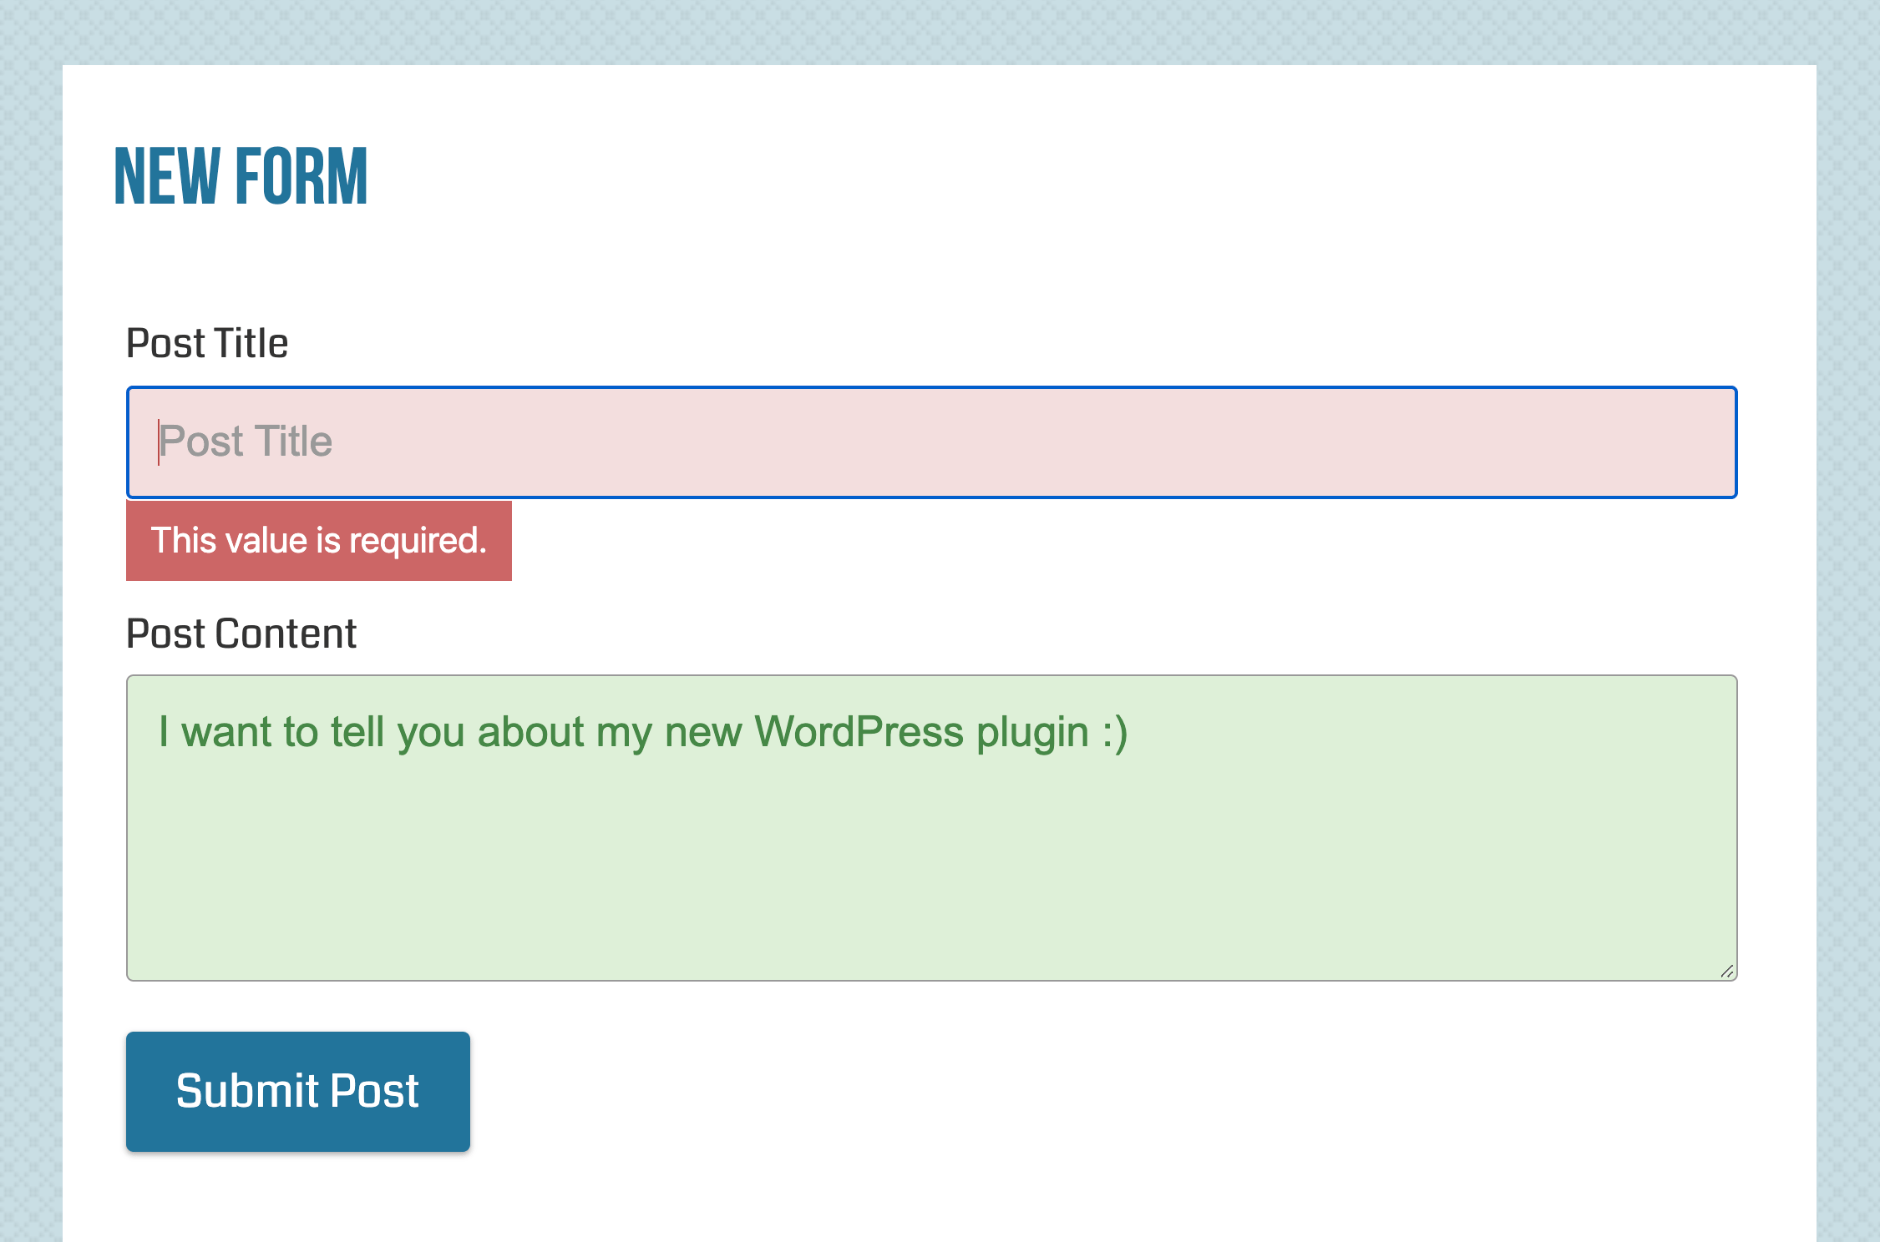
Here we have a “Post Title” field that is set as required. So upon form submission, Parsley lets the user know about it.