BBQ Pro provides flexible protection against a wide range of threats. This quick tutorial explains how to set up BBQ Pro so that only select IP addresses are allowed access to your site. So any requests from other IP addresses will be blocked. It’s an effective technique for making any WordPress site private (like for Intranet sites limited by IP address), and it requires only a few minutes to set it up.
Follow these steps
Here are the steps to block all requests except those made from your chosen IP address(es).
- Make a good working backup of your WP database. Just in case something unexpected happens, you can restore original functionality asap. Do not skip this step.
- Visit BBQ Pro Settings and enter your IP address(es) that you want to allow to the plugin setting, “Whitelist IPs”. Make sure your local IP address is included, or you will be blocked from your site (see notes below).
- Visit BBQ Pro Settings and check the box next to the setting, “Custom Rules”. Click the “Save Changes” button.
- Visit the BBQ Pro Firewall ▸ Custom tab. In the “Request URI” section, click “Add Pattern” and enter a forward slash
/. Click the “Save Changes” button.
Done! Here is what we did. First we whitelisted the desired IP address(es). Then we enabled the custom part of the firewall, and added a single forward slash, should look like this:
/The result of these changes is that every request will be blocked (because every request includes at least one forward slash /) unless it is coming from the IP address(es) defined in the whitelist setting.
Notes
Now, a couple things to keep in mind.
First, testing. With your own IP address whitelisted, you always will have access to your site. So you won’t be able to test firewall patterns. In this case, you can use a free proxy server or VPN to test things using a different IP address (one that is not whitelisted).
Second, if you make a mistake and get blocked from your own site, you will need to access to the WordPress database. To restore access, simply delete bbq_options from the Options table. That will restore default options, which will never block you from site access. So now you can log in to WordPress and start over with the default options.
Alternate Technique
Here is an alternate way of limiting access based on IP address, that may provide more flexibility if needed. Follow the same steps 1 through 3 as outlined above, and then instead of adding a forward slash / in step 4, do this instead. Visit the BBQ Pro Firewall ▸ Custom tab. In the “IP Address” section, add the following three patterns:
0.12
After adding those three patterns, click the “Save Changes” button and done. Note: remember to include a dot/period after the zero 0. Here is a screenshot showing an example of what it should look like:
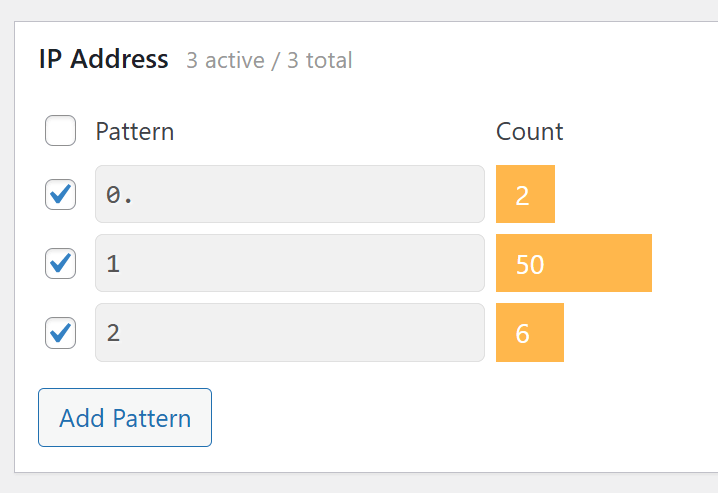
Because of the way that BBQ matches IP addresses, adding those three patterns will block all IP addresses, except for the ones you have whitelisted. Here is an explanation of what each of the above three patterns is doing:
0.– Blocks access to all IP addresses that begin with zero0(e.g.,0.xxx.xxx.xxx)1– Blocks access to all IP addresses that begin with number from 1 to 199 (e.g.,199.xxx.xxx.xxx)2– Blocks access to all IP addresses that begin with number from 200 to 255 (e.g.,255.xxx.xxx.xxx)
That is the simplified explanation. The actual pattern matching is a bit more complicated, but the result is the same: adding the above three patterns provides an alternate way to block ALL IP addresses, so that only whitelisted addresses are allowed access (as explained in the above tutorial).