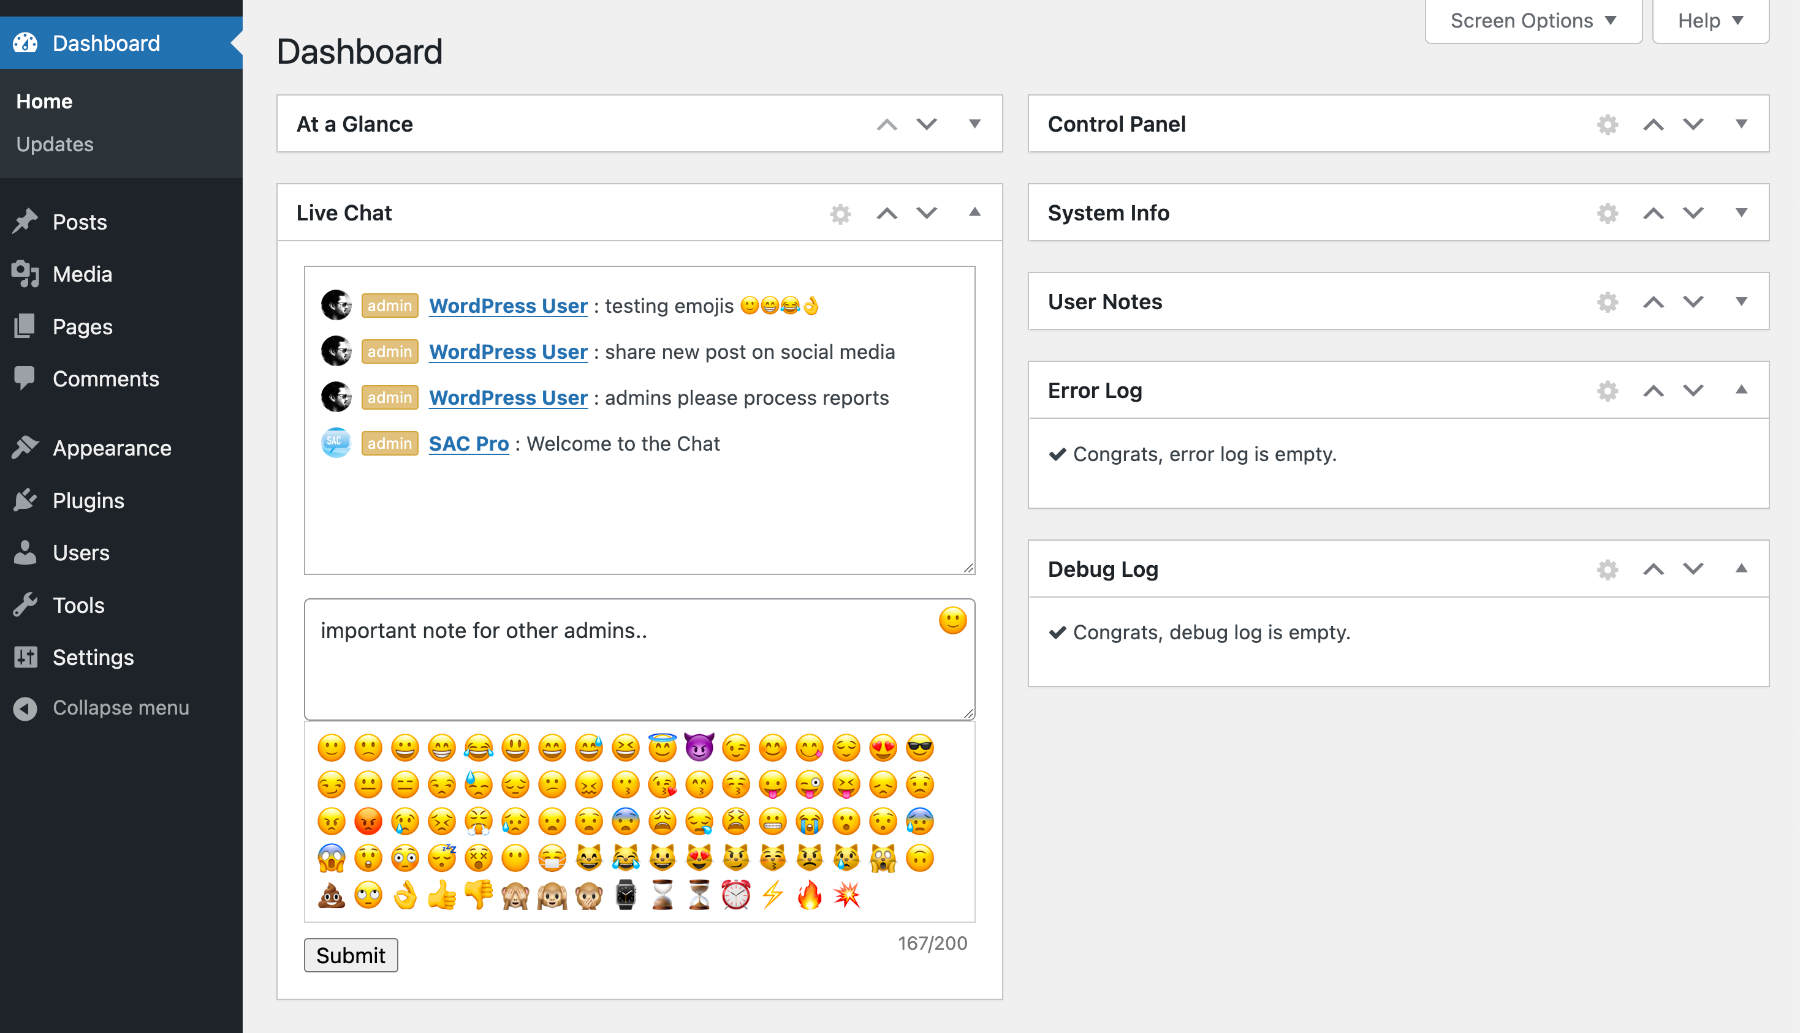
Simple Ajax Chat Pro (SAC Pro) makes it easy to display a chat form on the Dashboard in the WordPress Admin Area. This super quick tutorial shows how to enable the dashboard chat on your WordPress-powered site.
Enable Dashboard Chat
To enable the dashboard chat, visit the SAC Pro settings ▸ General ▸ “Dashboard Chat”. There you can choose the minimum user role required to access the chat. Or you can choose to disable it. Totally your call.
Here is a screenshot of the dashboard chat. Click image to view full size (opens new tab or window).
 Screenshot of SAC Pro’s Dashboard Chat with Emoji Picker toggled open. Click to view full-size image (opens new tab or window).
Customize (Advanced)
For developers, it is possible to customize the dashboard chat box using the sacpro_dashboard_chat filter hook. By default, the dashboard chat is configured as follows:
[sacpro form_id="DashChat" chat_theme="classic" user_name="display_name" user_url="edit_url" user_avatar="true" display_meta="true"]That shortcode is passed through the filter sacpro_dashboard_chat. So you can customize some of the attributes as desired. Some important notes to keep in mind:
- For the dashboard chat, the
form_idalways must beDashChat - Be careful when changing/adding attributes; not all features are suitable for dashboard display
Lastly, here is the function that calls the sacpro_dashboard_chat filter, to give you a better idea of context, etc.
function simple_ajax_chat_pro_dashboard_chat() {

	$shortcode = '[sacpro form_id="DashChat" chat_theme="classic" user_name="display_name" user_url="edit_url" user_avatar="true" display_meta="true"]';

	$shortcode = apply_filters('sacpro_dashboard_chat', $shortcode); // be careful! not all chat themes and features are tested or suitable for dashboard display.

	echo '<div class="sacpro-dashboard-chat">';

	echo do_shortcode($shortcode);

	echo '</div>';

}
Note: the above code is current as of the time of this writing, although may change in future versions of the plugin. Always check the current plugin source to get the latest codes.