SES Pro provides an array of global settings to help you run your own email campaigns, newsletters, and more. In this Doc, we explore the various settings and tools provided by SES Pro. Further, form-specific settings are available via shortcode attributes, and other features are explained elsewhere in the SES Docs.
Table of Contents
Screenshots
Global Settings
Global settings include options for JavaScript/Ajax, Google Fonts, Subscriber Management, Custom Fields, and SMTP Mail. View Global Settings »
Include JavaScript
This setting determines the pages that should include the SES JavaScript.
- On all pages (default)
- On specific pages (see next setting, “URLs for JavaScript”)
- On no pages (Ajax disabled)
URLs for JavaScript
Specify the URLs on which SES JavaScript should be included (one URL per line, valid only when “Multiple” is selected for the previous setting).
Email Blacklist
List of email addresses or domains that should be blocked (comma-separated).
Subscribers Table – Max Rows
This setting specifies the maximum number of rows to display in the Subscribers table.
Subscribers Table – Sort Order
This setting specifies the sort order of the subscribers table.
Custom Field 1
Here you may specify a custom value to use for the first custom field. Note that this custom field is included/displayed on forms only when the display_cf1 attribute is set to true in the [ses_pro] shortcode. Learn more.
Custom Field 2
Here you may specify a custom value to use for the second custom field. Note that this custom field is included/displayed on forms only when the display_cf2 attribute is set to true in the [ses_pro] shortcode. Learn more.
Custom Field 3
Here you may specify a custom value to use for the third custom field. Note that this custom field is included/displayed on forms only when the display_cf3 attribute is set to true in the [ses_pro] shortcode. Learn more.
Restore default options?
Check this box to restore default options the next time the plugin is deactivated.
reCAPTCHA Public Key
To enable Google reCAPTCHA for any sign-up form, enter your Public Key and Private Key (next setting).
reCAPTCHA Private Key
To enable Google reCAPTCHA for any sign-up form, enter your Private Key and Public Key (previous setting).
Google Fonts
Auto-include Google Fonts. Add each font name separated by a vertical bar and no spaces, like this: Ubuntu|Droid+Sans|Oswald. Then use the fonts as usual in your CSS, for example: .example { font-family: Oswald, sans-serif; }.
SMTP Settings
If you have SMTP set up on your server, you can enter its credentials here. Note that if you are not using SMTP, it is fine to leave these settings blank and/or keep the default values.
- SMTP Host – The SMTP host or server name
- SMTP Port – The SMTP port number (e.g., 25, 465, 587)
- SMTP Encryption – The SMTP encryption (i.e., ssl or tls)
- SMTP Username – The SMTP username
- SMTP Password – The SMTP password
Customize Form Styles
Here you can customize styles for your signup forms. Here are the steps:
- Select a form style
- Click “Shortcode” to add/edit a specific form shortcode, otherwise the default form is used
- Click “Script” to add/edit JavaScript (enabled on front-end only; disabled for live preview)
- Click “Style” to add/edit CSS
- Click “Refresh” to preview changes
To use a style for any form, include its Style ID in the form shortcode, for example: [ses_pro style="1"].
Manage Subscribers
The “Subscribers” screen displays all of your subscribers in a paged table. You can check the box next to any subscriber(s), and then select “Edit Selected” or “Delete Selected” from the dropdown menu. Using the controls located just above the table, you can sort, jump, and search by field. Let’s go through each of the table columns:
- Name – the subscriber’s name
- Email – the subscriber’s email address
- Custom Field 1 – value collected when the 1st custom field is included in the signup form
- Custom Field 2 – value collected when the 2nd custom field is included in the signup form
- Custom Field 3 – value collected when the 3rd custom field is included in the signup form
- Form – the form ID, specified by the
form_idshortcode attribute - Opt-In – whether or not the subscriber has double opted-in (true or false)
- Sent – comma-separated list of SES Email (Post IDs) that have been sent to the subscriber
- Info – hover over the dot to see the subscriber’s signup date/time and IP address
Note: the custom field names will change according to the Custom Field values specified in the Global Settings.
Add Subscriber
Use this form to manually add a subscriber to the database.
Import Subscribers
Here you can upload your subscriber data from a CSV-formatted file. In order to import data, your CSV file must contain the following fields. Use the import.csv file in the plugin’s /csv/ directory as an example. At minimum, the email field should contain data, all other fields may be left empty.
| Field Name | Description |
|---|---|
ses_name |
Subscriber Name |
ses_email |
Subscriber Email |
ses_cf1 |
Custom Field 1 – Custom Field 1 (as specified in SES Pro Settings) |
ses_cf2 |
Custom Field 2 – Custom Field 2 (as specified in SES Pro Settings) |
ses_cf3 |
Custom Field 3 – Custom Field 3 (as specified in SES Pro Settings) |
ses_key |
Unique Key – used for double opt-in and unsubscribe functionality |
ses_send |
Double Opt-In – this field contains a value of “true” if the subscriber has double opted-in; otherwise it is left blank |
ses_sent |
Sent/Flag – contains the Post ID of the most recent successful email, or “false” if unsuccessful; otherwise left blank |
ses_id |
SES Form ID – an optional id that specifies which form is used to sign up subscribers |
ses_ip |
IP Address |
ses_date |
Date/Time |
Export Subscribers
Here you can download your subscriber data in CSV format. You may select which fields to include in the exported CSV file:
- Name
- Custom Field 1
- Custom Field 2
- Custom Field 3
- Unique Key
- Opt-In
- Sent/Flag
- Form ID
- IP Address
- Date/Time
Additionally, you may specify the sort order of the exported data.
Compose Email
Located in its own menu in the WP Admin Area, the “SES Email” screen works just like the regular WP Post Editor. There you can create, edit, and manage all of your email messages. In addition to the usual features like the visual post-content editor, post categories, and featured images, the SES Email screen enables the following functionality:
- Select the email format, plain text or HTML, from the Email Options panel
- Select the mail transport protocol, Mail, Sendmail, or SMTP, via the Email Options panel
- To add custom CC/BCC recipients, add custom fields,
ses_email_cc/ses_email_bcc - To add attachments, you have three choices:
- Add an attachment via the Media Library by attaching any file to the SES Email
- Add an attachment via Custom Field named ses_attach, with the file URL as the value
- Add an attachment by setting a Featured Image for the SES Email (image file only)
Once you have composed your email message, you can send it by visiting the Send Email screen and selecting the message from the dropdown menu.
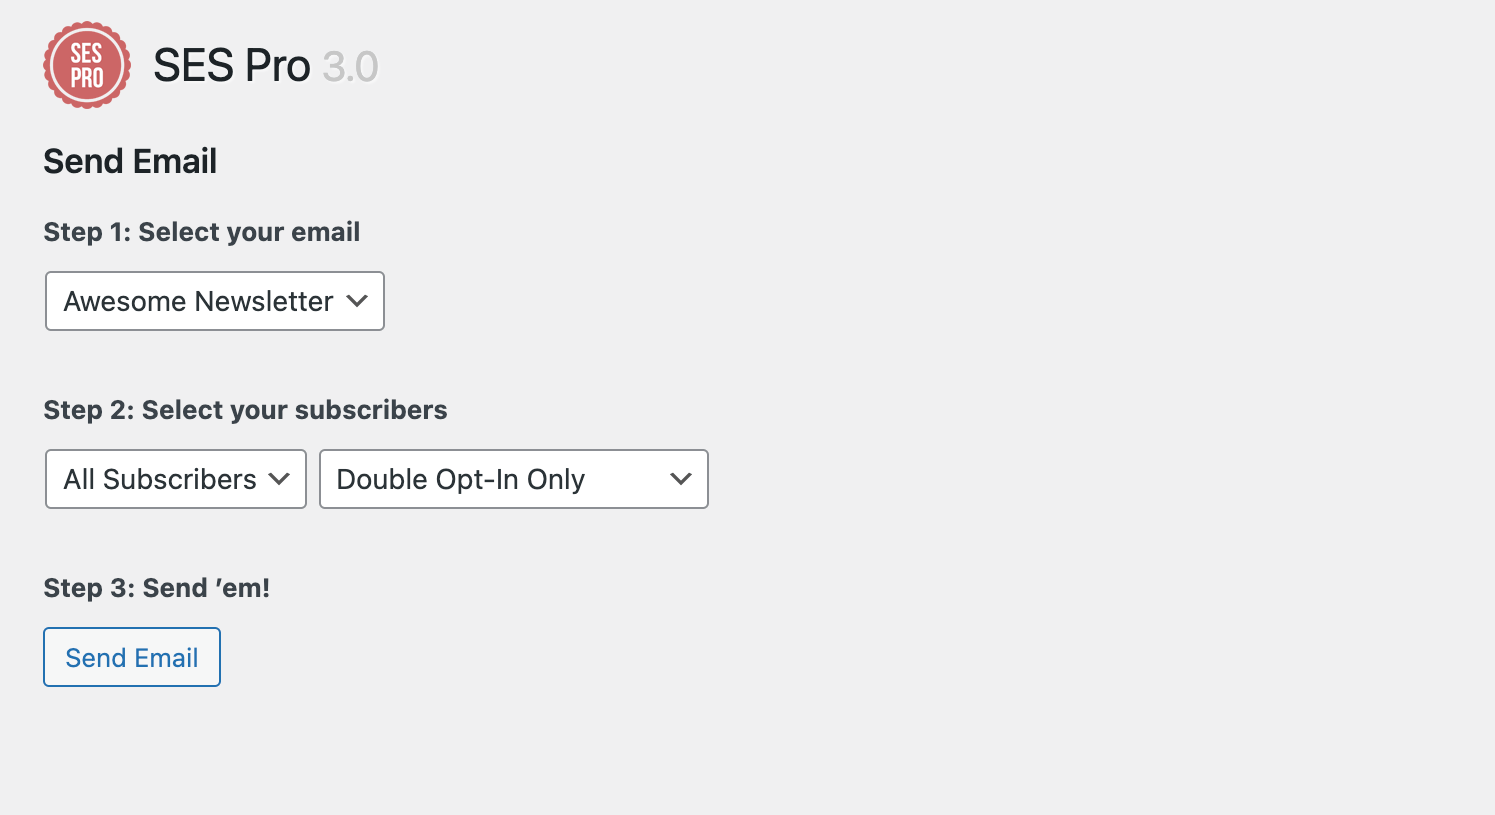
Send Email
The “Send Email” screen is designed to make sending email super-simple. There are three steps:
- Select your email
- Select your subscribers
- Send your email and done.
After clicking the “Send Email” button, you will see the results of the delivery displayed below. Each attempted email delivery will be displayed with a status code and a status message:
[A] Already sent the selected message
[F] Flagged (e.g., invalid email)
[E] Existing flag (e.g., invalid email)
[S] Successfully sent the selected message
[C] Check result (e.g., rejected email address)
Beneath the status display, a delivery summary will display the total number of emails sent successfully, total number of failed, and total emails (failed and success). Additionally, any CC and/or BCC recipients will be displayed.
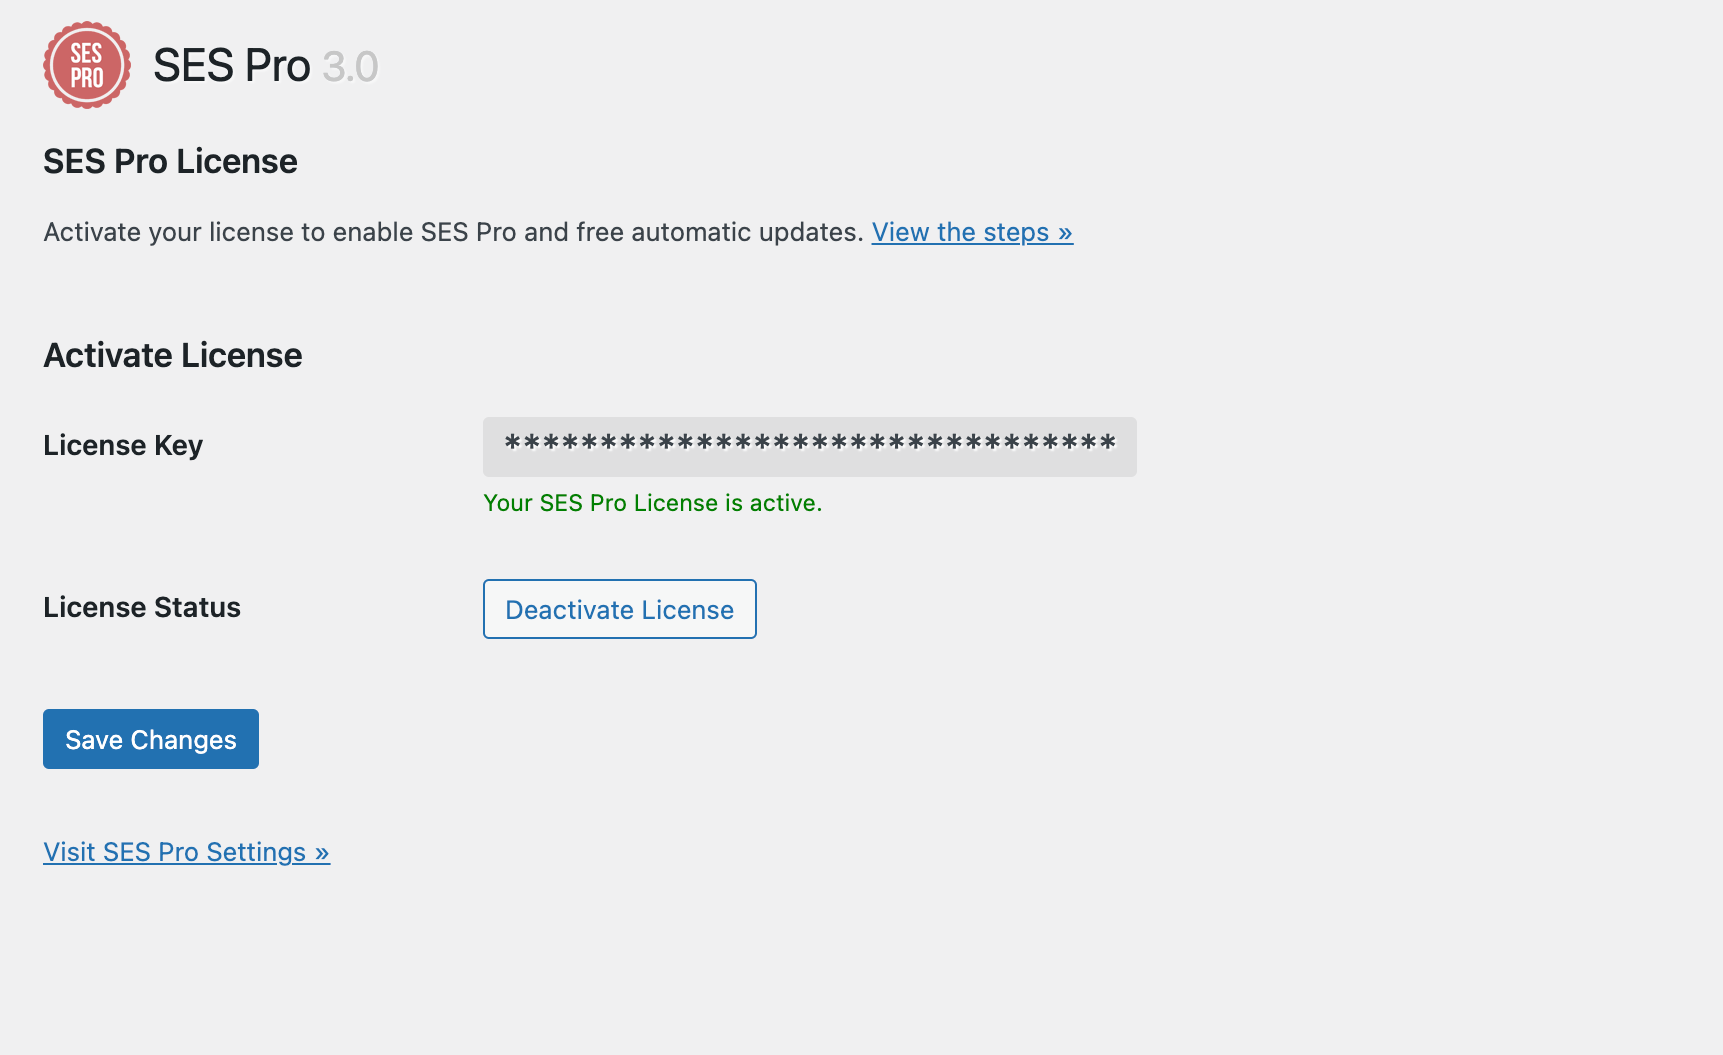
SES License
Your purchase of SES Pro entitles you to free automatic updates according to the license terms. To enable this feature, visit the SES “License” screen to enter your License Key and activate the plugin. Note: to view your License Key at any time, log in to your account at Plugin Planet.
To enable SES Pro, enter your License Key below, click “Save Changes”, and then click “Activate License”. Learn more about managing your license.