This tutorial explains how to add a required checkbox to any USP Form. For example, this could be used to implement a toggle “Agree to Terms” checkbox or similar.
Step 1: Define the custom field
First, define a custom field for any USP Form using the following attributes:
data-required#true|type#checkbox|value#agree|placeholder#Terms and Conditions|label#I agree to the terms|class#usp-termsThen add the custom field to your USP Form via its form shortcode. Learn more about adding custom fields to USP Forms.
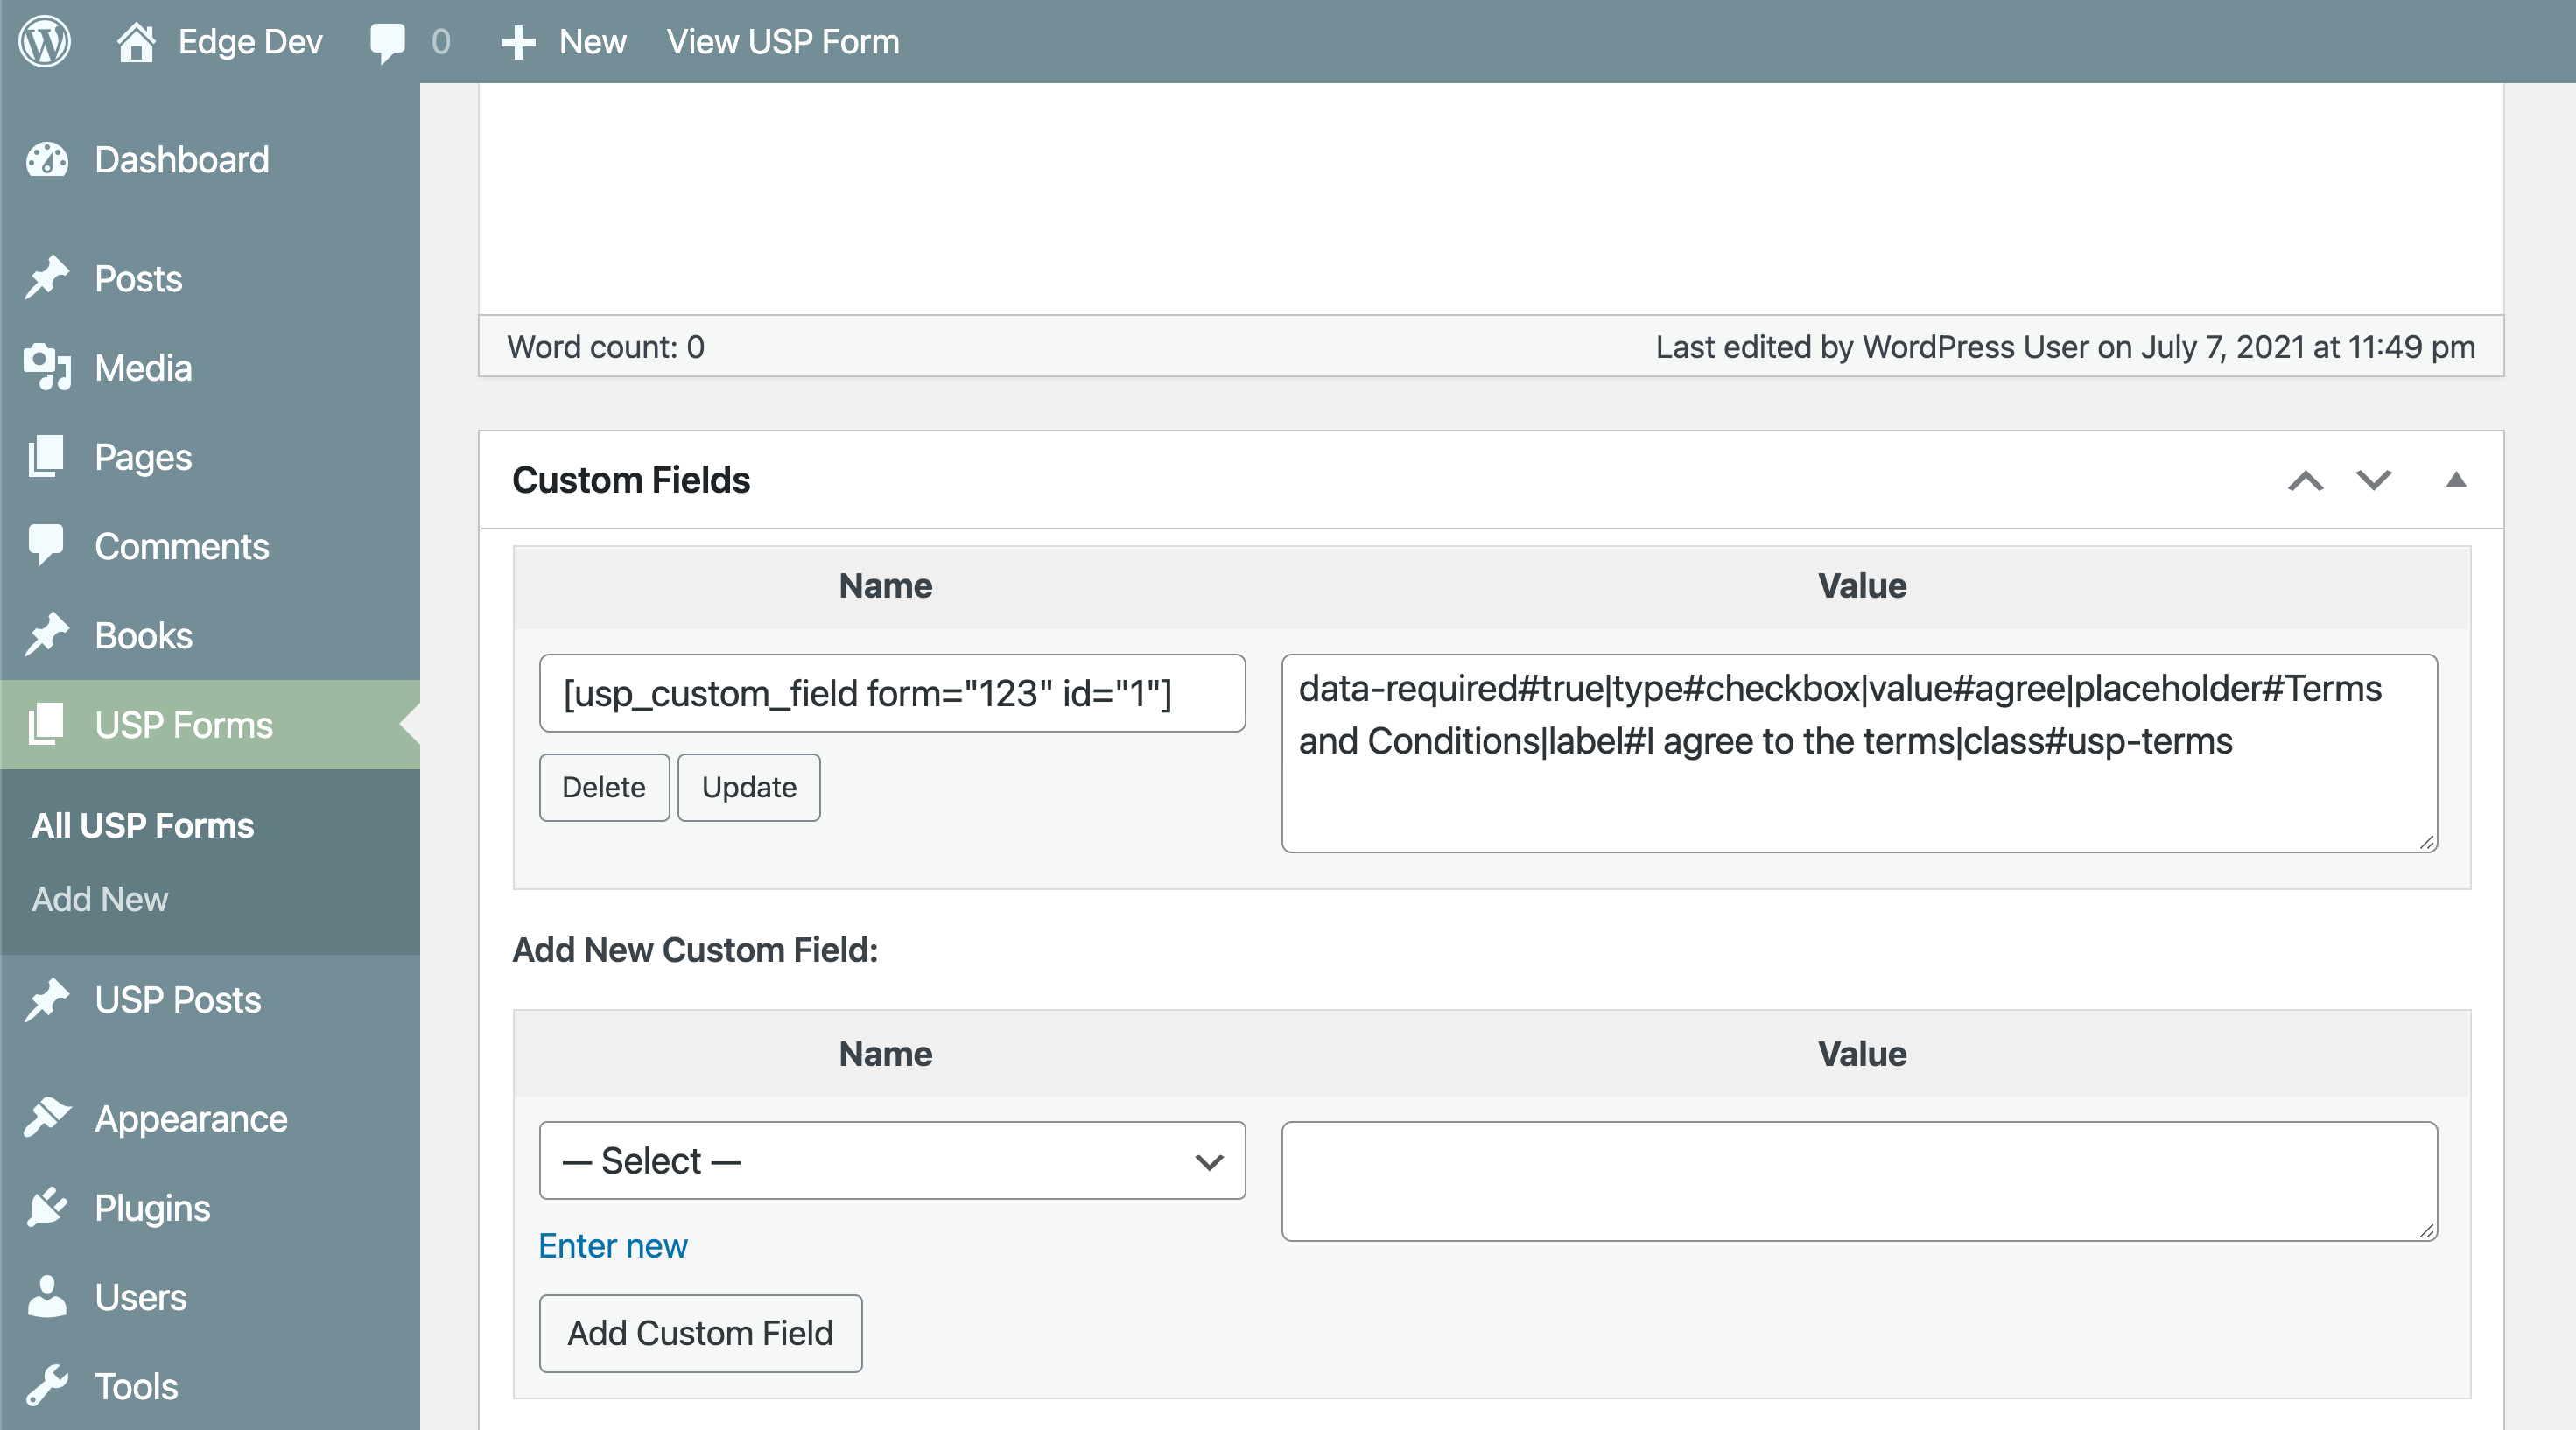
Step 2: Add the code
To the USP Form, add each of the following three code snippets.
CSS
<style>
	.usp-required { width: 220px; }
	.usp-terms { float: right; width: 20px; }
	.example-class-1 { float: right; width: 200px; }
	.fine-print { font-size: 11px; display: none; }
	.show-terms { cursor: pointer; font-size: 12px; padding-bottom: 5px; }
</style>
JavaScript/jQuery
<script>
	jQuery(document).ready(function($){
		$('.show-terms').click(function(){
			$('.fine-print').toggle();
		});
	});
</script>
HTML
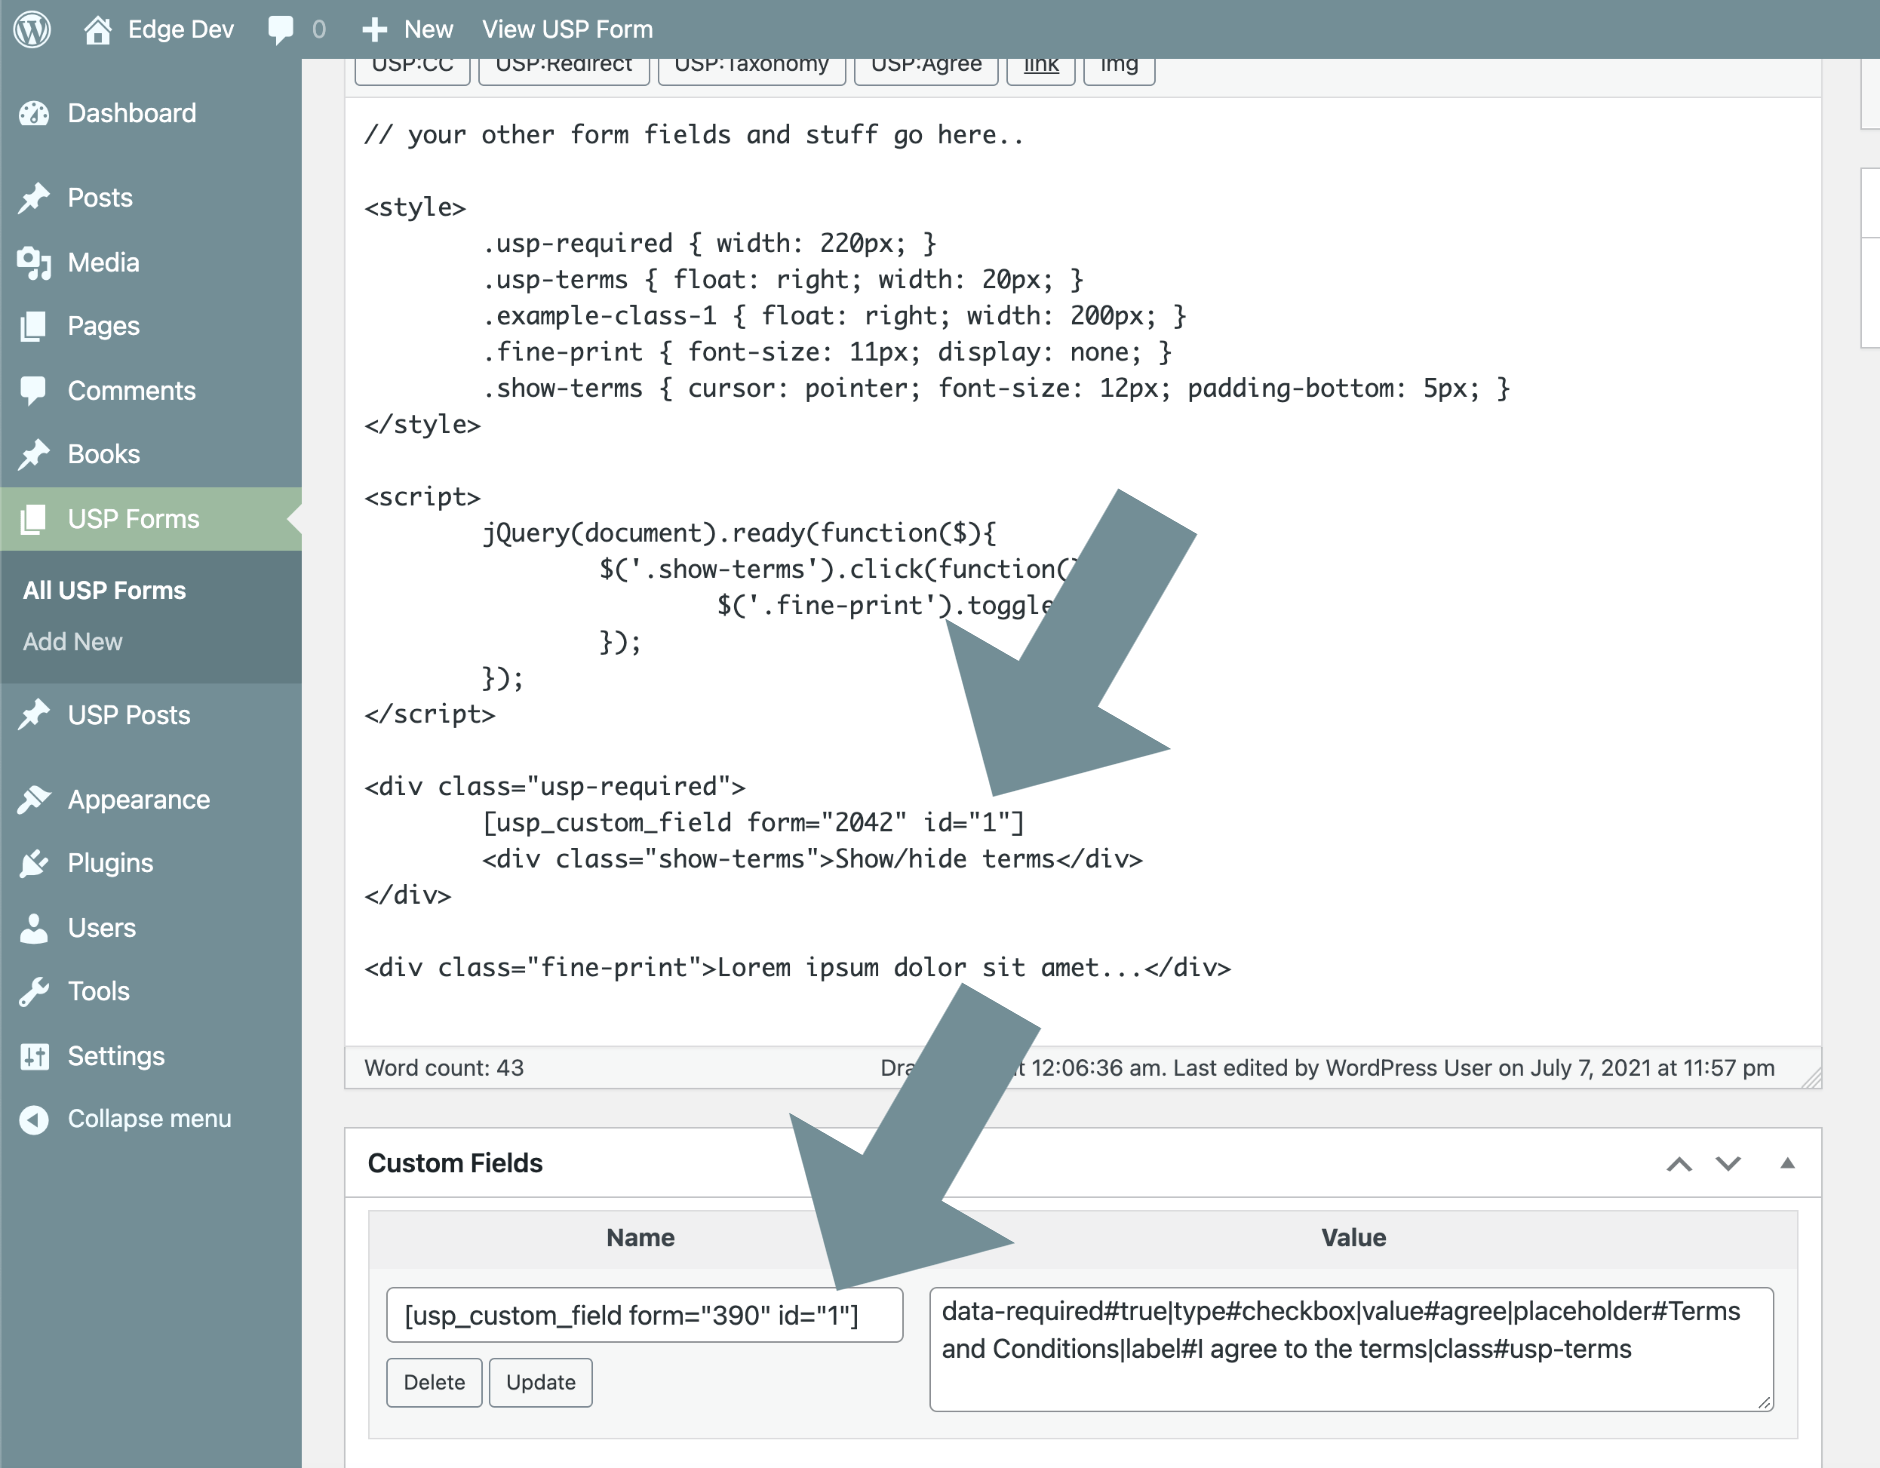
<div class="usp-required">
	[usp_custom_field form="2042" id="1"]
	<div class="show-terms">Show/hide terms</div>
</div>

<div class="fine-print">Lorem ipsum dolor sit amet...</div>
Modify according to your needs. Note that you can (and should) move the CSS into your theme’s style.css (or other stylesheet), and also move the JavaScript to your theme’s JavaScript file.
After this step, view the form on the front end. Depending on your theme, it should look something like this.
Step 3: Customize the error and label (optional)
At this point, everything is complete and the required checkbox is working great. There are two other things worth mentioning, that you may (or may not) wish to customize: the error message and the default label. Let’s look at each.
Customize the error message
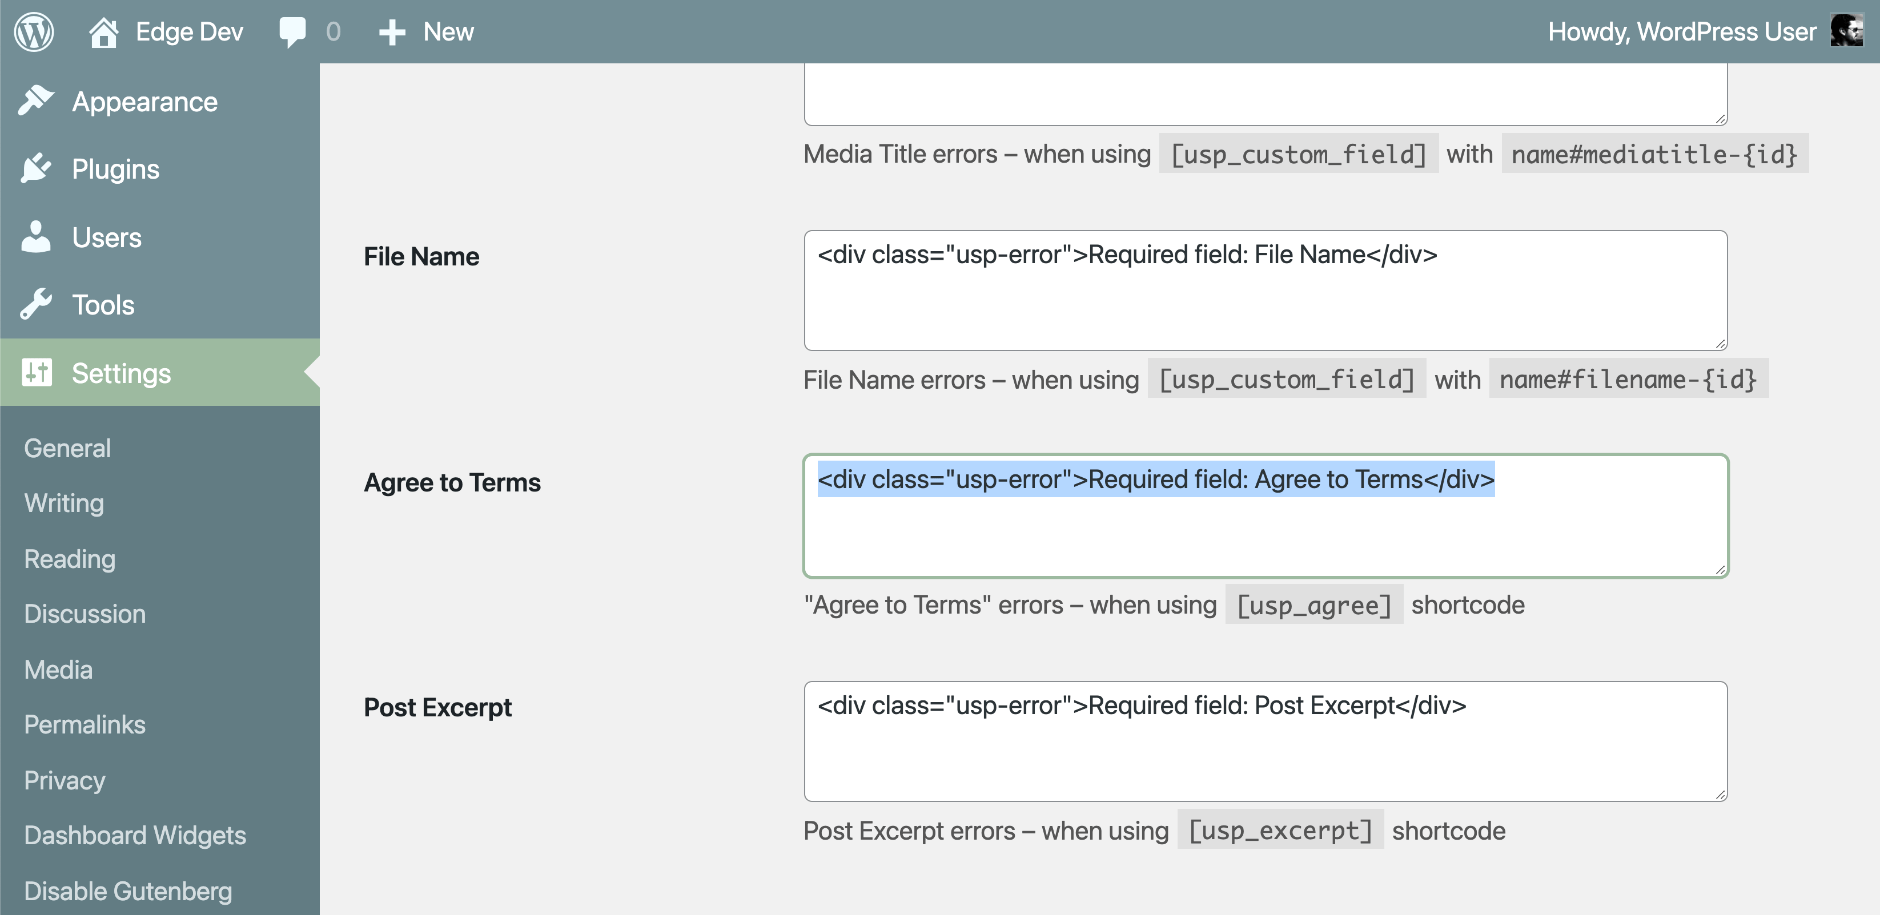
When the user tries to submit the form without checking the “Agree to Terms” box, the form will display an error. The default error message that’s displayed is “Required field: Agree to Terms”. This can be customized to whatever you want in the plugin settings. Go to USP settings ▸ Errors ▸ “Primary Field Errors”, then scroll down to “Agree to Terms”. You will find the default error message (including markup) looks like this:
<div class="usp-error">Required field: Agree to Terms</div>You can change that to whatever you want, save changes and done.
Customize the default label
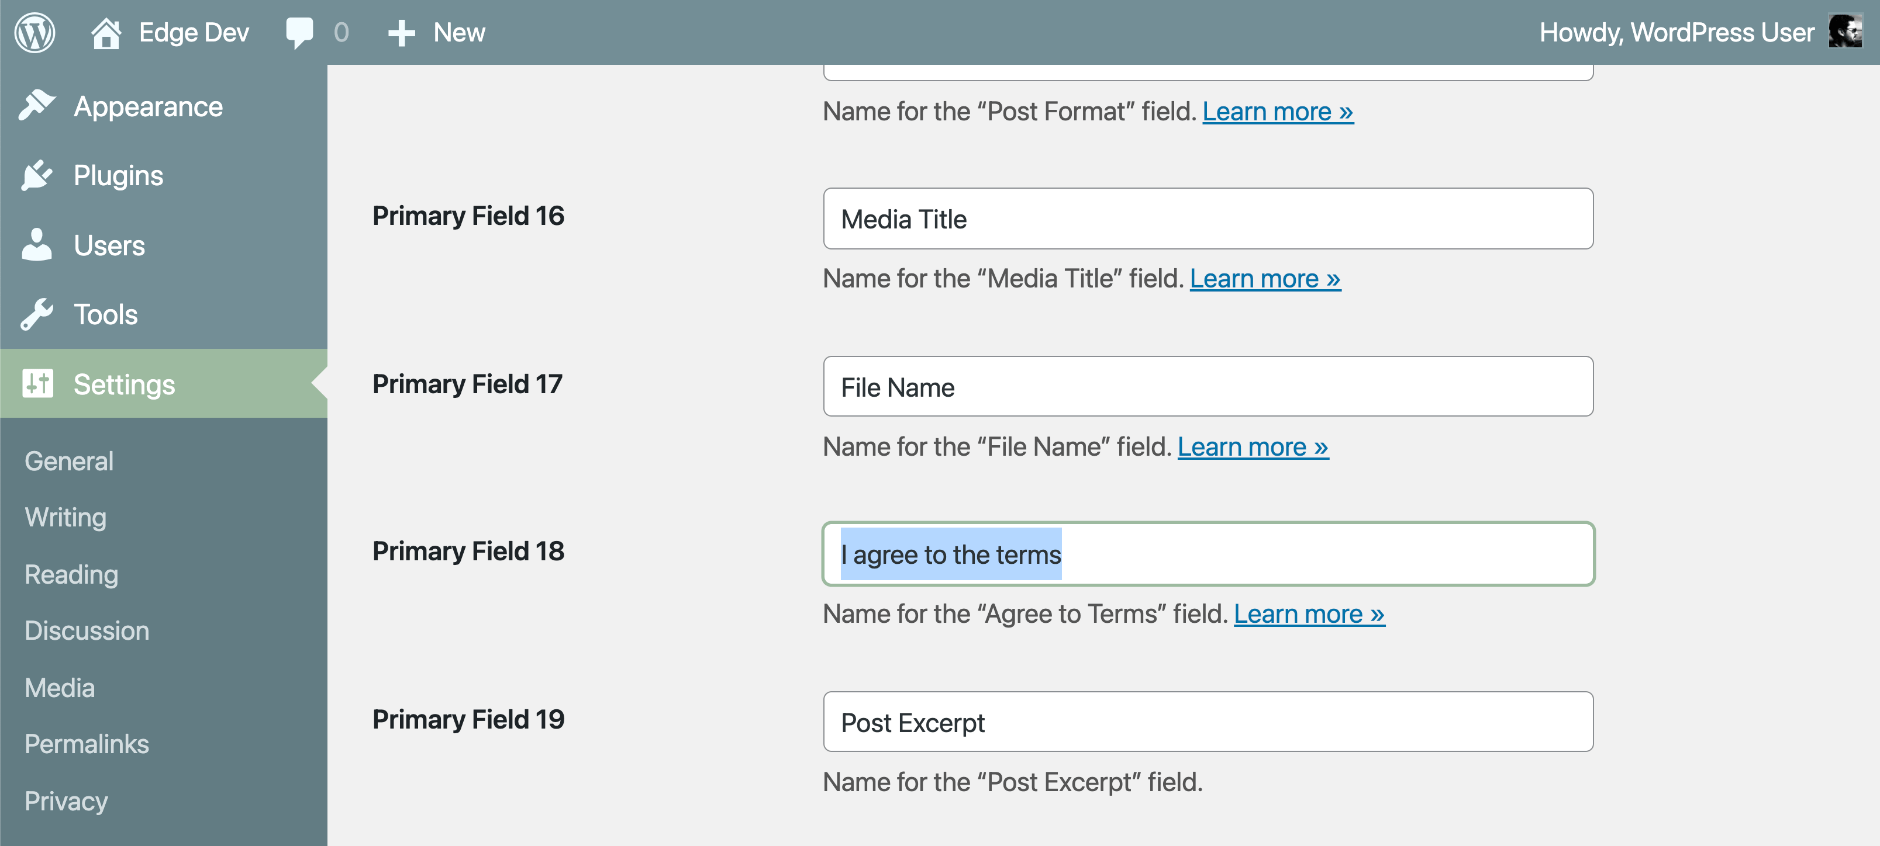
One more thing that you may want to customize is the default label that’s displayed for the “Agree to Terms” field. Technically it doesn’t matter in this case, because we’ve already defined the label in the custom-field definition (in step #1 above, you will find the label attribute).
Whenever you define a label on the form itself, it will override whatever you have for the default setting. So this is just to let you know where that default setting is located. Visit USP settings ▸ Advanced ▸ “Primary Form Fields”, and scroll down to “Primary Field 18”. There you will find the default label for the “Agree to Terms” box, “I agree to the terms”. Now that you now where it is, you can customize so it will be used by default on any forms where you haven’t overriden locally via the label attribute.
Step 4: Verify that it’s working
To verify that the checkbox field is working properly, try submitting the form with and without the field checked. When it is not checked, you should get an error message (see previous step). When it is checked, the checkbox data will be attached to the submitted post as a custom field. Here is a screenshot.