In previous versions of USP Pro, you could add a required checkbox in a few steps. Now in USP Pro version 2.3, you can add an “Agree to Terms” box with a single click. Read on to reveal the magic..
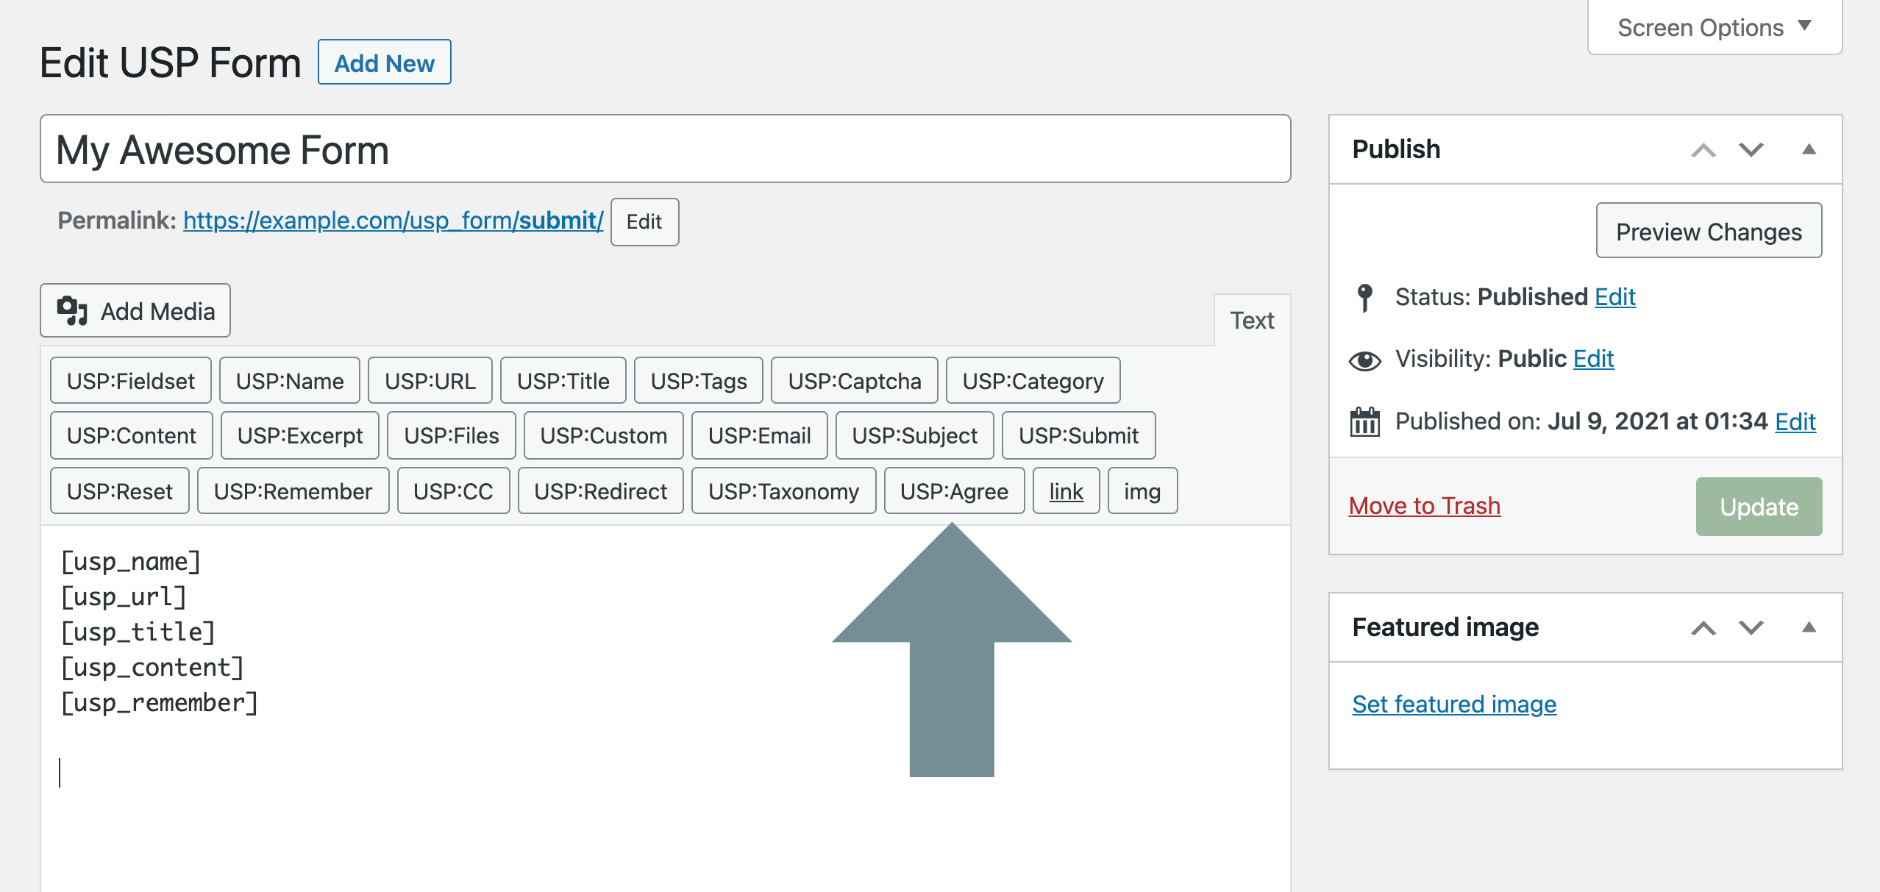
Agree to Terms Quicktag
When creating or customizing a USP Form, click on the “USP:Agree” Quicktag to add an “Agree to Terms” box in one click. Here is a screenshot:
Agree to Terms Options
Clicking on the “USP:Agree” Quicktag, you’ll get a popup dialog that looks like this:
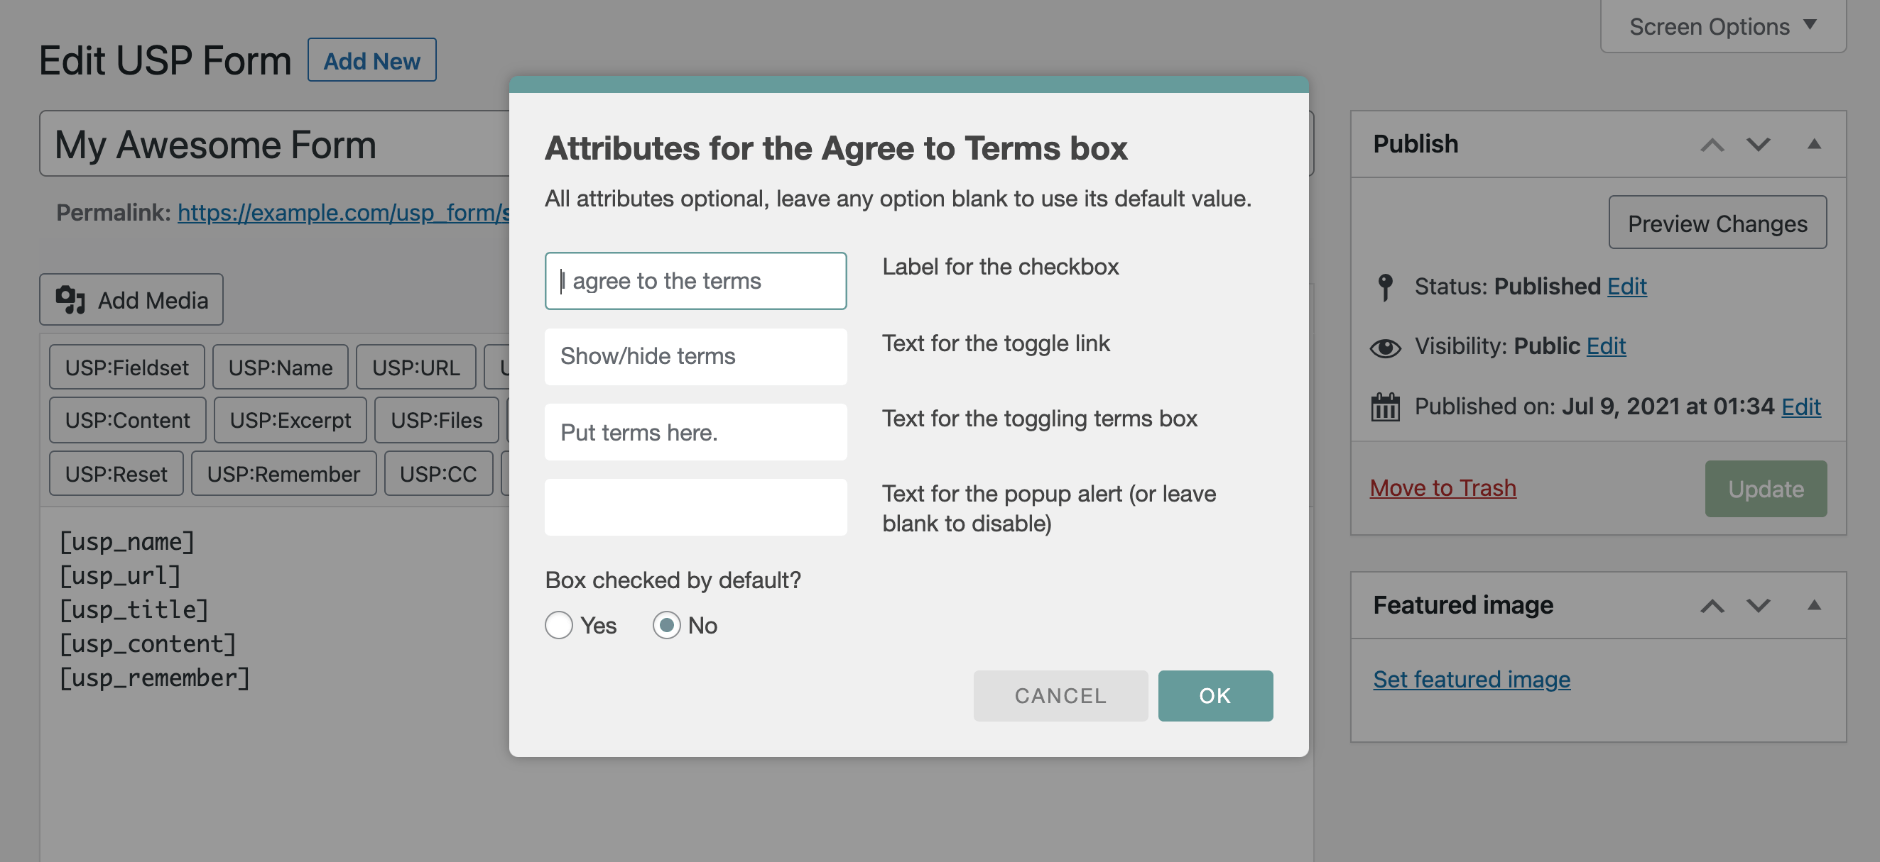
Here you may customize your options or just click “OK” to insert the “Agree to Terms” Shortcode. Here are the options presented when using the USP:Agree Quicktag:
- Label for the checkbox — (optional) label text for the required checkbox (default: I agree to the terms)
- Text for the toggle link — (optional) text used for the toggle-terms link (default: Show/hide terms)
- Text for the toggling terms box — (optional) text used for the terms info, can use curly brackets to include basic markup, for example:
{em class='myclass'}emphasized{/em}(use single quotes for attributes) (default: Put terms here.) - Text for popup alert — (optional) enable JavaScript alert: enter text to enable or leave blank to disable (default: blank)
- Check by default — (optional) should the “agree” checkbox be checked/enabled by default (default: false)
After configuring our options, we click “OK” to add the [usp_agree] Shortcode to our form:
[usp_agree label="Agree to Terms" toggle="View the Terms" default="false" terms="The terms go here.."]..which will look something like this in the form:

Agree to Terms Shortcode
Now that we’ve seen how to add the “Agree to Terms” box via the USP:Agree Quicktag, let’s see how to add it by using the [usp_agree] Shortcode directly. Either method results in the same thing: an Agree to Terms box displayed in the form. But the shortcode accepts several attributes that aren’t provided by the Quicktag.
Basic Shortcode
[usp_agree]Complete Shortcode
[usp_agree label="" toggle="" terms="" custom="" style="" script="" alert="" class="" fieldset=""]Here is a complete list of attributes for this shortcode:
label    = (optional) label text for the required checkbox (default: I agree to the terms)
toggle   = (optional) text used for the toggle-terms link (default: Show/hide terms)
terms    = (optional) text used for the terms information (default: Put terms here.)
custom   = (optional) custom attributes for the required checkbox (default: none)
style    = (optional) custom CSS for the required checkbox (default: none)
script   = (optional) custom JavaScript for the required checkbox (default: none)
alert    = (optional) enable the JavaScript alert: enter text to enable or leave blank to disable (default: blank)
class    = (optional) custom classes for the required checkbox (default: none)
fieldset = (optional) enable auto-fieldset: true, false, or custom class name (default true)
required = (optional) whether the field should be required: true or false (default: true)
default  = (optional) whether the box should be checked by default: true or false (default: false)
As you can see, the Agree Shortcode provides plenty of attributes for customizing things exactly as required.
Custom Field
Each post that is submitted via form that includes an “Agree to Terms” box will include the following Custom Field (Name and Value):
usp-agree = true
This information may be used to implement further functionality, depending on the specific goals of the site.
Include a link
In some cases it might make sense to put all of your official terms and conditions on a separate page, and then simply link to that page from the Agree to Terms box. By default, link markup cannot be added via the [usp_agree] shortcode, but it is trivial to do with a bit of jQuery:
<script>
	jQuery(document).ready(function($) {
		$('.usp-agree-toggle').click(function(){
			$('.usp-agree-terms').wrapInner('<a href="/url/"></a>');
		});
	});
</script>
You can add that code snippet directly to your USP Form to wrap the “agree” text with a link to /url/ (edit with your actual URL).
Custom Markup
If for whatever reason the HTML/markup used to display the “Agree to Terms” field needs to be modified, you can do so by replacing the shortcode with the following markup:
<div class="usp-agree">
	<input name="usp-agree" id="usp-agree" type="checkbox" required="required" data-required="true" class="usp-input usp-input-agree">
	<label for="usp-agree" class="usp-label usp-label-agree">I agree to the terms</label>
	<input type="hidden" name="usp-agree-required" value="1">
	<div>Put terms here.</div>
</div>
So instead of adding [usp_agree] to your form, you would add the above code instead. That gives you a working field that you can customize as needed. You can change just about anything except for the hidden field and the name attribute/value of the checkbox input.