Simple Ajax Chat Pro (SAC Pro) provides advanced tools to manage chat messages, edit chats, delete chats, export CSV files, and delete chat tables from the database. You can also access user data and mute or ban chat users with a click. Basically every aspect of your chats can be managed via the SAC Pro settings ▸ Manage screen. This tutorial explains how to do all these tasks, along with some useful tips and tricks.
Overview
A picture is worth a thousand words. So before diving into a written explanation of all the tools available on the Manage screen, here are some screenshots to give you an overview, or mental picture, of how things work. Click any image to view full size (opens new tab or window).
 Screenshot showing the Manage screen. Click “Manage Chats” to toggle open chat messages (see next screenshot).
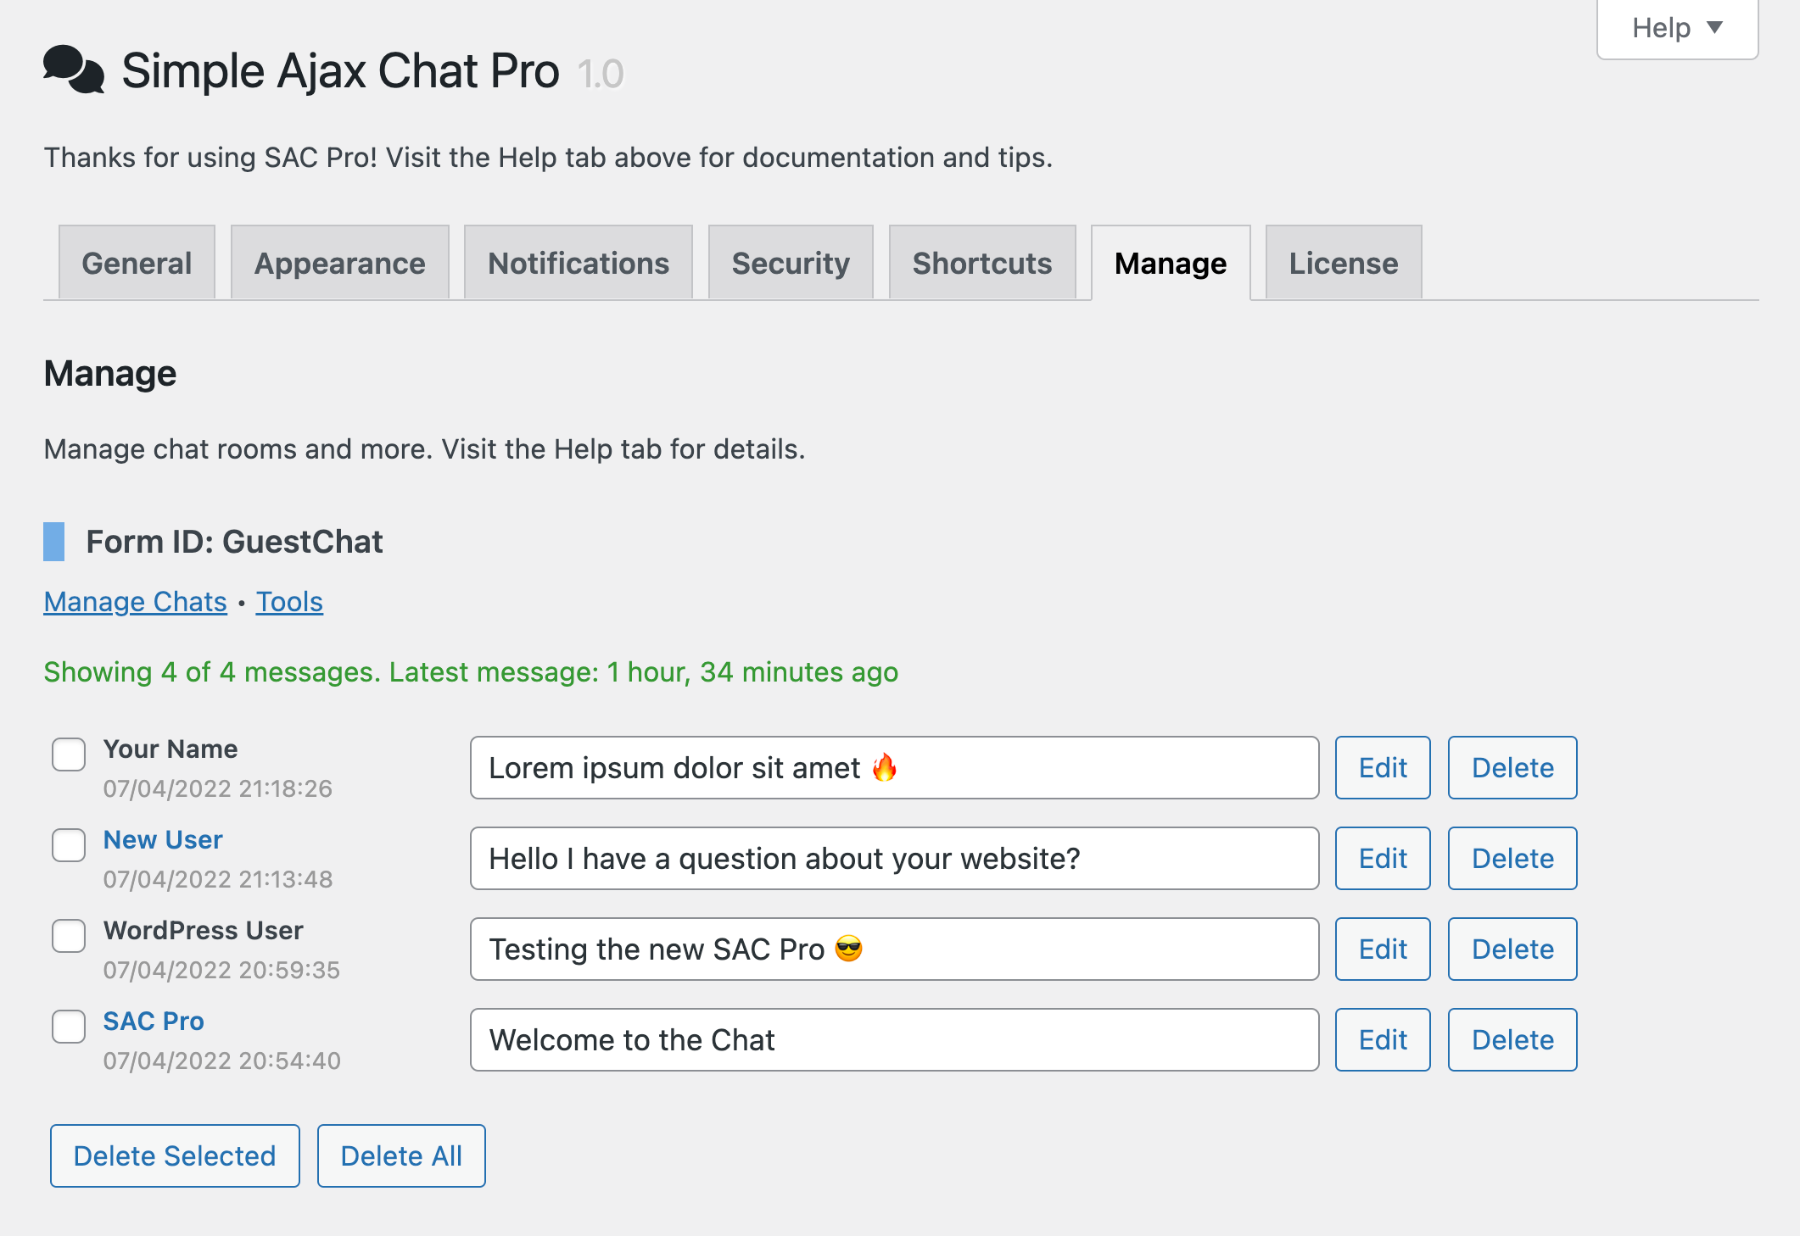 Screenshot showing chat messages on the Manage screen. Click the chat date to toggle open details for any chat message (see next screenshot).
 Screenshot showing details of a chat message. Note: you can disable collection of sensitive user data like IP address and host name.
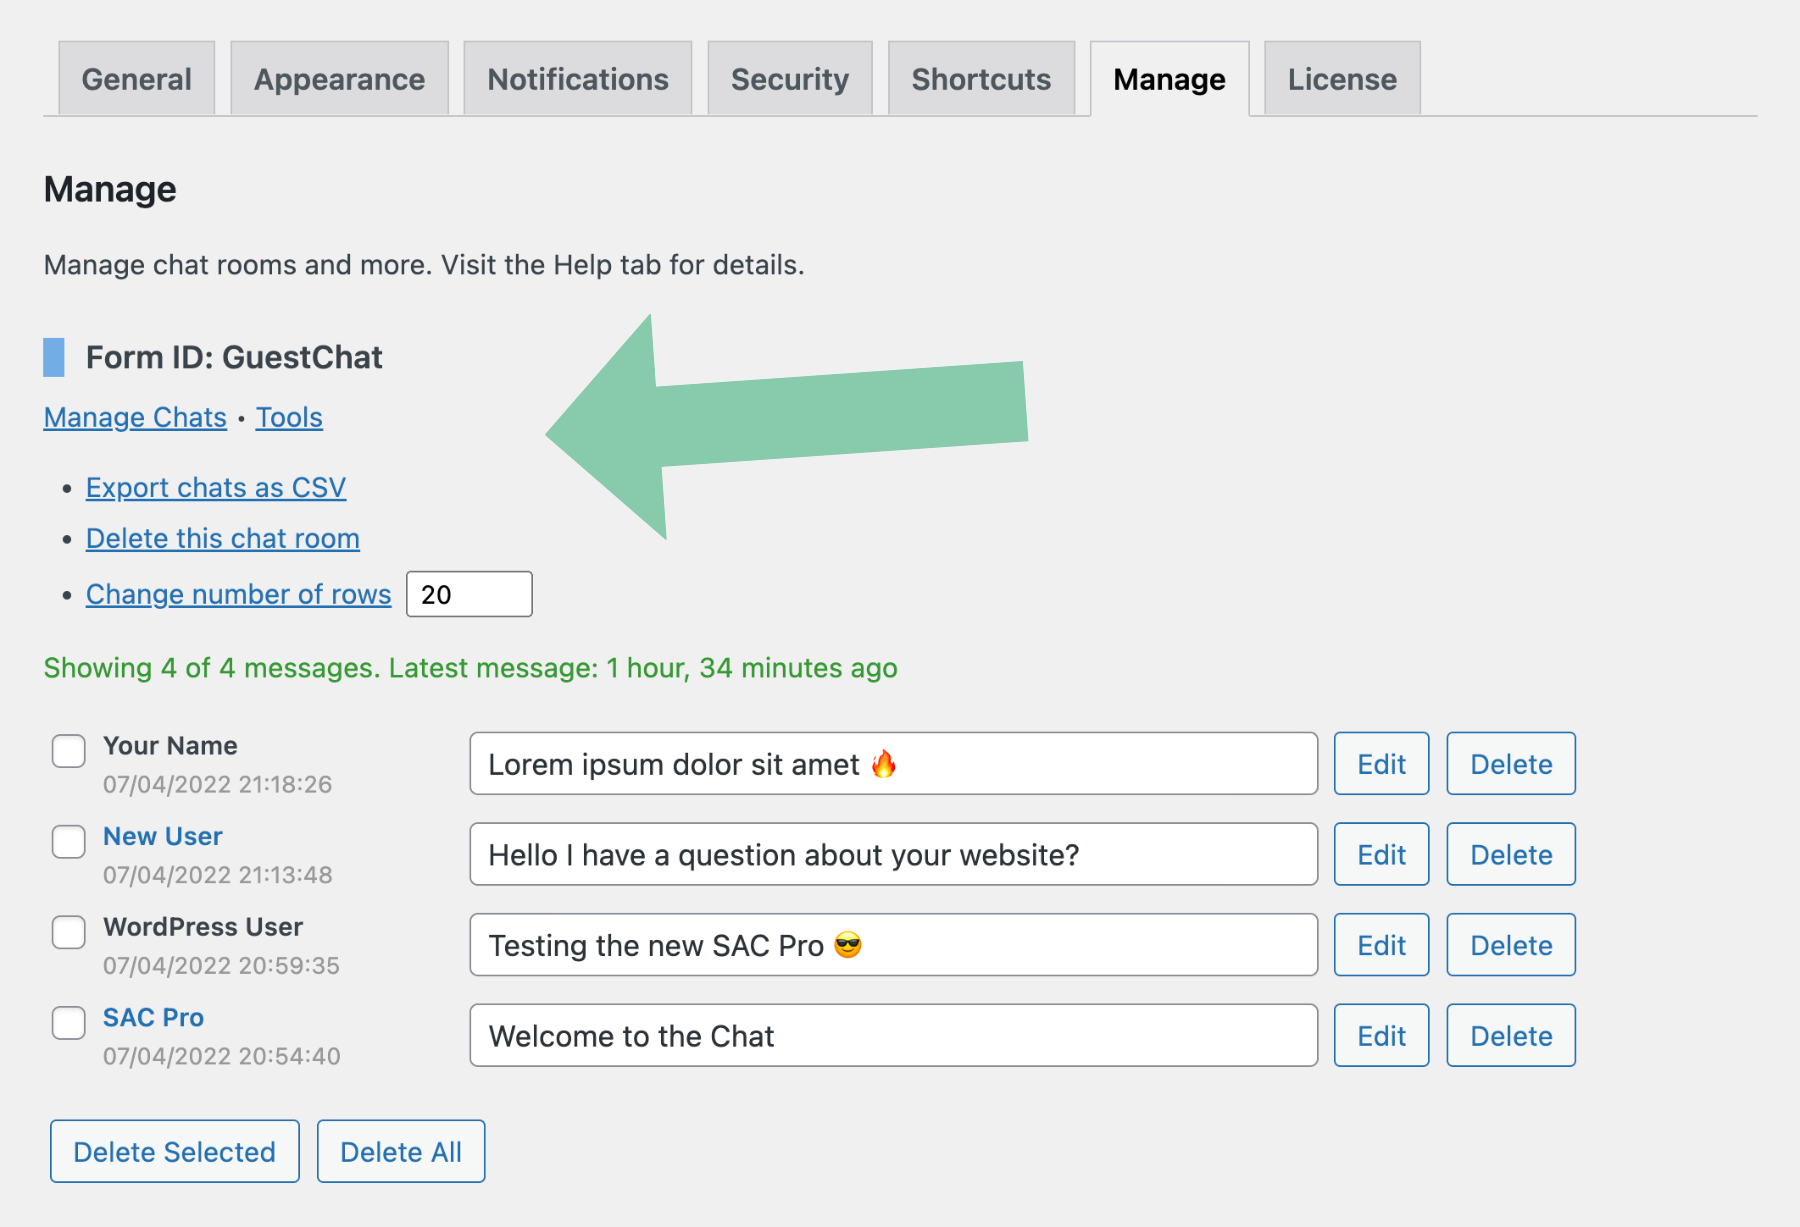 Screenshot showing the management tools toggled open. Click on “Tools” to open/close the chat tools.
Manage chat messages
To manage chat forms, messages, and more, visit the SAC Pro settings ▸ “Manage” screen.
The Manage screen is similar to the manage-chats panel provided in the free version of SAC, so everything should feel familiar. Of course you get way more functionality with the pro version. The above screenshots should be enough to get you started, as the UI is designed to be as intuitive as possible. Even so, the Manage screen is packed with features and tools, so let’s take a closer look at how to perform some specific tasks.
View chat messages
To view chat messages for any chat form, click the “Manage Chats” link under the form ID.
Open management tools
To open the management tools for any chat form, click the “Tools” link under the form ID. Management tools include export CSV, delete chat room, and change number of displayed rows.
Export chat messages
To export chat messages and metadata for any form, click “Export chats as CSV” under the Tools menu. Doing so will generate a CSV file on the server and display “Download” and “Delete” links. Click Download to download the file to your local machine. Click Delete to delete the file from the server. It’s fine to leave the files on the server, but can build up over time and consume precious disk space. Learn more »
Delete a chat room
To delete any chat room, click “Delete this chat room” under the Tools menu. Doing so will remove the chat table (and all chat messages) from the WP database. To prevent the same chat table from being recreated, also delete any instances of the corresponding [sacpro] shortcode.
[sacpro] shortcode/form is visited on the front end. So to completely remove/delete a chat room, delete both its database table and all instances of its corresponding shortcode.Display number of chats
By default, the number of chat messages displayed for each chat room is 20. To change that to whatever number, toggle open the Tools menu, enter your number, and click “Change number of rows” to make it happen. This is useful when you have many chat rooms and/or many chat messages, to prevent slow page loading (or even timeouts if more data than your server can handle).
View chat message details
To view details for any chat message, click the date link under the user name. That will toggle open chat data such as user role, IP address, host name, user agent, request URL, and more. Note: you can disable collection of sensitive user data like IP address and host name.
Mute/Un-mute any user
To mute or un-mute any user, toggle open their chat details and click “Mute user” or “Un-mute user”. Muted users will be able to view chats but not add their own. Here is a complete guide on how to mute and ban users.
Ban/Un-ban any user
To ban or un-ban any user, toggle open their chat details and click “Ban user” or “Un-ban user”. Banned users will not have access to the chat room. While you can mute any user, only non-admin users can be banned. Here is a complete guide on how to mute and ban users.
Edit any chat message
To edit any chat message, modify the chat message as desired and then click the “Edit” button (located to the right of the message).
Delete any chat messages
To delete any chat message, click the “Delete” button (located to the right of the message).
Bulk delete chat messages
To bulk or batch delete chat messages, check their boxes and click the “Delete Selected” button (located beneath the list of chat messages).
Delete all chat messages
To delete all chat messages for any chat room, click the “Delete All” button (located beneath the list of chat messages). Note: deleting all chat messages (via the “Delete All” button) removes messages only (the chat table is NOT removed from the database).